

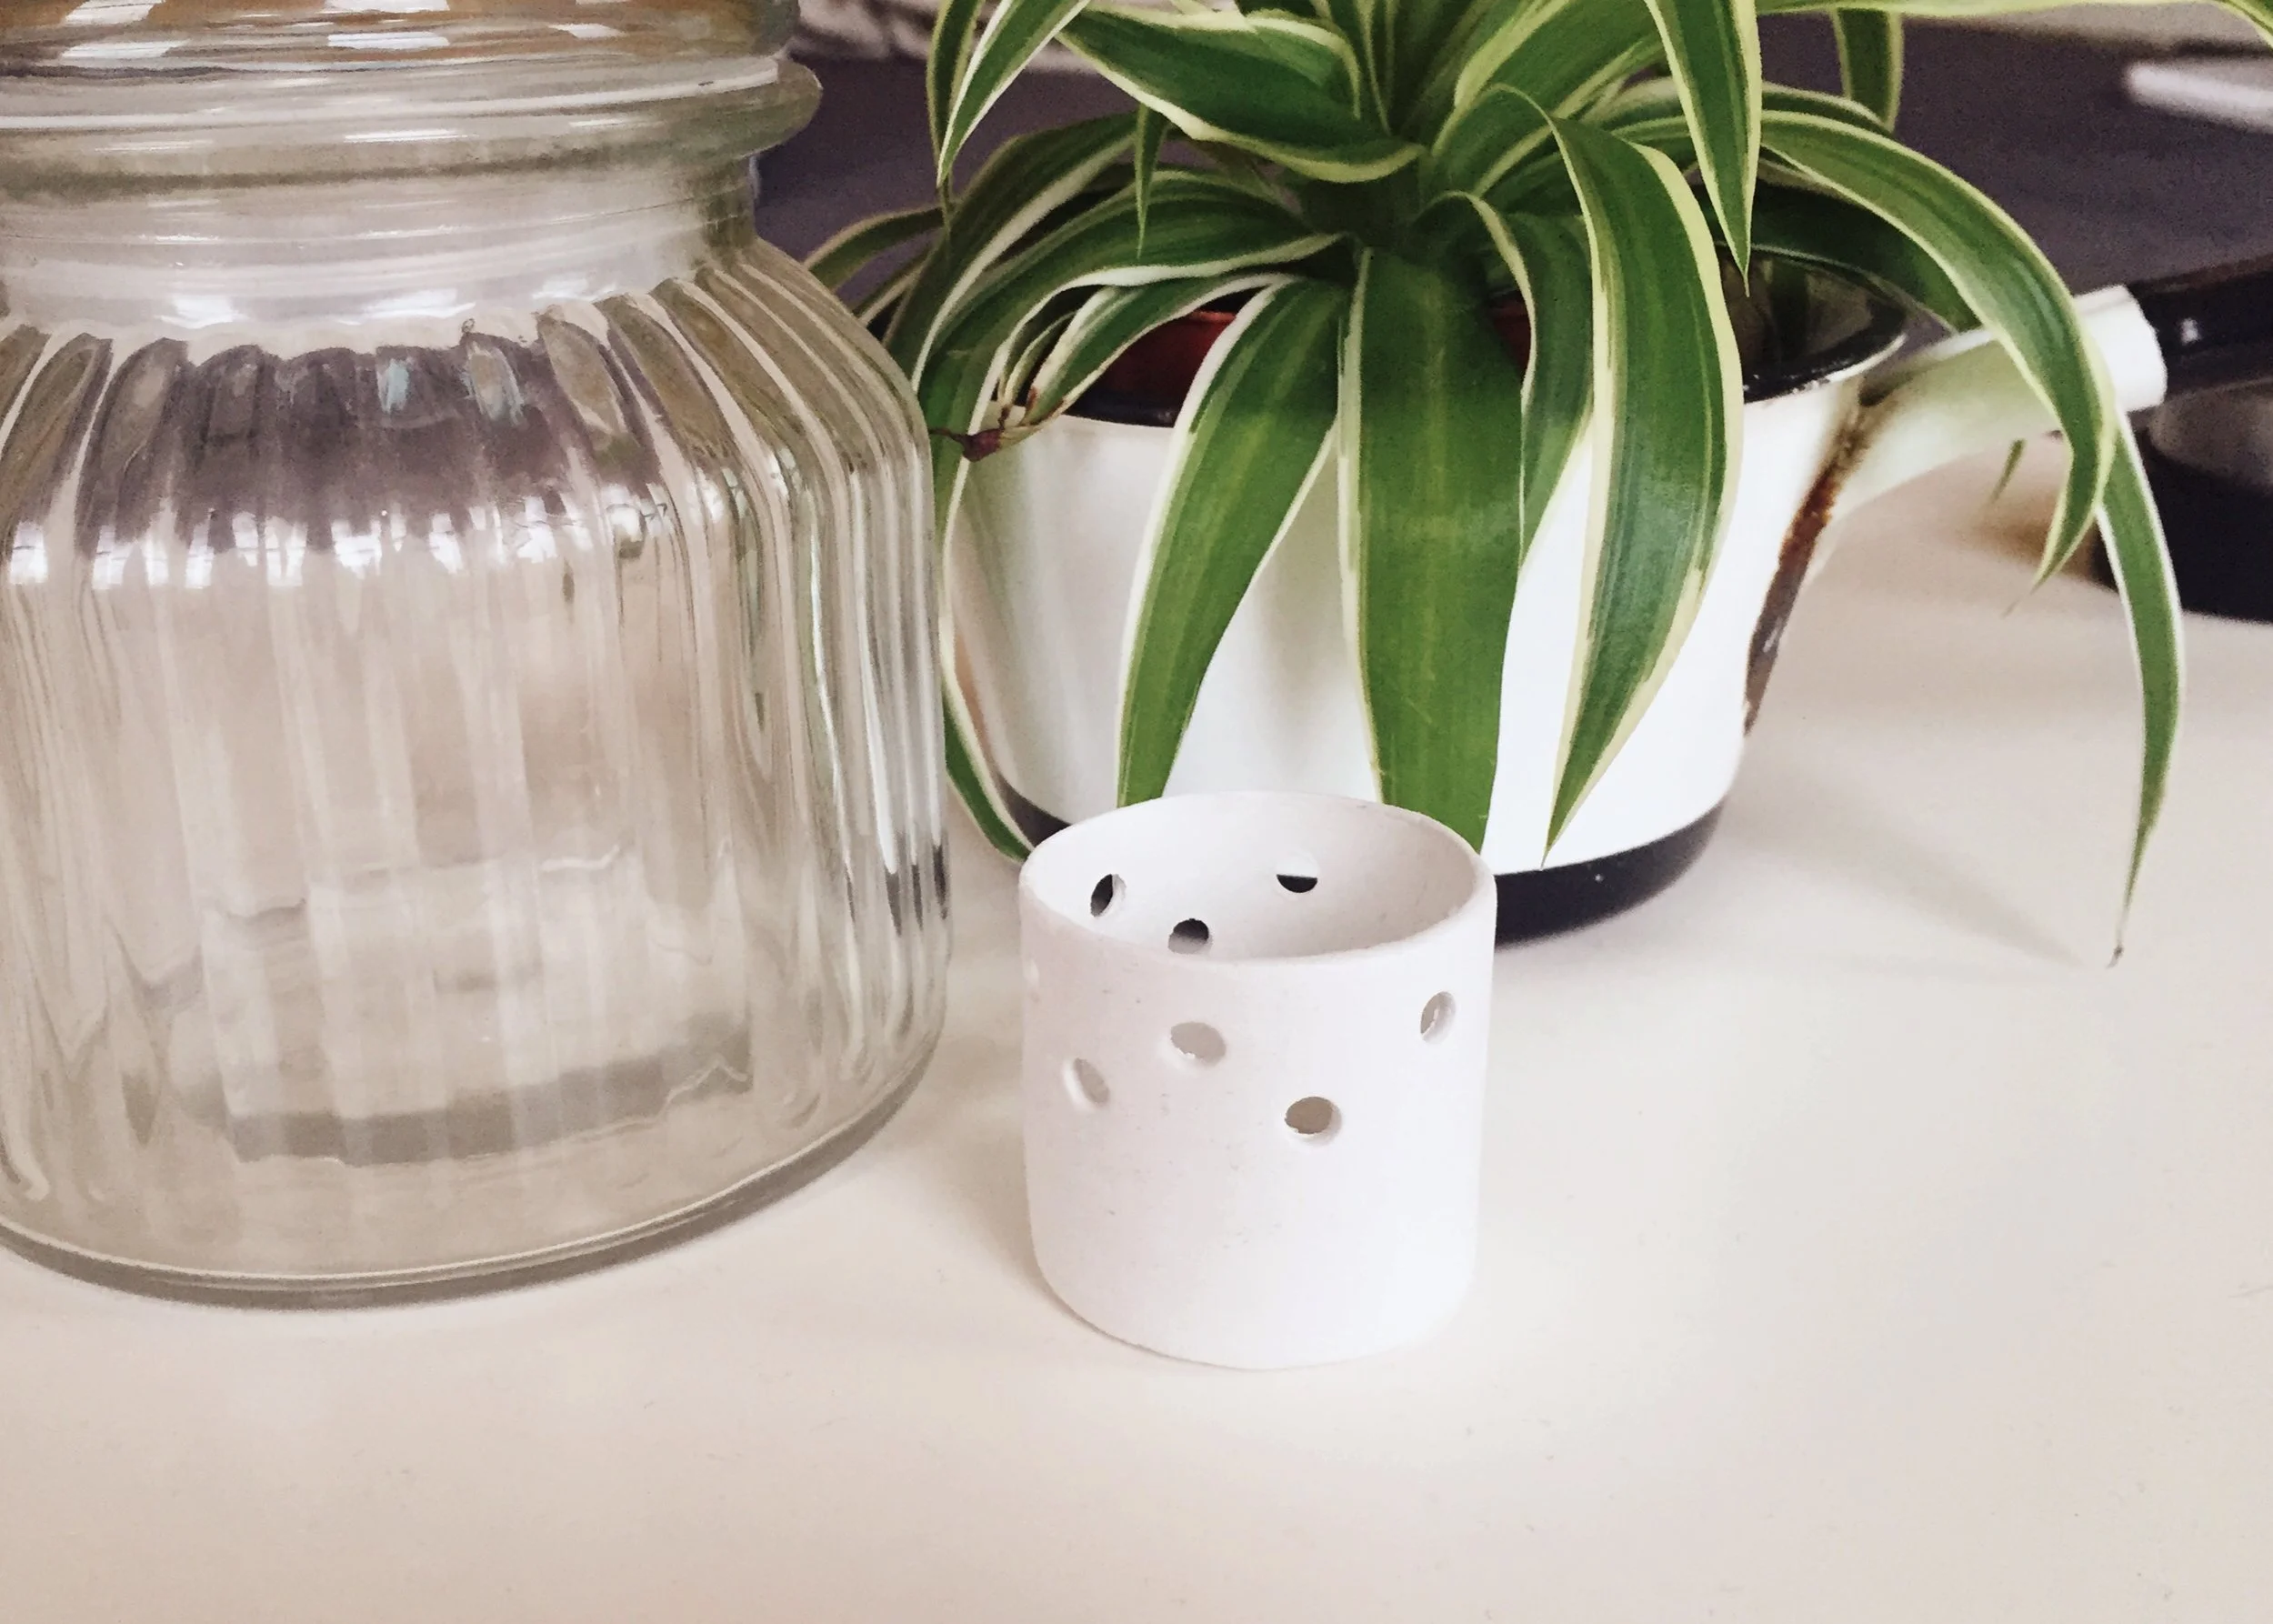
Can you believe it's November?! Having flown out to Malaysia on the 5th (so cool to see all of the fireworks from above!) and come back on the 19th, I feel like I've hardly been in the UK and because of that, this month has literally just flown by. I had such a lovely time in Malaysia and would definitely recommend visiting. It's so different out there, which just adds to how surreal it feels to be back. But, with Christmas just around the corner, there is lots to look forward to and it's probably time to start crafting those handmade gifts (yay)! Something which I've been dying to have a go at is an air-dry clay candle holder. I've seen quite a few clay candle holder DIY's on Pinterest however most of them seem to use polymer clay. For this project, I really wanted the nice matte and slightly textured finish that you get with air-dry clay and so used bits and bobs of ideas from various tutorials to come up with the following DIY.


1. Measure the circumference of your cardboard tube. For this I used a toilet roll tube and a measuring tape. I didn't measure the height of the tube as I had a rough idea in my head as to how high I wanted my candle holder to be.
2. Using this measurement, create a rectangle on a piece of paper and cut it out. This will be your template when cutting the clay. Laying the measuring tape out flat onto paper, I used the perimeter of the tube as the length of my paper rectangle and for the height of the rectangle, marked how tall I wanted my holder to be.

3. Knead some air-dry clay until it is soft and then separate into two pieces. Here, I cut the clay into one larger and one smaller piece. The larger piece will make the sides of the candle holder and the smaller piece will make the base of the candle holder.
4. Take one piece of clay and roll it out, elongating it in one direction until it is larger than your paper template. Although I wanted to make sure the clay was larger than the paper template, I also wanted to make sure it was thick enough (approx. 4mm).

5. Lie the paper template on top of the clay and gently roll the rolling pin over it. I've never been very good at keeping templates still as I cut around them and so found that rolling over the paper on top of the clay leaves a nice indent on the clay (that doesn't move around!) to cut around.
6. Using the scalpel, cut out around the paper imprint to create a long clay rectangle. Here, I cut each side of the rectangle in one long movement to try and prevent deforming the rectangles shape.

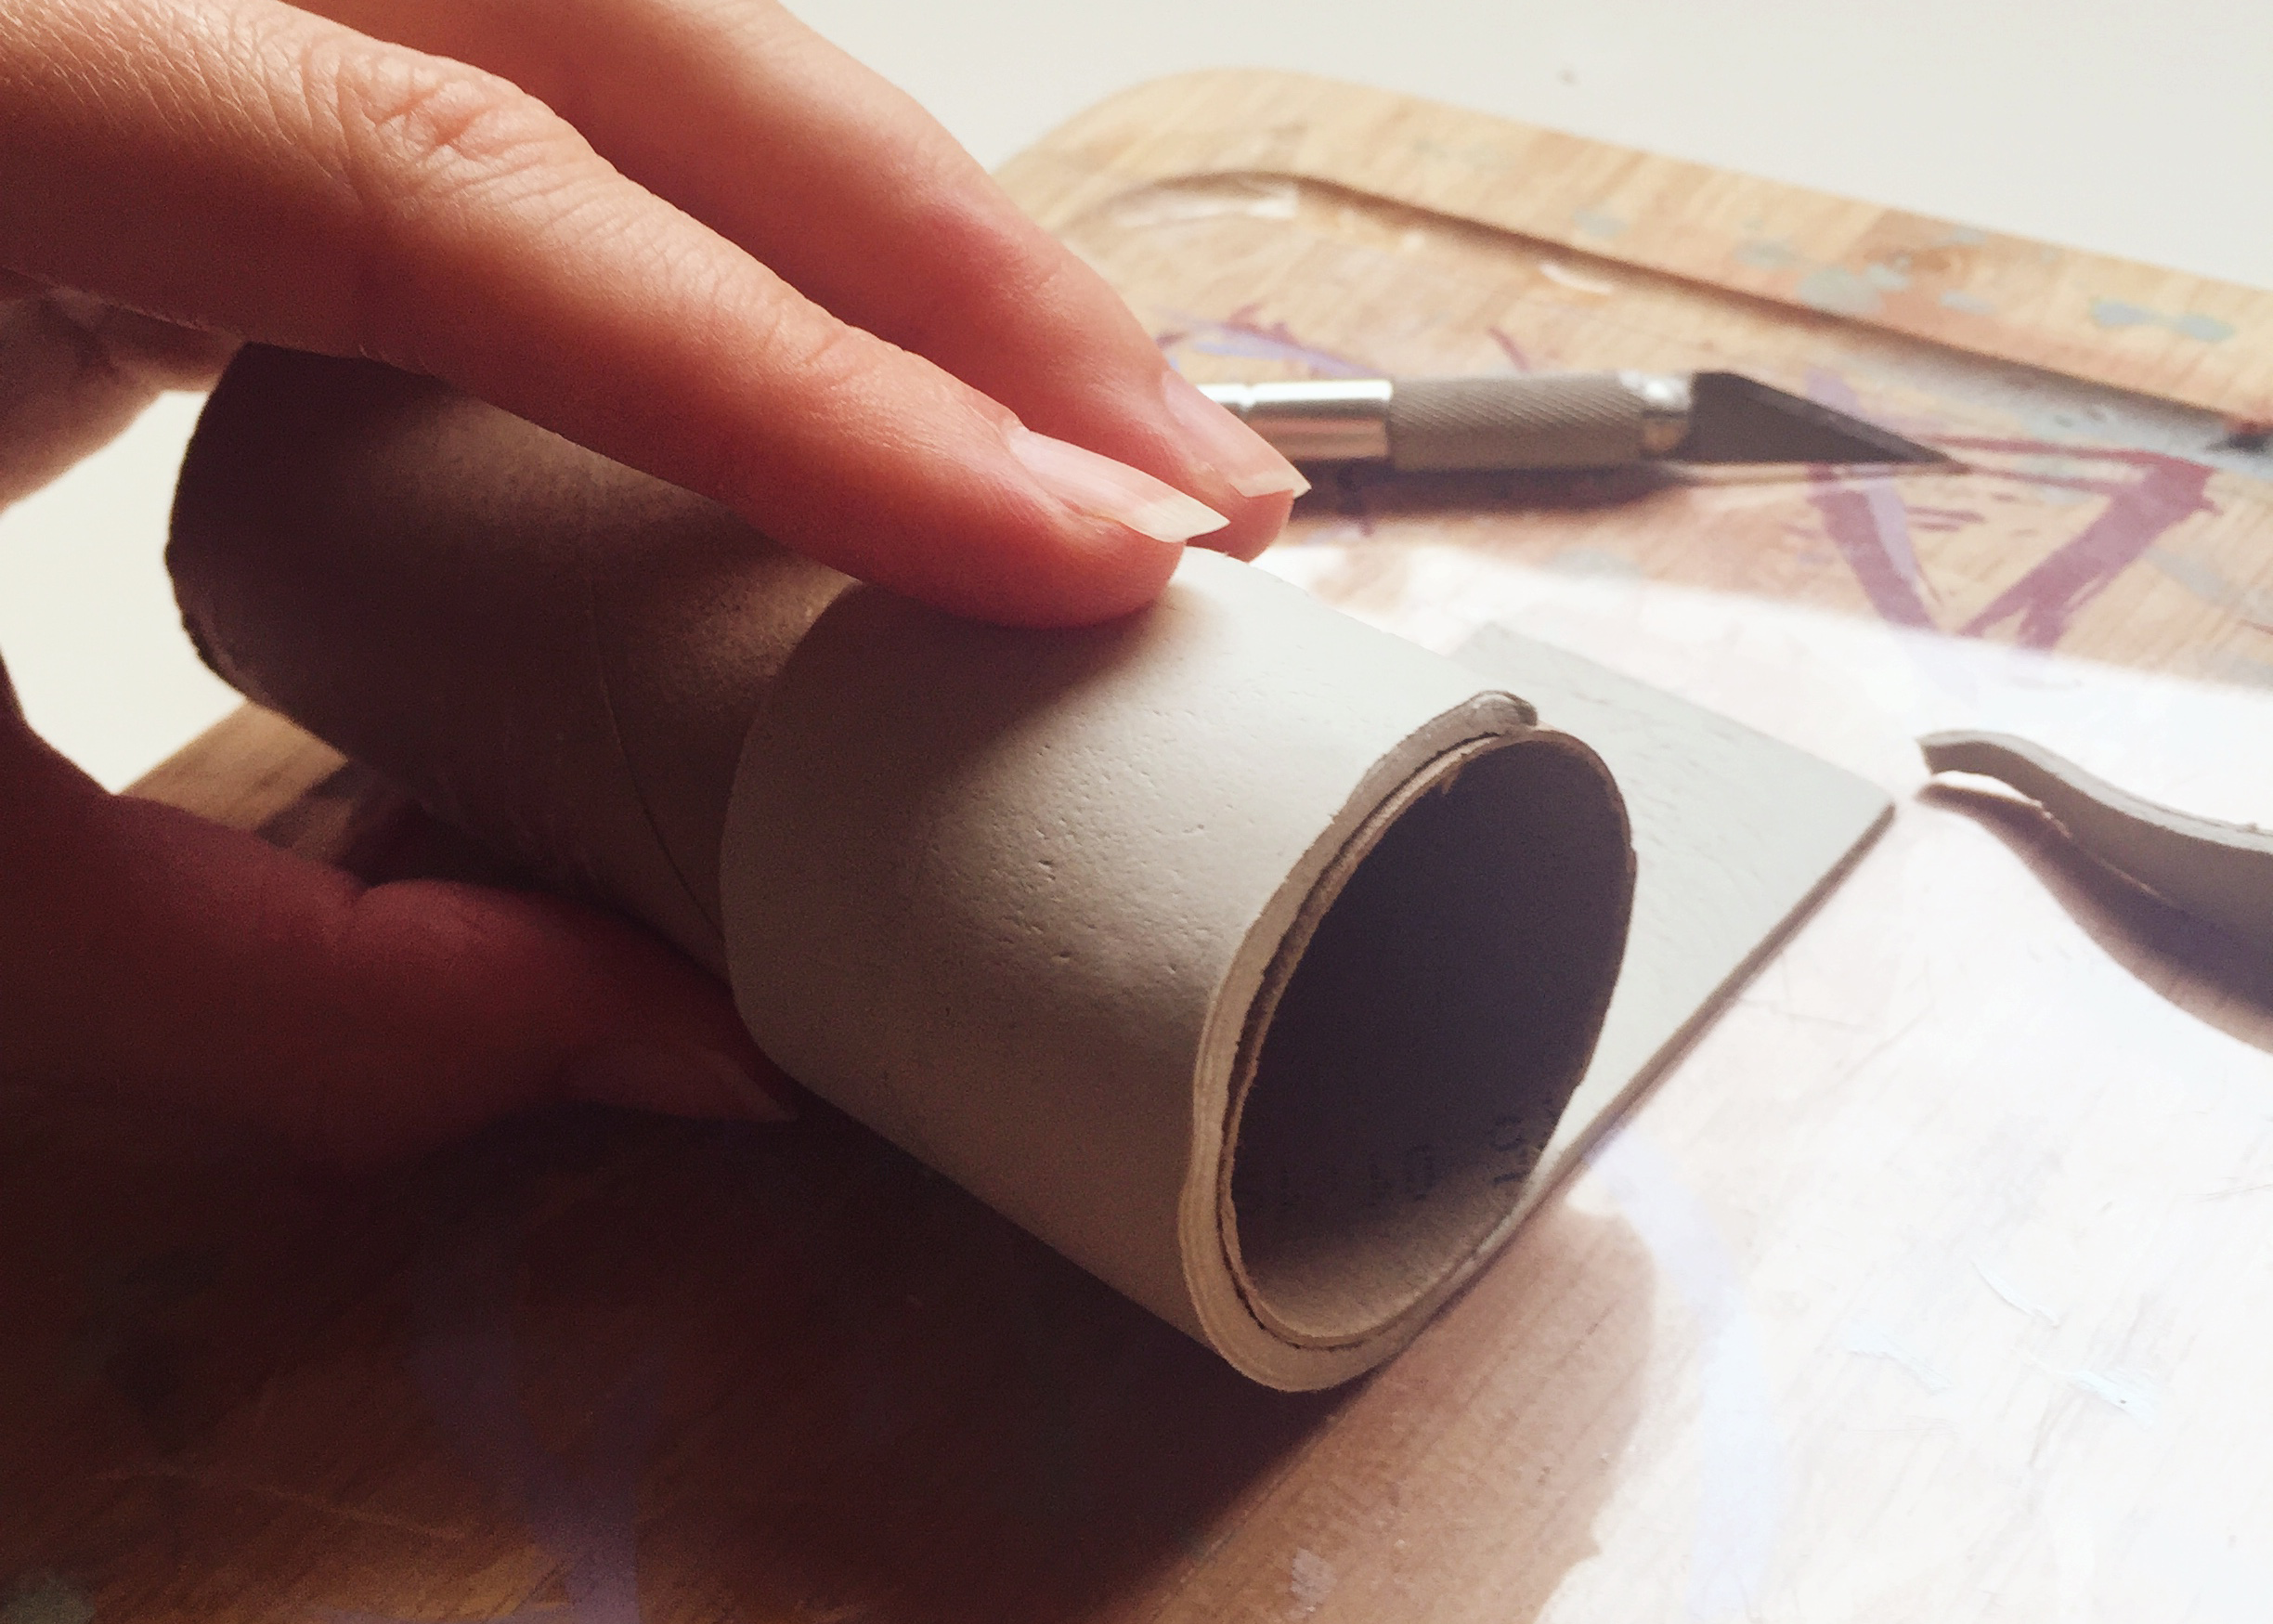
7. Wrap the clay rectangle loosely around your toilet roll or tube. To do this, I lifted one end of the rectangle and held it against the tube as I rolled the tube over the rest of the clay until the whole clay rectangle was wrapped around the tube.
8. Cut off any excess clay and fix the two rectangle ends together to create a cylinder. Using my scalpel, I cut off any overlapping clay. With the paintbrush, some excess clay and water, I then created a clay putty, which I used to mould the two ends of the clay rectangle together.
9. Using a straw, cut out some holes from the clay cylinder. Here, I pushed a straw into the clay until I felt it hit the cardboard tube and twisted it until I was sure that the straw had completely cut out a hole.
10. Put this to one side and roll out the other piece of clay into a large circle. Using my trusty non-stick rolling pin (possibly the best thing I've ever bought from Hobbycraft!) I rolled out the clay into a circle larger than the circumference of the clay tube.

11. Dip your fingers into some water and lightly spread it over the clay circle. Place the cylinder on top of the wet clay circle. Here I've found that wetting the clay makes it sticky and so when you place the clay tube on top, it moulds together quite quickly.
12. Using the scalpel, cut around the cylinder removing the excess clay circle. To do this, I roughly cut off the excess clay until I was a few millimetres away from the clay tube and then more carefully cut around it.

12. Turn over and fill any gaps between the cylinder and circle. Using the paintbrush, and a mix of clay and water, fill the gaps around the edge between the clay cylinder and circle.
13. Whilst it is upturned, use the wet paint brush to smooth out any marks on the bottom of the clay circle. I had a little trouble getting the bottom of the clay candle holder (formerly the clay circle) off of the acetate and so had to coax it off using my scalpel. This left quite a few indentations on the bottom which I gently smoothed over using the paintbrush and some water.

14. Place the clay candle holder upright and leave to dry overnight. Here, I left the clay holder to dry a little with the cardboard tube in the middle (as support). After a couple of hours, when I felt that the clay was sturdy enough to support itself, I gently pulled out the tube and left the holder to dry for approximately 24 hours.
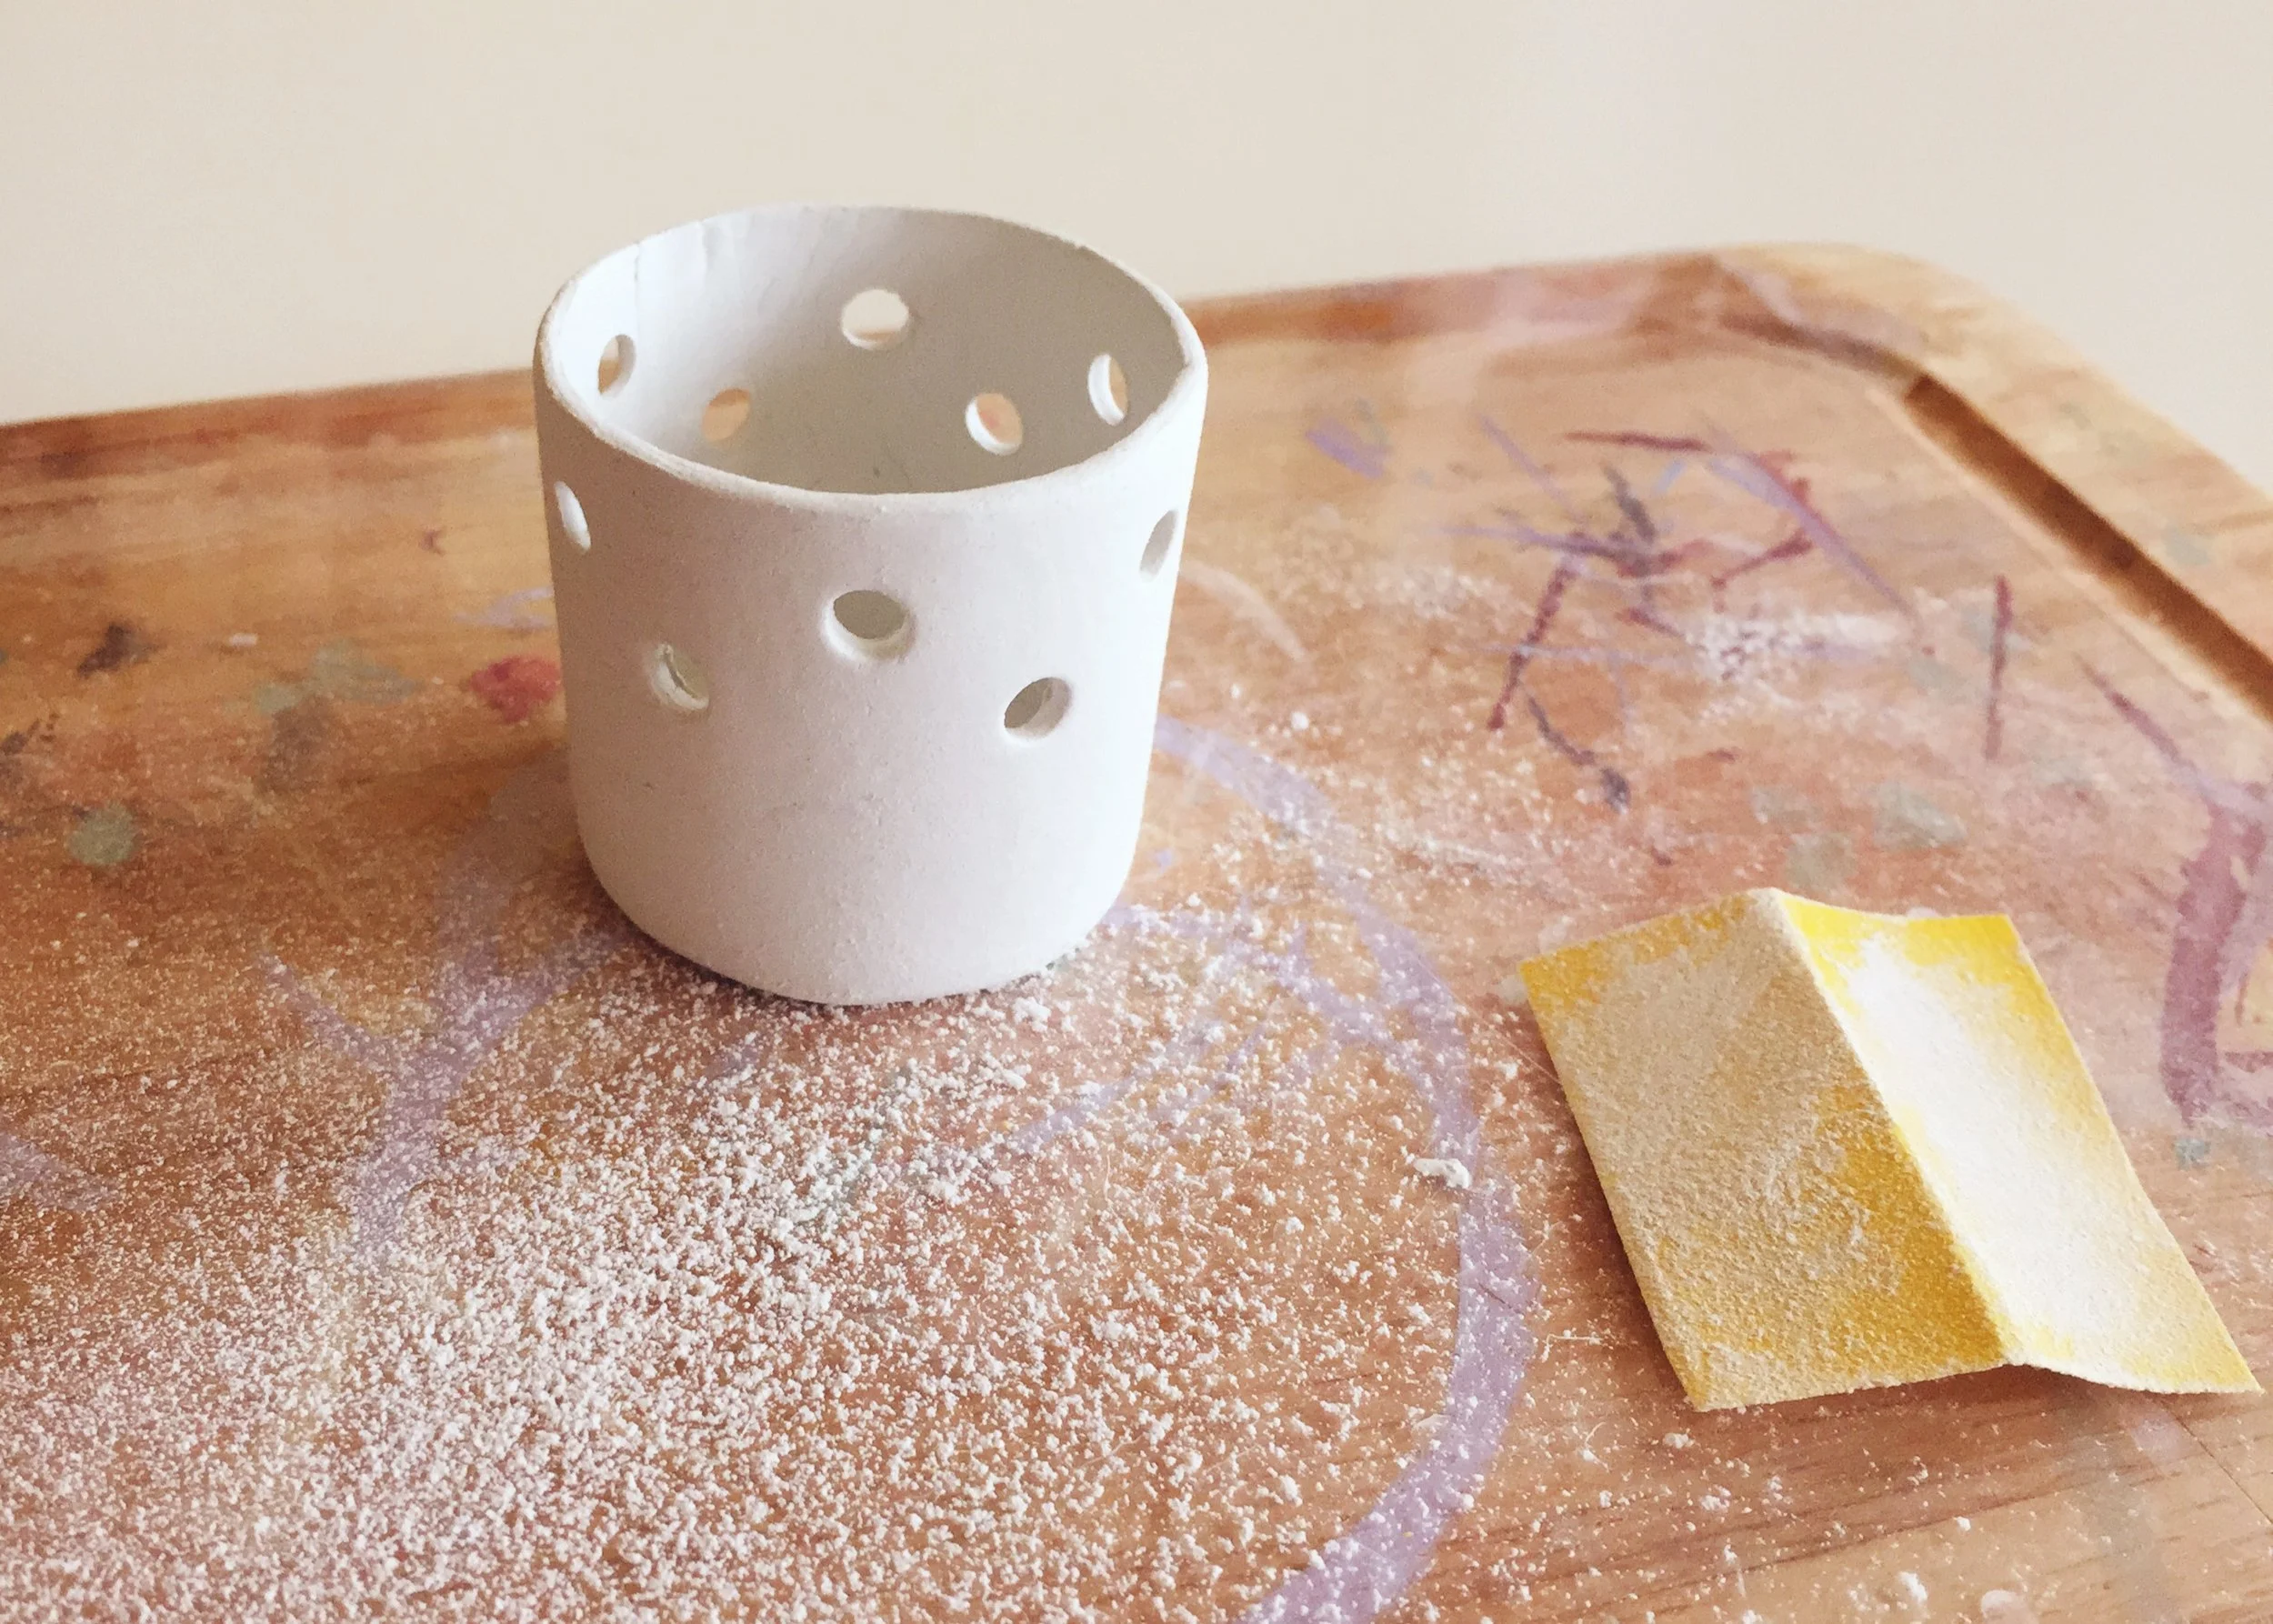
15. Once dry, smooth the clay with a damp piece of sandpaper. Here, I used a fine sandpaper to smooth out any paintbrush strokes and any lumps and bumps. To minimise dust particles (although as you can see, there were still quite a few!), I dampened the sandpaper.
... and that's it!

I'm really happy with how this little project turned out and think that it would make a nice gift for family, friends or for yourself and if you use a mini star cutter, as opposed to a straw, would make a chic little christmas decoration.
As always, I love to hear what you think so let me know in the comments below!
♥


