• ABOUT ME
    • PRIVACY POLICY
  • COLLABORATE
  • BLOG
    • ART
    • WEDDING
    • LIBRARY
    • DECOR
    • JEWELLERY
    • STATIONARY
    • NAIL ART
    • BAKING
    • CHRISTMAS
    • EASTER
    • ART PRINTS
    • WEDDING STATIONARY
  • CONTACT
Menu

ISOSCELLA

Street Address
City, State, Zip
Phone Number

Your Custom Text Here

ISOSCELLA

  • ABOUT
    • ABOUT ME
    • PRIVACY POLICY
  • COLLABORATE
  • BLOG
  • ART
    • ART
    • WEDDING
    • LIBRARY
  • DIY
    • DECOR
    • JEWELLERY
    • STATIONARY
    • NAIL ART
    • BAKING
    • CHRISTMAS
    • EASTER
  • SHOP
    • ART PRINTS
    • WEDDING STATIONARY
  • CONTACT

Faux Brick Effect Fireplace

January 6, 2024 Isoscella M
Faux Brick Effect Fireplace by Isoscella

A quick and easy way to create a faux brick effect in your faux fireplace!

I’m no stranger to creating a faux brick effect, I’ve previously used plaster and tape to create a brick effect on one of the walls in our office/guest room. That was quite a fun, although laborious process, and it came out so well. This time however, I wasn’t sure if I wanted to commit to the faux brick effect in our new faux fireplace, and so I opted for something removable.

PEEL & STICK TILES

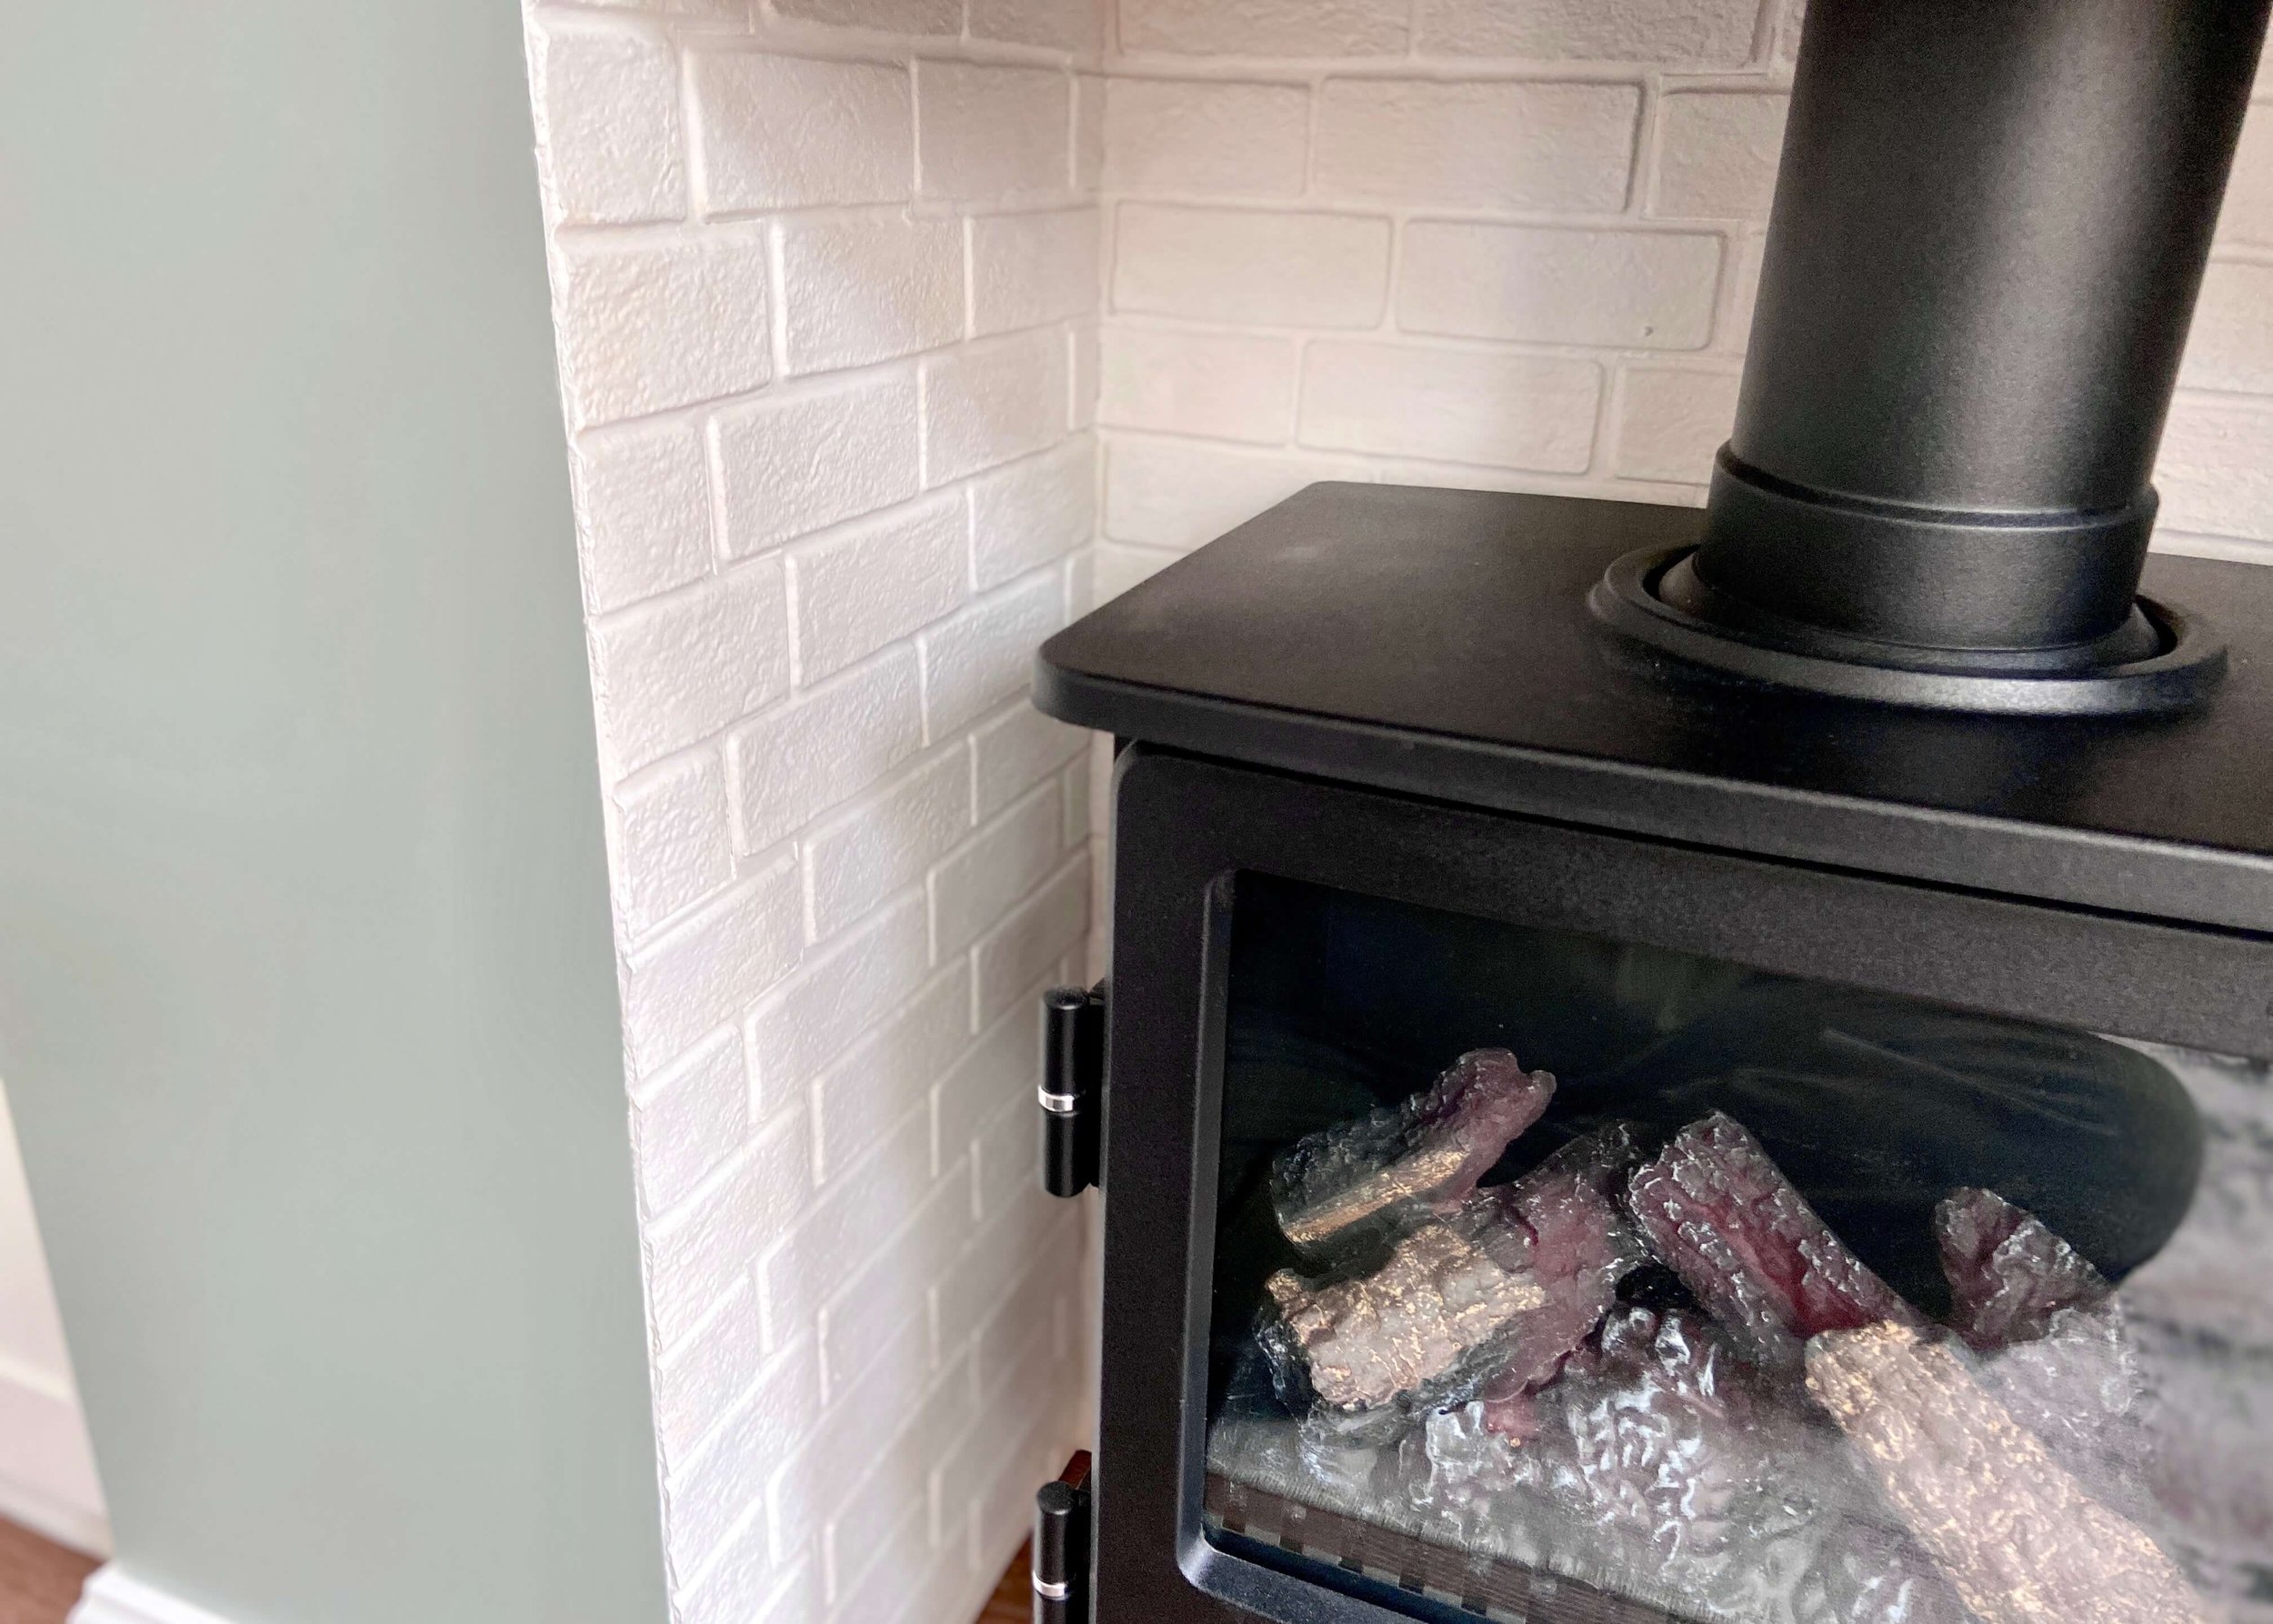
After a bit of research, I opted for some eel and stick tiles. When I was looking for what to buy, the main thing I was looking for was that they would be textured. I wasn’t too fussed by the colour of them, as I knew I would be painting them white, and so the style of brick and how textured they were, was what cemented my decision. I wasn’t sure how well this was going to work either, and so I also didn’t want to break the bank. I was pleasantly suprised by how well the tiles adhered to the fireplace surround, though I did notice when painting them that the colour started to come off of the tiles - so they probably weren’t the best quality.

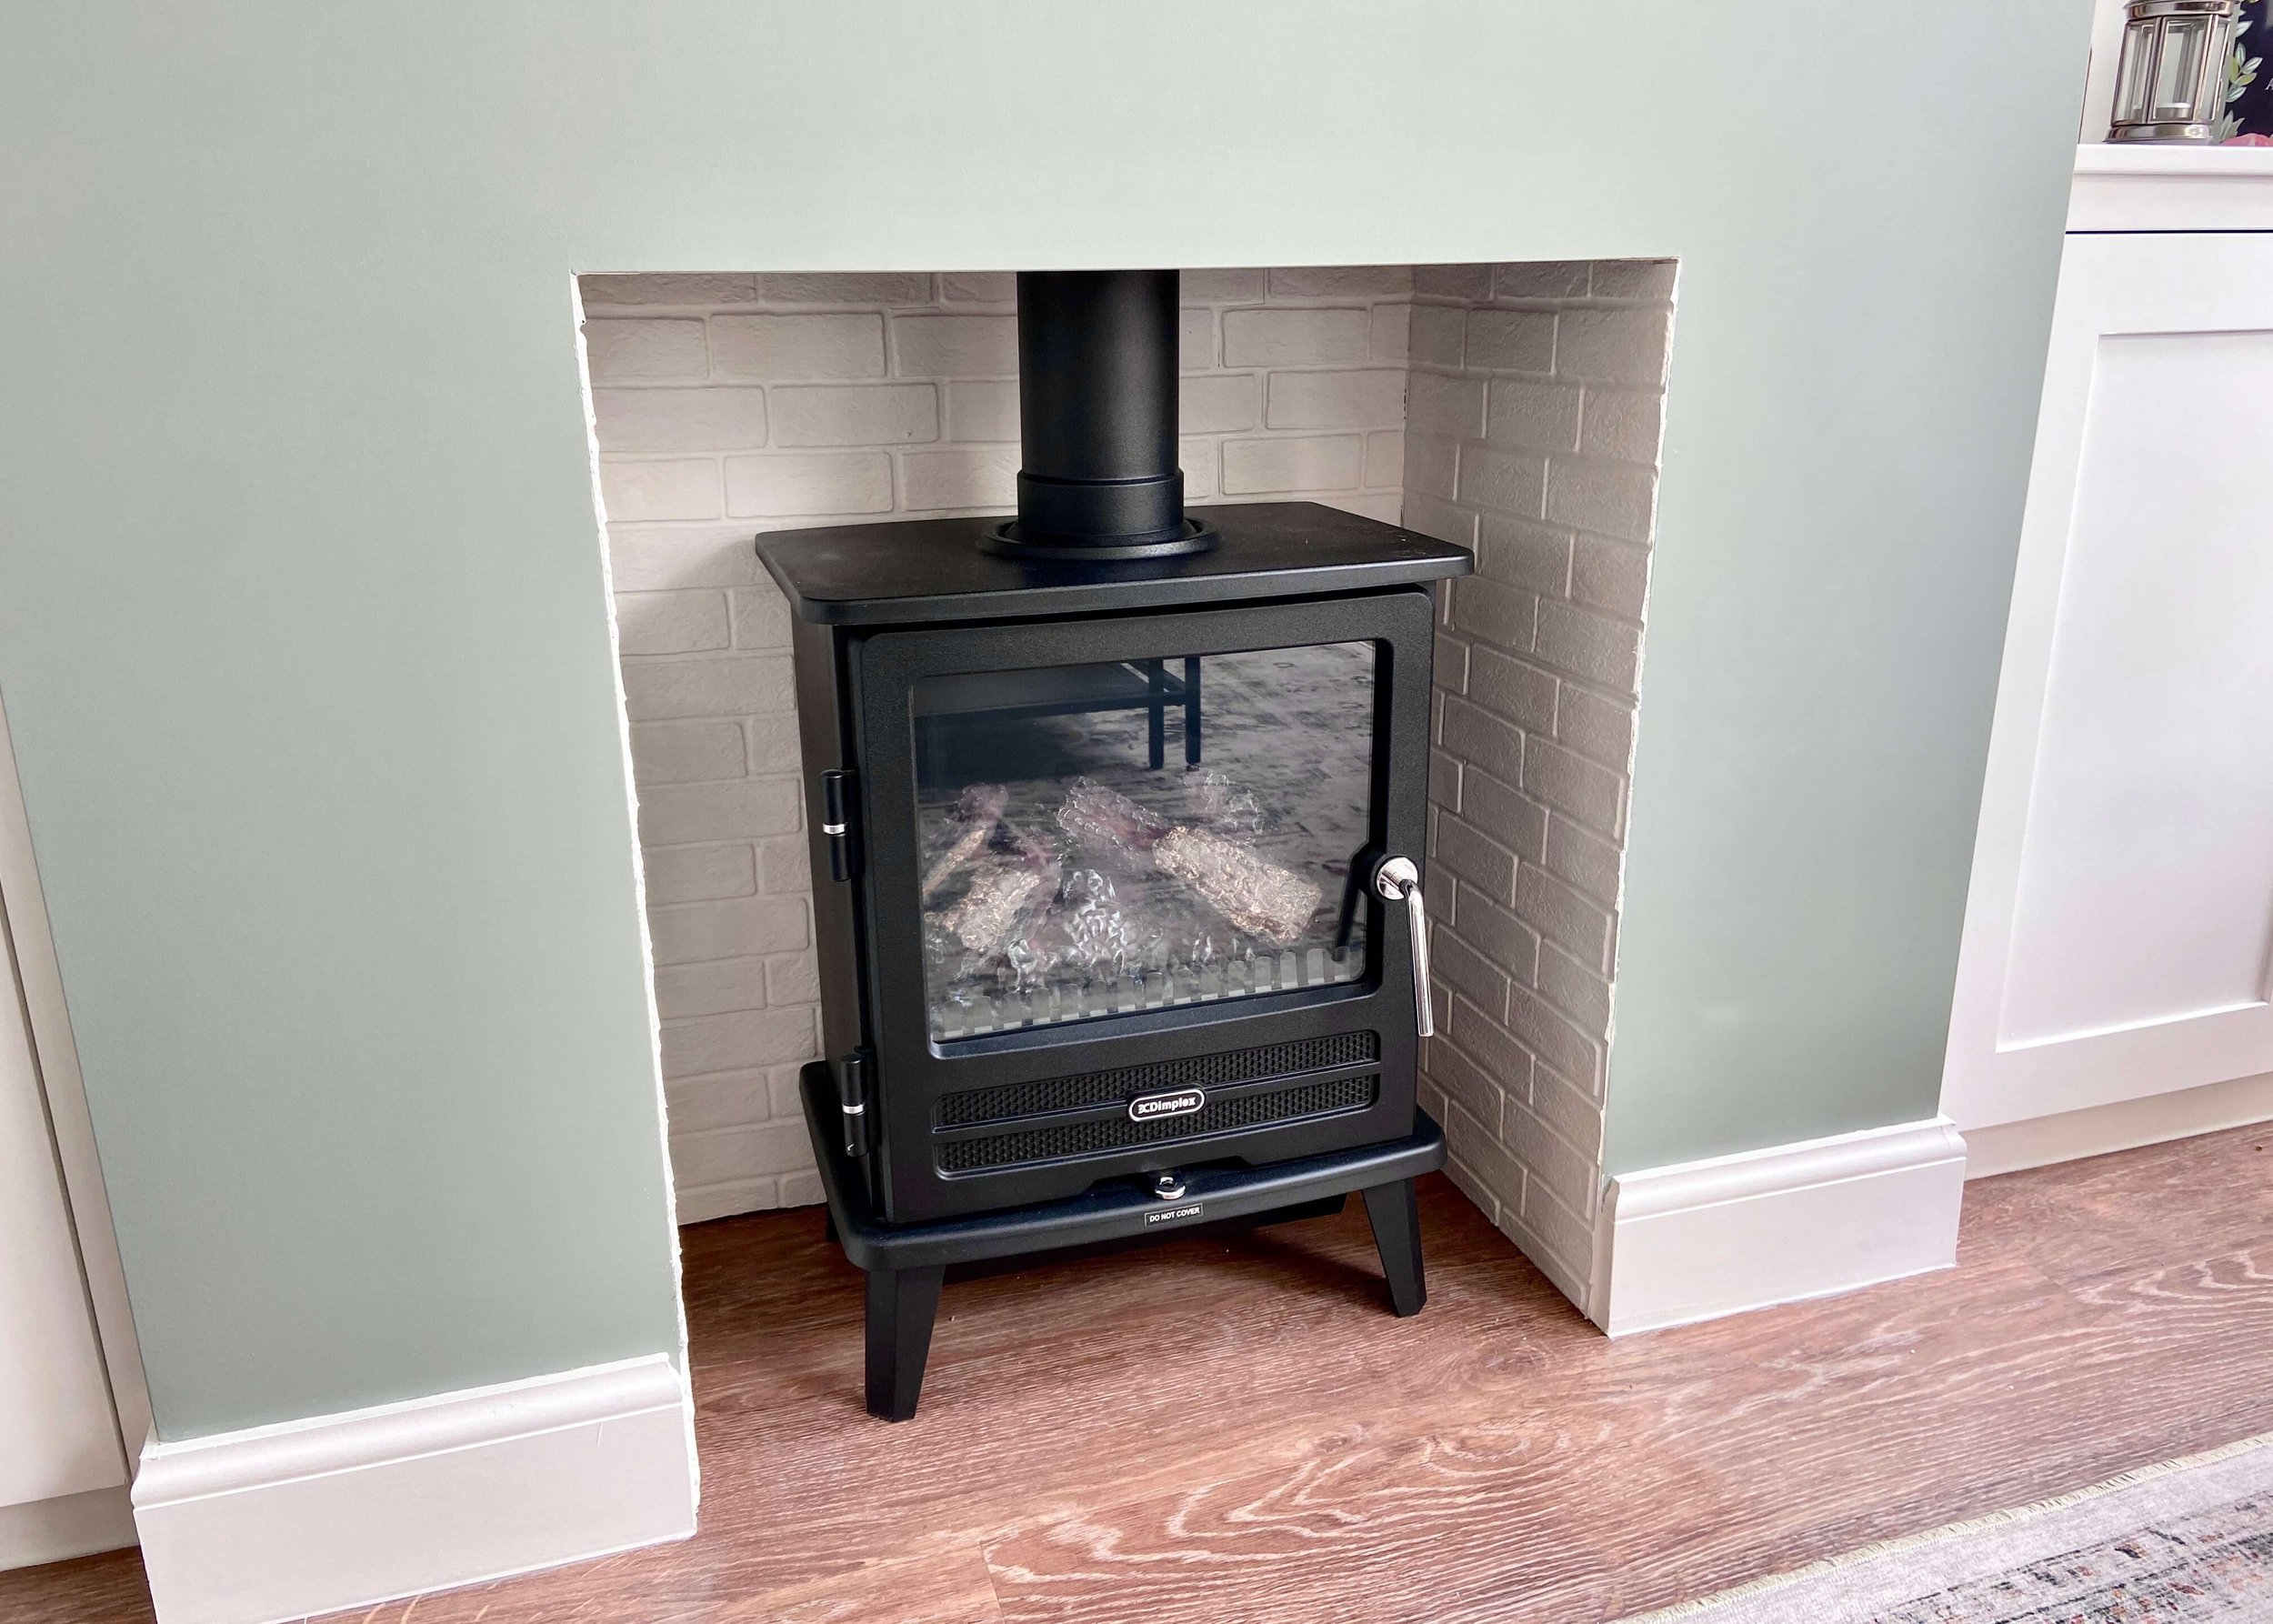
With a bit of perserverence and a few layers of paint later, we finally got them to be white, and for a temporary solution we’re pretty pleased with it. For a more permanent and better quality solution, you could always use brick tiles which would give a much more realistic effect. As always, please do share this post if you enjoyed it, and keep reading to find out what materials I used and the step-by-step tutorial!

Faux Brick Effect Fireplace by Isoscella

Textured brick peel and stick

Scissors

Caulk

Paint

Stanley knife

Dimplex Optimyst Willowbrook Fire

Faux Brick Effect Fireplace by Isoscella

1.

First of all, we primed the surround of our faux fireplace to make it easier to remove the tiles in the future. We have an electric fire which does not have a real flame and only gives out heat from the front (and which we don’t use all that often) so we felt confident to do this hack. I would not recommend it if you have a real flame or fire.

peel and stick tiles brick

2.

Once the primer was dry, we grabbed the brick tiles and started working out how they would most realistically interlink.

cut brick tiles

3.

Using scissors, we cut one side of the first tile so that it was straight and also removed some of the excess material around the brick effect on the right. This enabled the tiles to fit more snuggly together.

peel off backing

4.

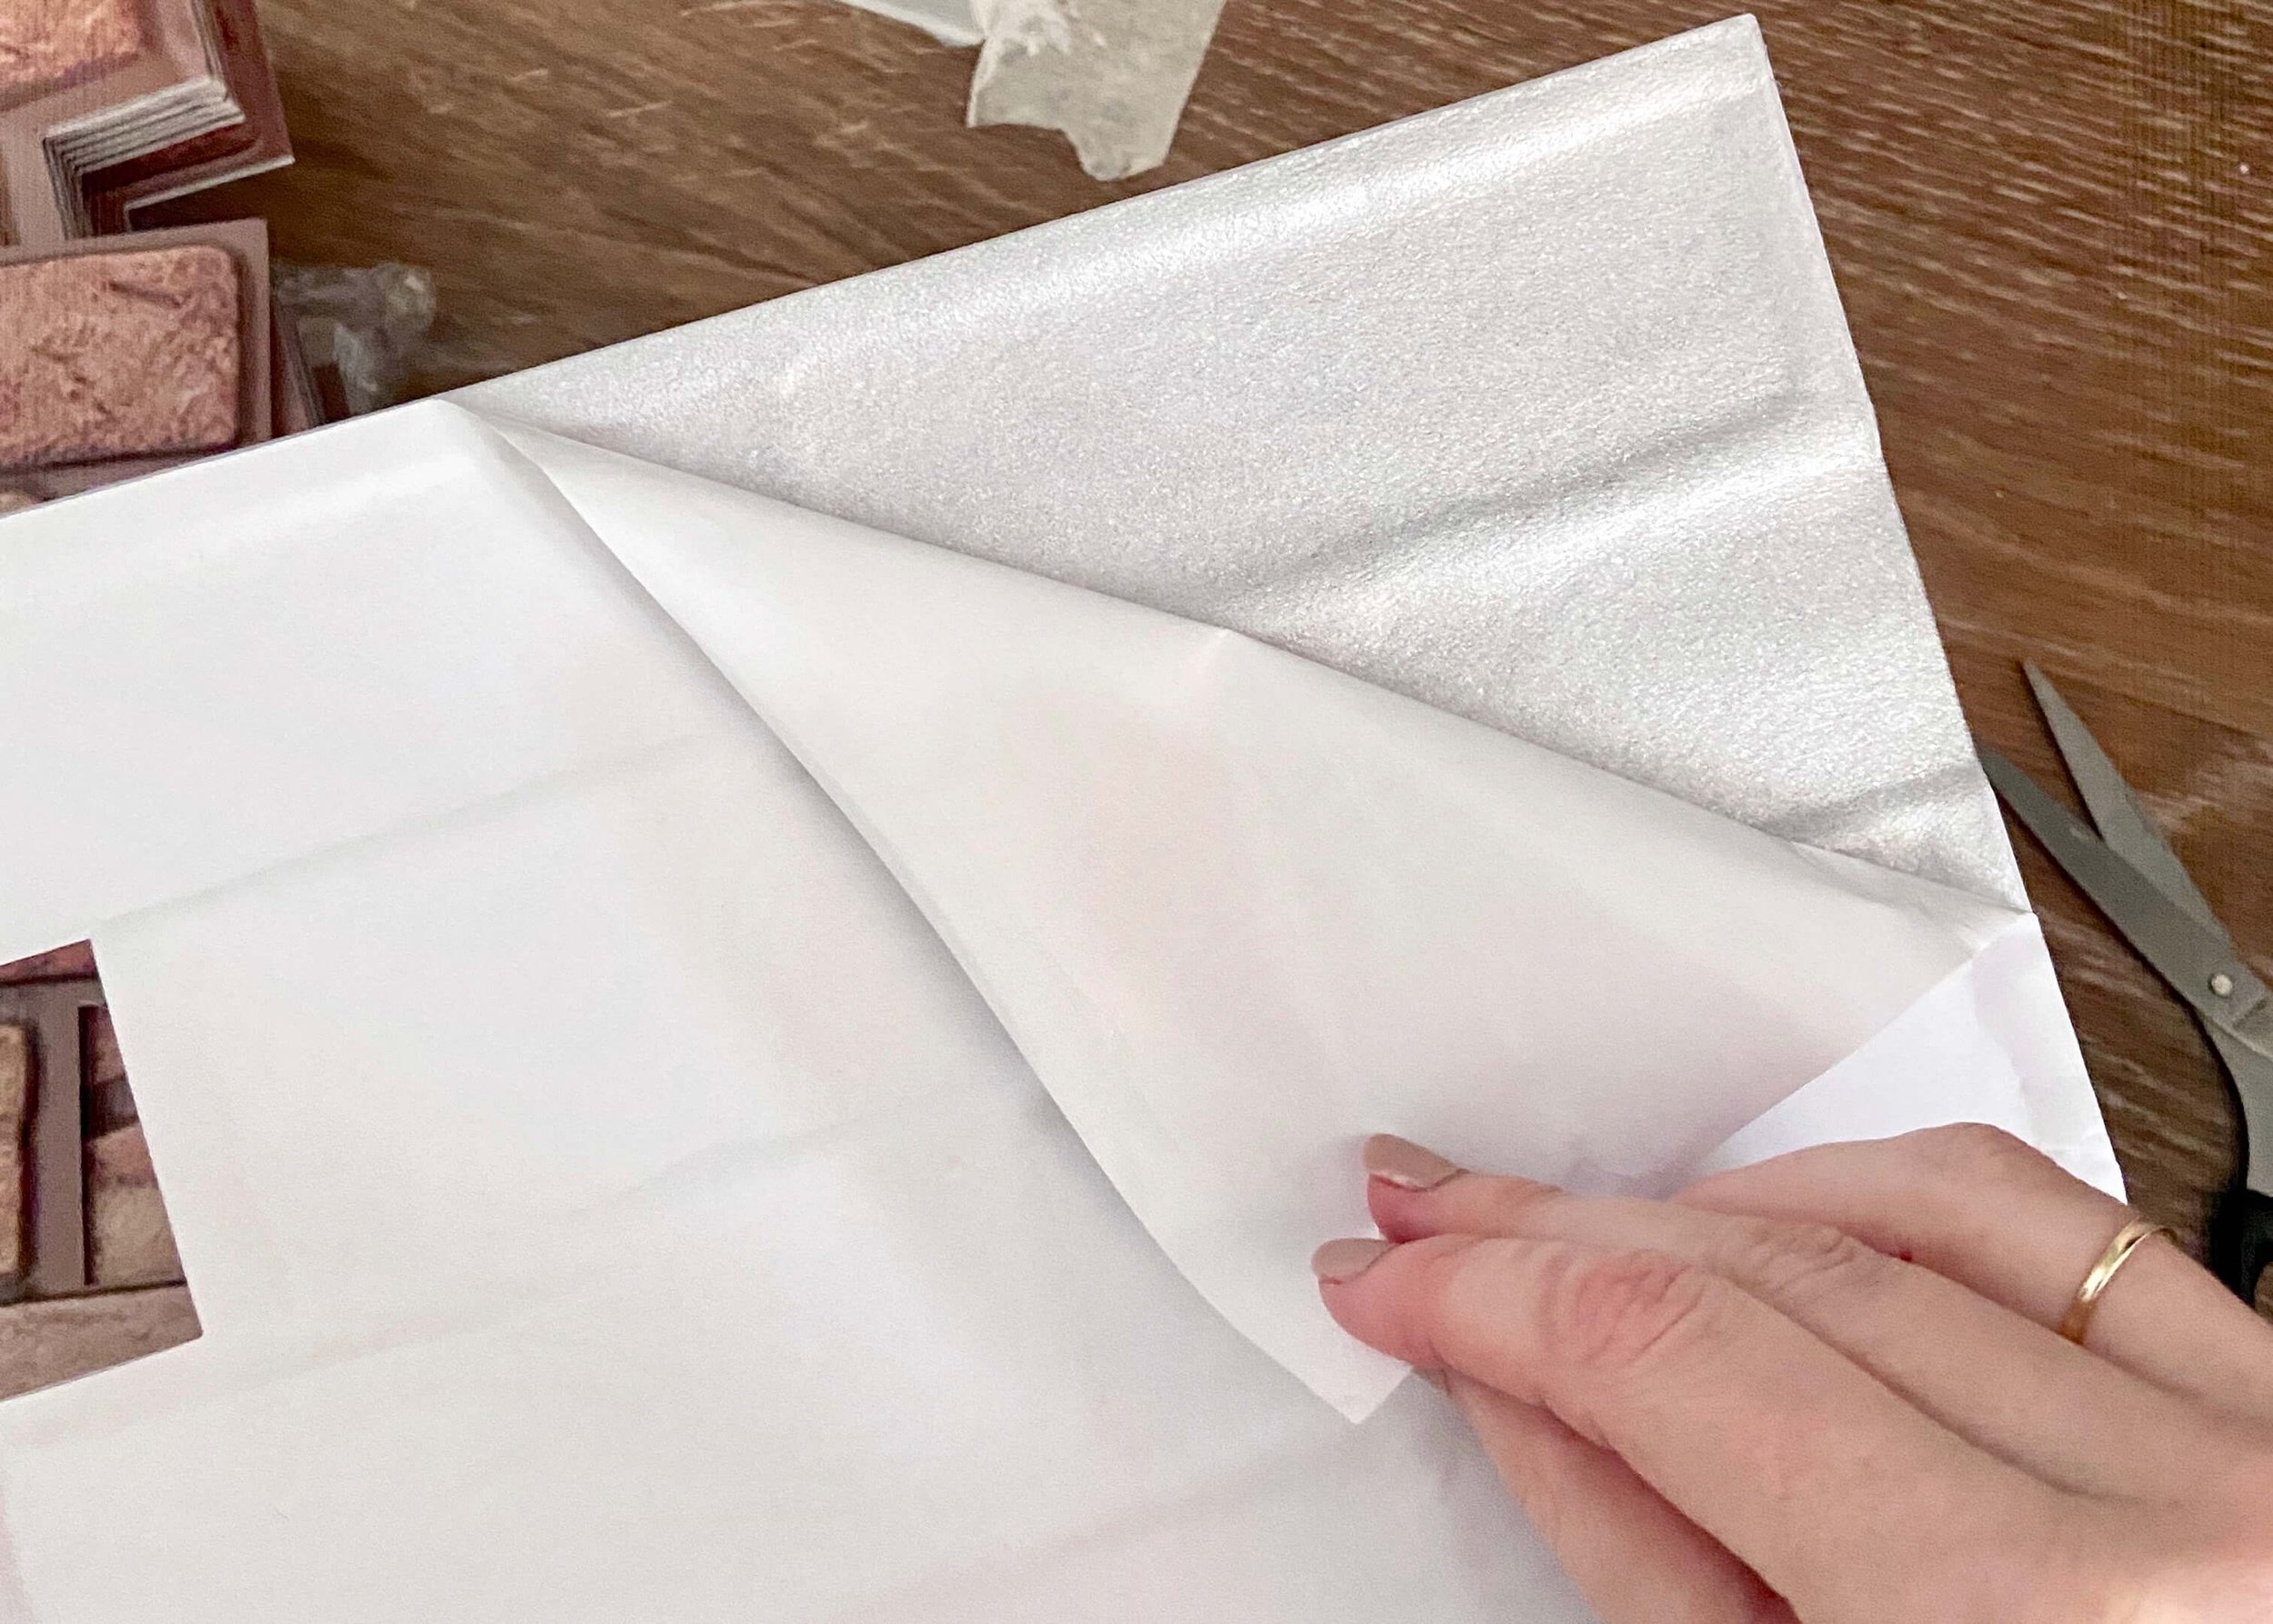
We then peeled the backing off of the first peel and stick tile.

stick first tile in corner

5.

We then placed the first tile on the back of the fire surround in the top left, ensuring that the lines between the bricks were straight with a level.

cut and stick on tiles interlocking

6.

We then chose our next tile, and dry fitted it to check it would interlink with the tile already stuck down. I used scissors to trim off any excess to make sure it did, but i wasn’t too worried about any small gaps. We continued this all over, using a stanley knife to cut out a gap for our electric fire cable.

cut and line up on corners

7.

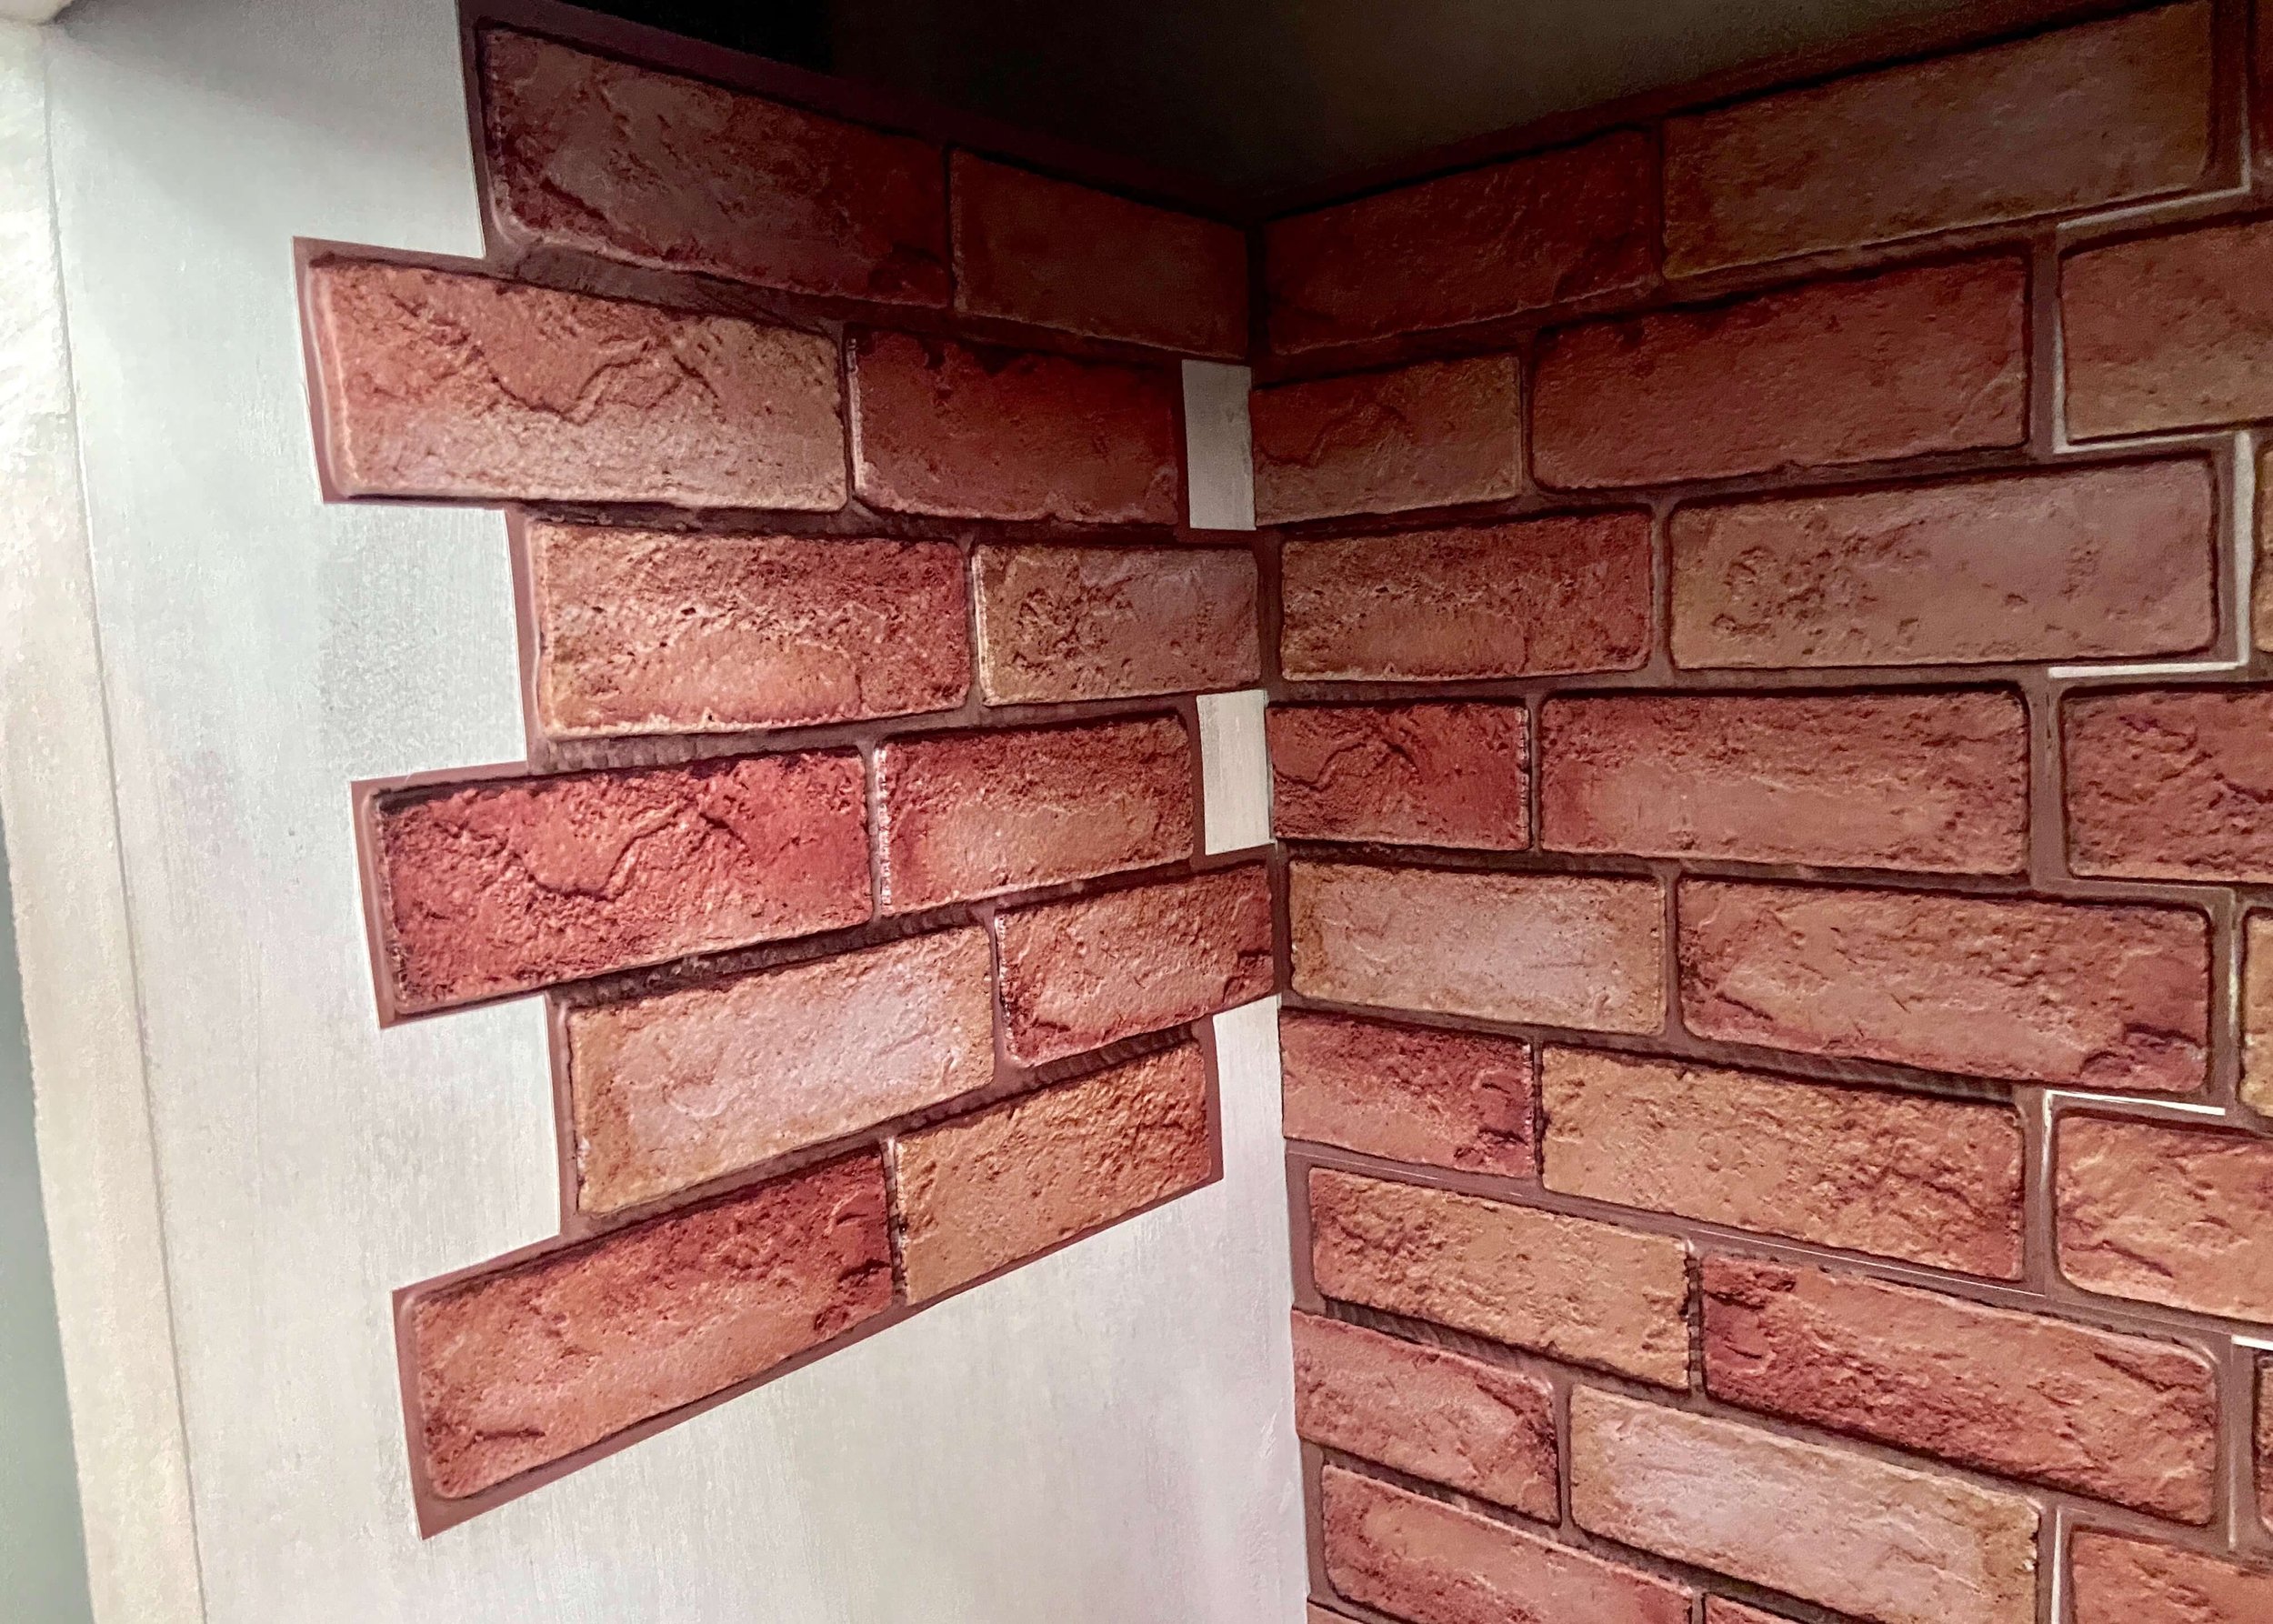
Once the back was covered, we then started on the sides. We again, through trial and error, found the tiles that would fit the best, but here we didn’t trim the edge of the tile that would be going up against the corner. Instead we kept a small gap, and cut off small bis of matching brick from other tiles to fill these gaps.

cover fireplace surround

8.

We continued this all over and used a stanley knife to carefully trim along the front of the fireplace to create a straight and smooth edge.

caulk the seams

9.

Next we used decorators caulk to fill in any of the seams between the tiles, at the corners, and on the front edge of the fireplace surround to make it as neat as possible for painting.

paint bricks

10

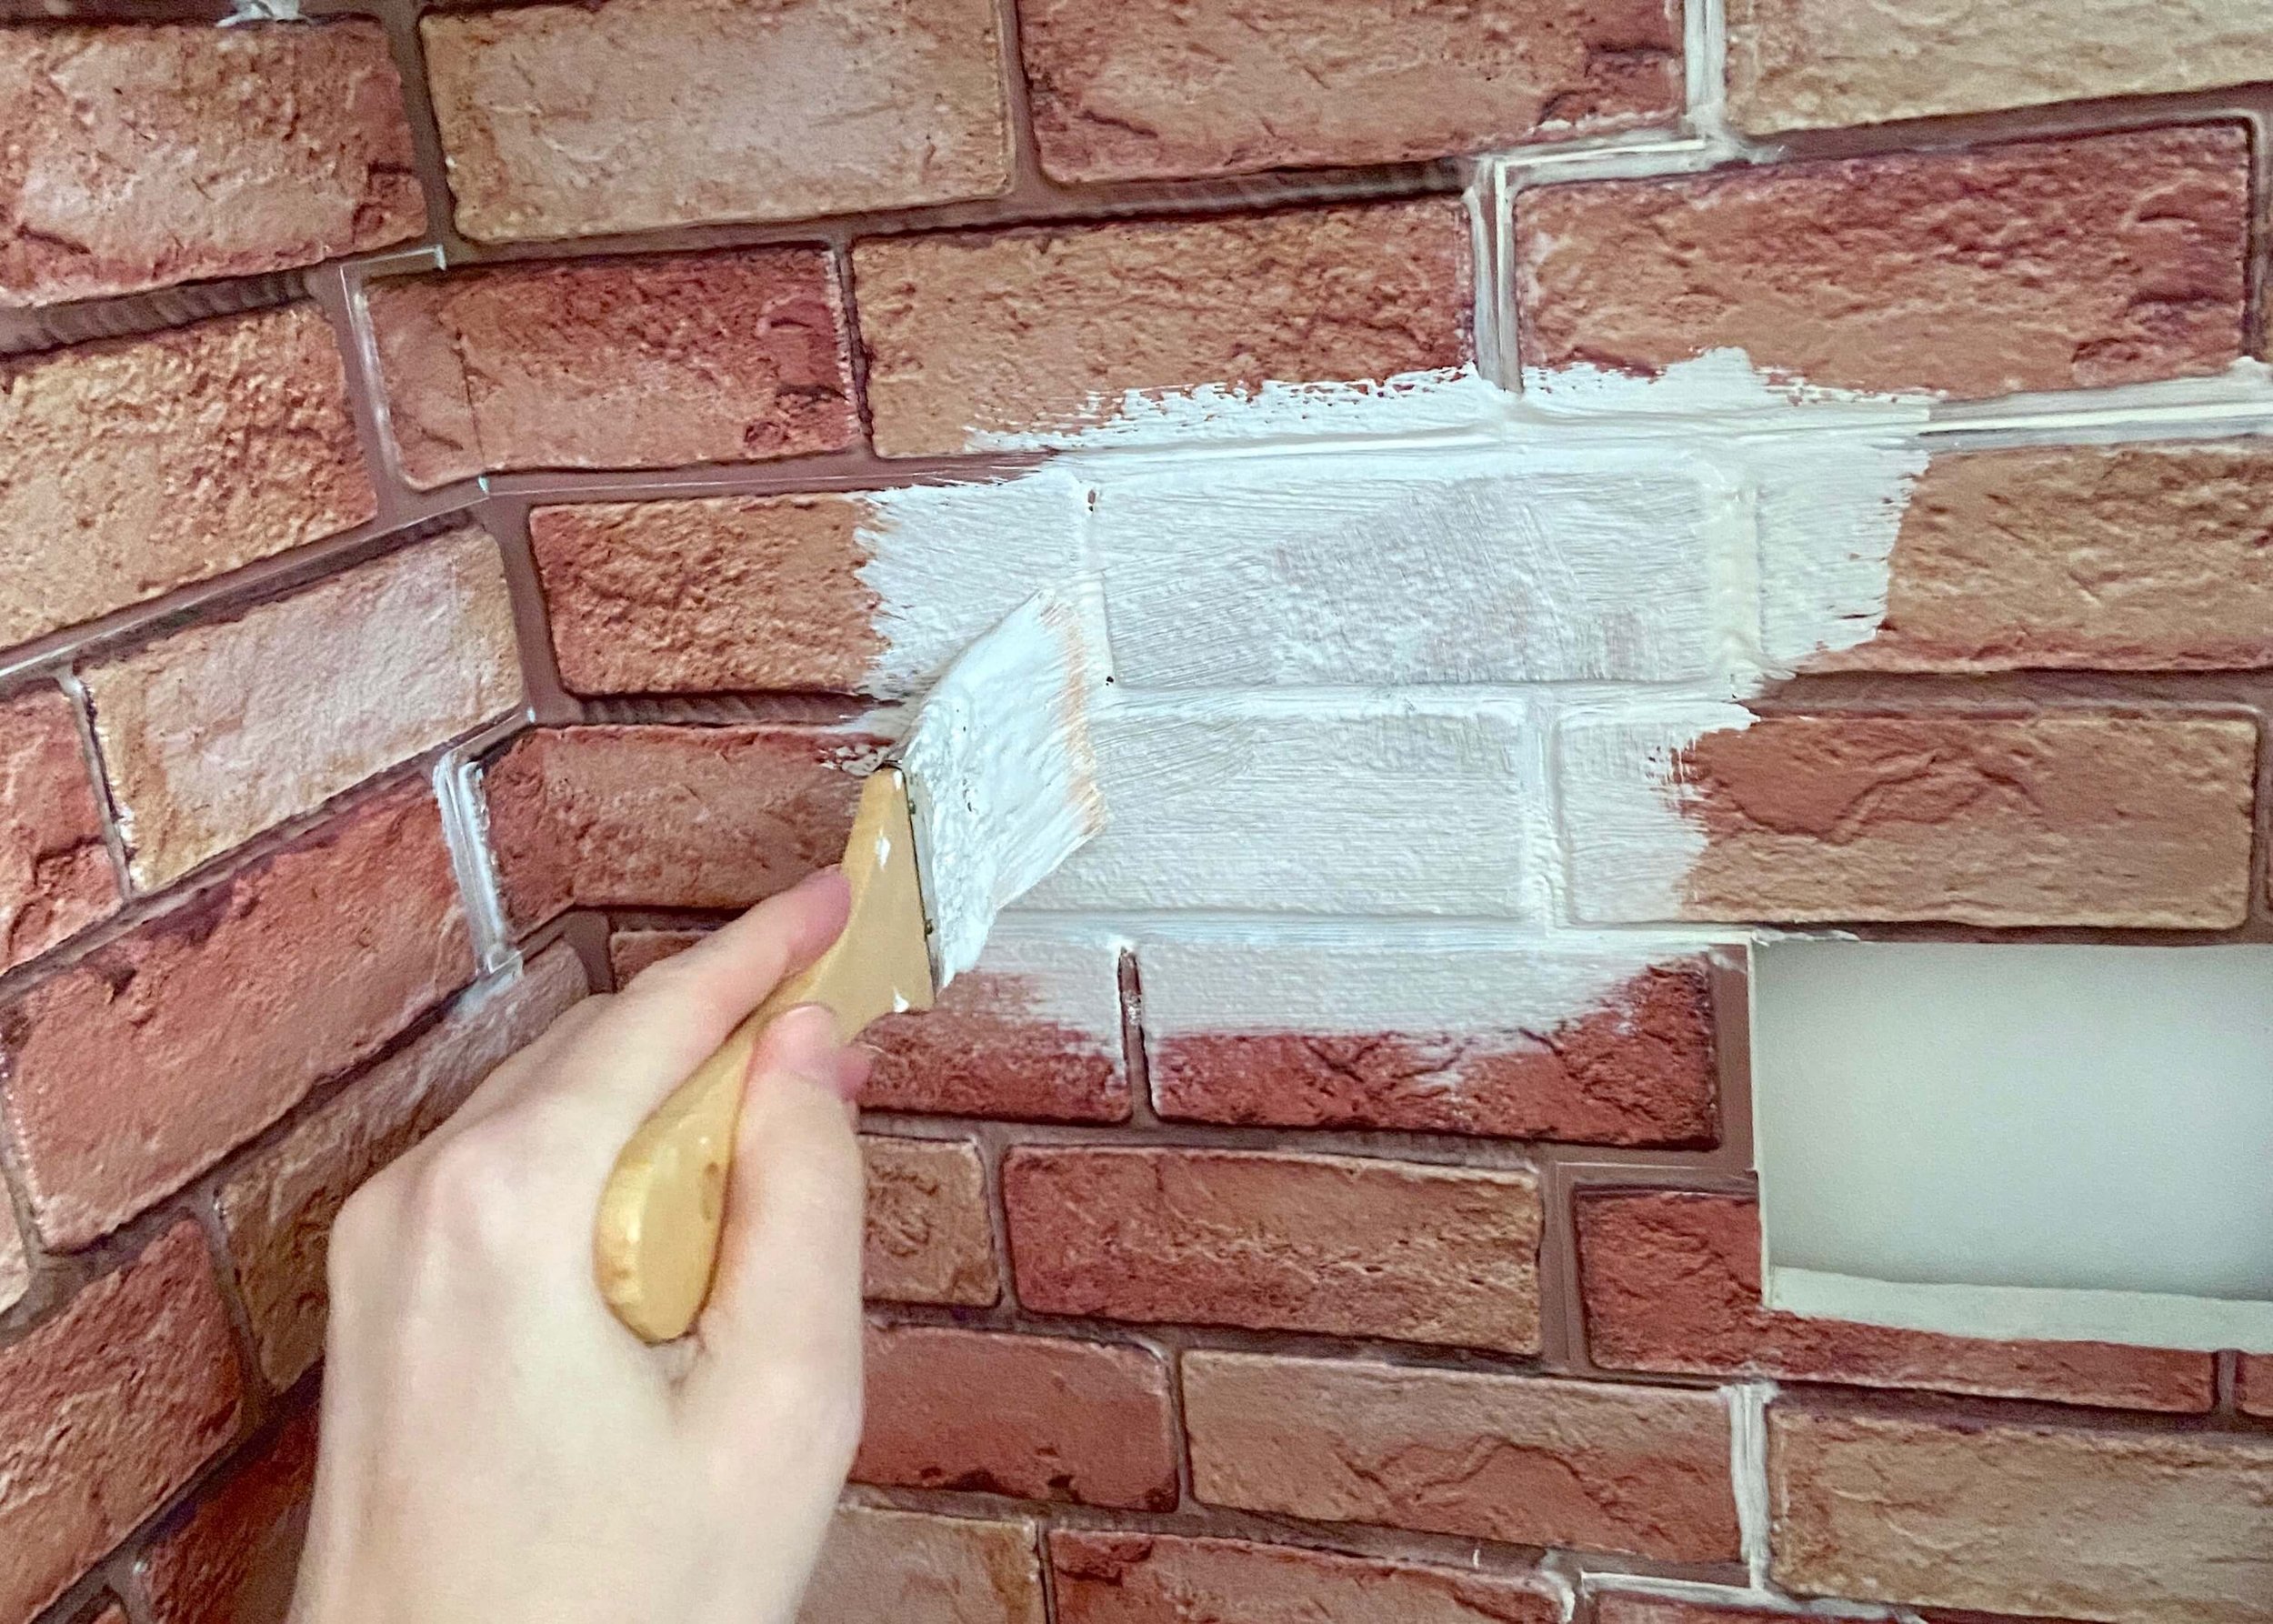
We then painted the tiles in several coats of a white matt paint that we already had. It took a few coats to get it to completely cover the colour of the brick tiles.

leave to dry

11.

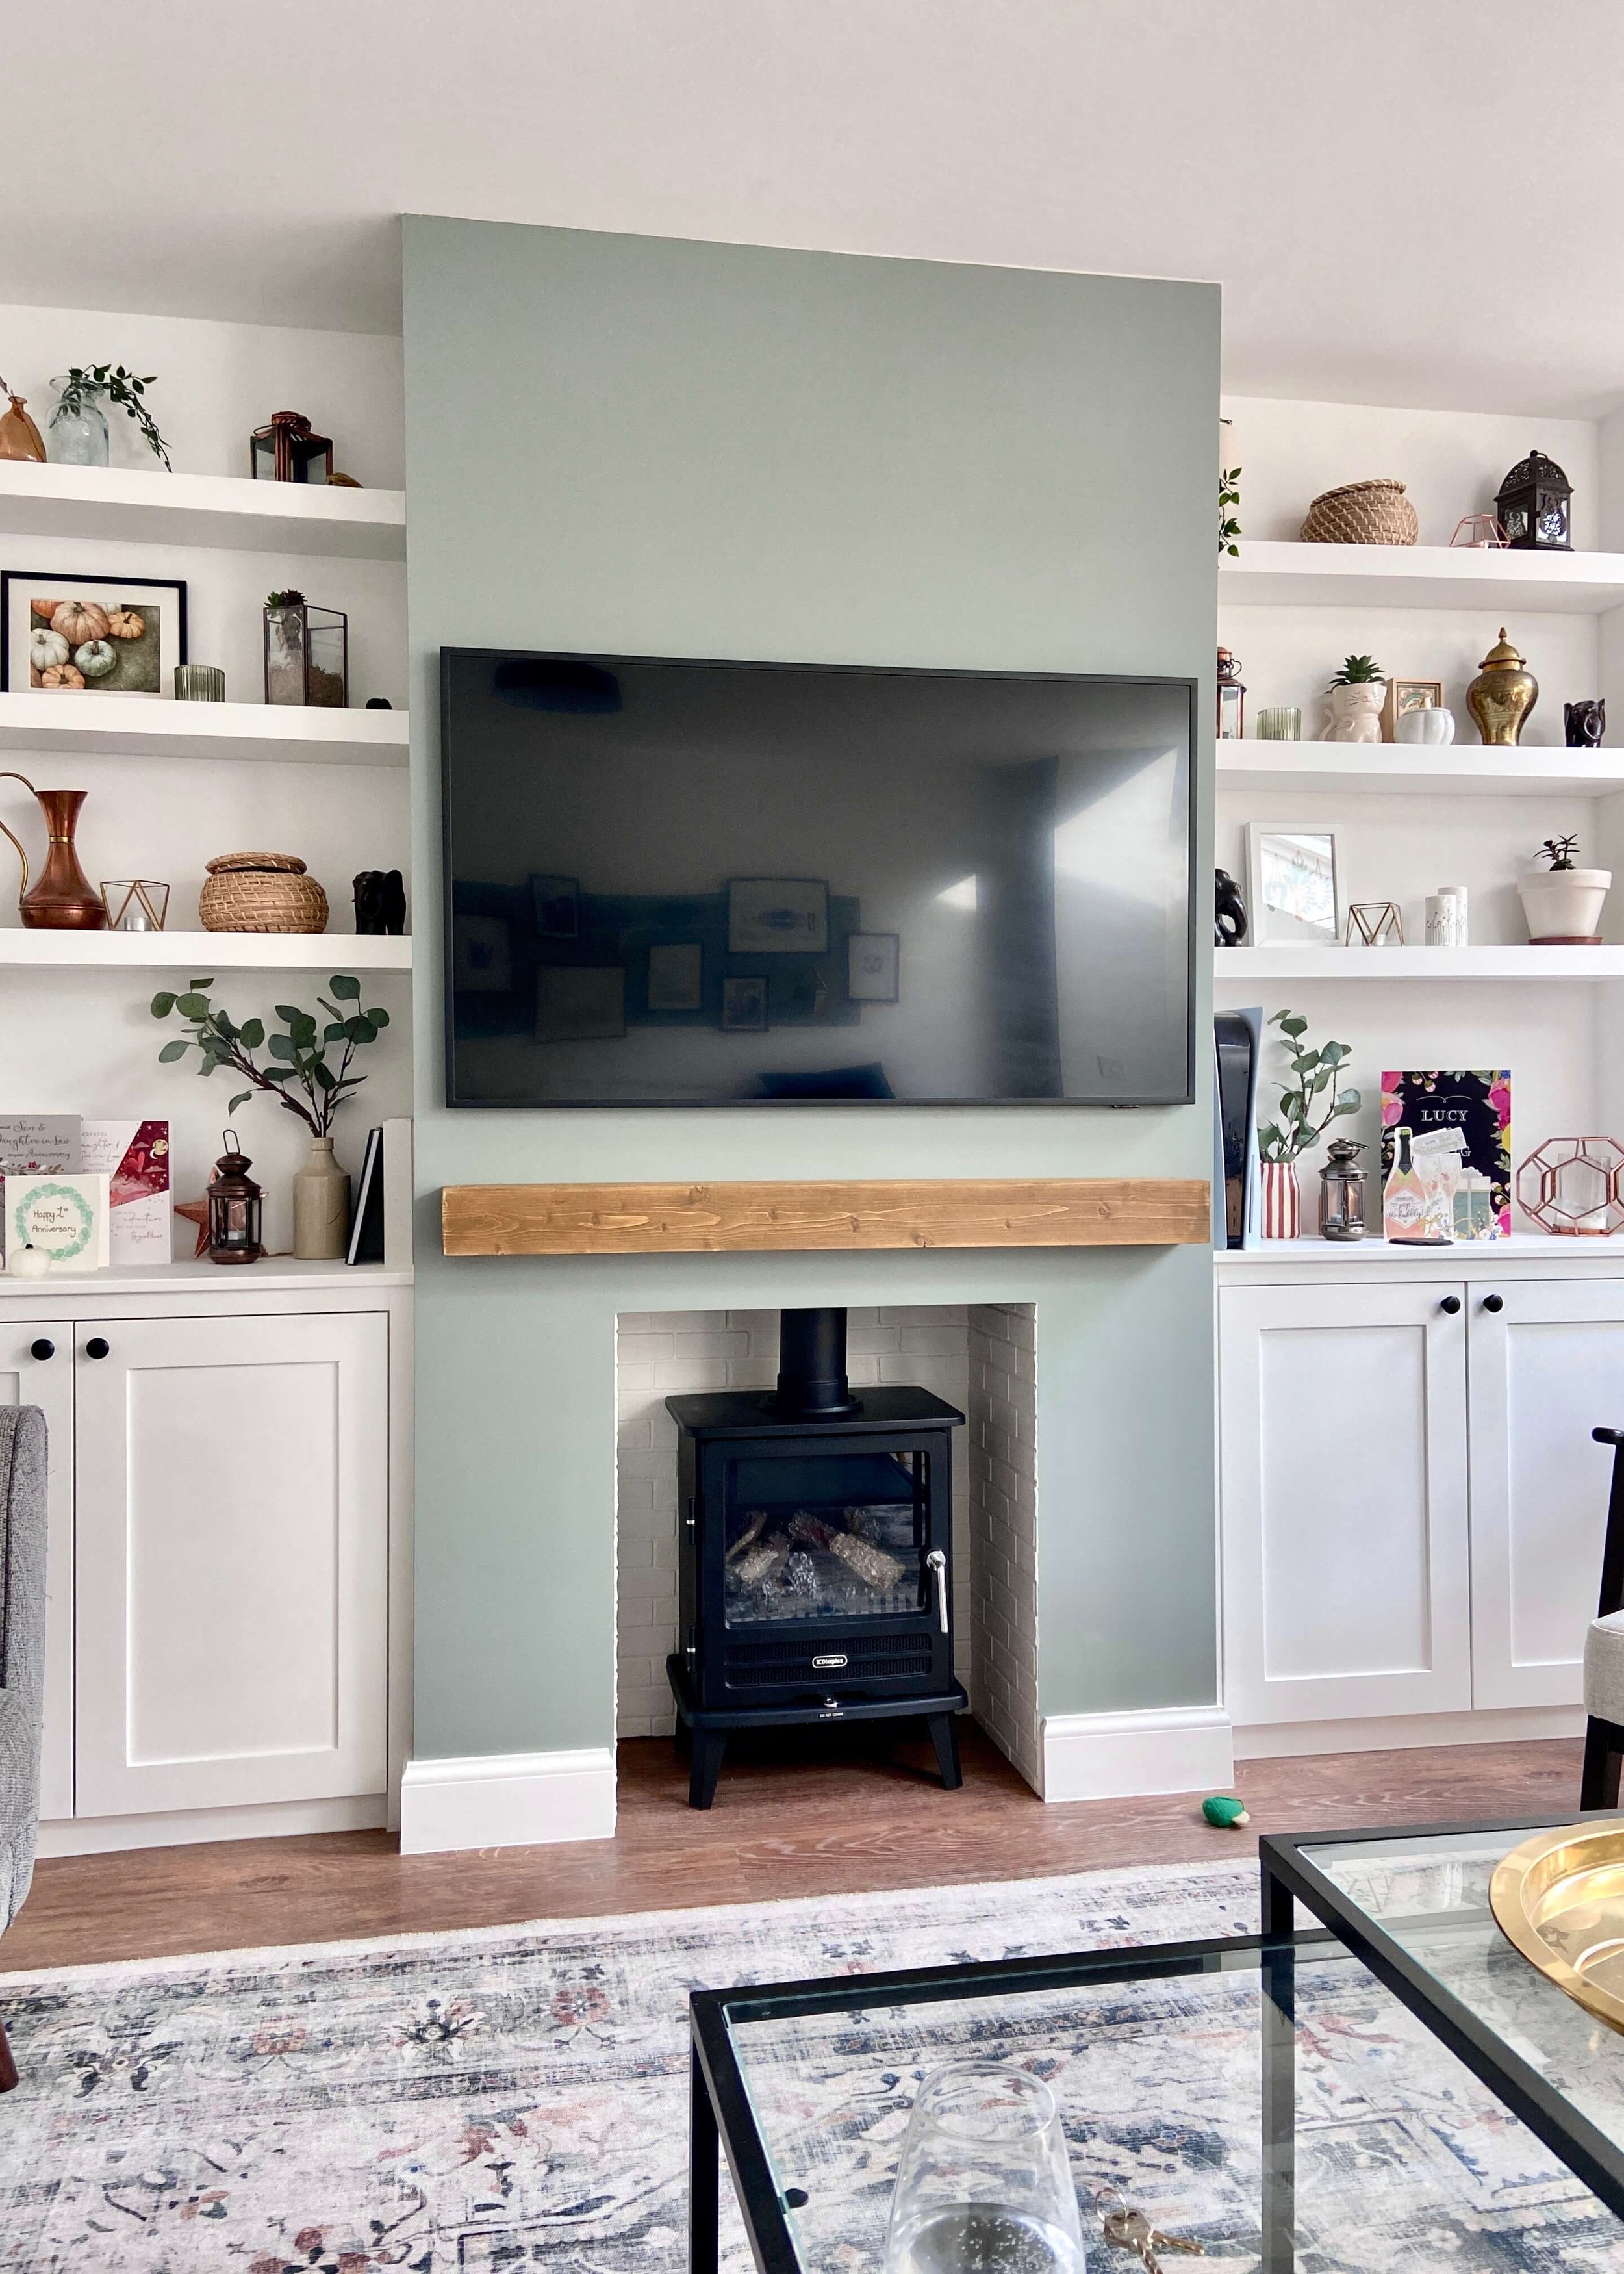
We then left it to dry, popped our electric optimyst stove back in and added a faux flue to make it look like a real log burning fireplace.

…and that’s it!

Faux Brick Effect Fireplace by Isoscella
this is the alt text
YOU MIGHT ALSO LIKE...
Wooden Mushroom Decor
Apr 26, 2025
Wooden Mushroom Decor
Apr 26, 2025
Apr 26, 2025
Hand-Painted Floral Mural Arch
Mar 29, 2025
Hand-Painted Floral Mural Arch
Mar 29, 2025
Mar 29, 2025
Easy IKEA Antilop Makeover
Mar 1, 2025
Easy IKEA Antilop Makeover
Mar 1, 2025
Mar 1, 2025
Clay Leaf Shelf
Jun 29, 2024
Clay Leaf Shelf
Jun 29, 2024
Jun 29, 2024
Nursery Feature Wall
Jun 15, 2024
Nursery Feature Wall
Jun 15, 2024
Jun 15, 2024
Hallway Wall Niche
Jun 8, 2024
Hallway Wall Niche
Jun 8, 2024
Jun 8, 2024
Ikea Hemnes Drawer Hack
May 4, 2024
Ikea Hemnes Drawer Hack
May 4, 2024
May 4, 2024
Pressed Flower Taper Candle
Apr 20, 2024
Pressed Flower Taper Candle
Apr 20, 2024
Apr 20, 2024
Floral Rabbit Nursery Print
Apr 13, 2024
Floral Rabbit Nursery Print
Apr 13, 2024
Apr 13, 2024
Pressed Flower Egg Ornaments
Apr 10, 2024
Pressed Flower Egg Ornaments
Apr 10, 2024
Apr 10, 2024
In DIY, INTERIORS Tags home
← How to Make a Wooden MantelMushroom Fairy Lights →
 

Decorating, DIY-ing and doodling my way through life. Have a look around and let’s get creative!

>> FIND OUT MORE <<

Follow
The office is still one of my favourite transformations in the house! 😍

I started by panelling the wall with MDF strips and then painted the wall with a mix of colours. I used three IKEA drawer units for the base of the desk and then secured the de

ART

DIY

LIFE


THE LATEST

Featured
Wooden Mushroom Decor
Apr 26, 2025
Wooden Mushroom Decor
Apr 26, 2025
Apr 26, 2025
Hand-Painted Floral Mural Arch
Mar 29, 2025
Hand-Painted Floral Mural Arch
Mar 29, 2025
Mar 29, 2025
Easy IKEA Antilop Makeover
Mar 1, 2025
Easy IKEA Antilop Makeover
Mar 1, 2025
Mar 1, 2025
Clay Leaf Shelf
Jun 29, 2024
Clay Leaf Shelf
Jun 29, 2024
Jun 29, 2024
Nursery Feature Wall
Jun 15, 2024
Nursery Feature Wall
Jun 15, 2024
Jun 15, 2024


THE GREATEST

Featured
DIY // IKEA LACK TABLE INDUSTRIAL HACK
Sep 22, 2020
DIY
DIY // IKEA LACK TABLE INDUSTRIAL HACK
Sep 22, 2020
DIY
Sep 22, 2020
DIY
DIY // CLAY ALL-SEEING EYE MIRROR
Aug 14, 2020
DIY
DIY // CLAY ALL-SEEING EYE MIRROR
Aug 14, 2020
DIY
Aug 14, 2020
DIY
DIY // CLAY FACE DISH
Apr 29, 2020
DIY
DIY // CLAY FACE DISH
Apr 29, 2020
DIY
Apr 29, 2020
DIY
DIY // ABSTRACT ART FLORAL EGGS
Mar 25, 2020
DIY
DIY // ABSTRACT ART FLORAL EGGS
Mar 25, 2020
DIY
Mar 25, 2020
DIY
DIY // WIRE FACE EARRINGS
Feb 16, 2020
DIY
DIY // WIRE FACE EARRINGS
Feb 16, 2020
DIY
Feb 16, 2020
DIY

Follow
^^ BACK TO TOP
How does Monday come round so quick?!Wishing I could cosy up here today ✨

#mondaymood #storyofmyhome #mydailyhomesquare #interiordesign #budgetdiy #realstylishhomes #ourdiyhomes #femalediycollective #discoverunder5k #myhousethismonth #myhousedownsou
I&rsquo;ve got the day off today (woop!) and although it&rsquo;s not quite warm enough to sit out here yet, the sun is shining and I think a little walk to blow out the cobwebs is exactly what I need. Hope Monday is treating you well! ☀️

#summerdrea
Had such a lovely day seeing one of my besties and her adorable new baby that I completely forgot to share today&rsquo;s new blog post!

Head over to the blog for all the details of this easy DIY ring dish 🔝✨

#diy #diyhomedecor #diyhome #diyvalenti
That sunshine 👌🏻☀️

#mycosyhome #livingroomdecor #livingroominspo #mydiymydecor #homeobsessed #lovemydecor #homeinterioruk #discoverunder5k #diyhome #diyhomedecor #myhousethismonth #myhousedownsouth #realstylishhomes #ourdiyhomes #happythursday #in
A little corner our home on this chilly Tuesday morning ✨
.
.
#interior #homeobsessed #mycosyhome #homeinterioruk #instadecorating #homesofinstagram #happymonday #mondaymotivation #instainteriors #cornersofmyhome #myhousethismonth #myhousedownsouth #

Copyright 2021 isoscella. All rights reserved.

Powered by Squarespace