• ABOUT ME
    • PRIVACY POLICY
  • COLLABORATE
  • BLOG
    • ART
    • WEDDING
    • LIBRARY
    • DECOR
    • JEWELLERY
    • STATIONARY
    • NAIL ART
    • BAKING
    • CHRISTMAS
    • EASTER
    • ART PRINTS
    • WEDDING STATIONARY
  • CONTACT
Menu

ISOSCELLA

Street Address
City, State, Zip
Phone Number

Your Custom Text Here

ISOSCELLA

  • ABOUT
    • ABOUT ME
    • PRIVACY POLICY
  • COLLABORATE
  • BLOG
  • ART
    • ART
    • WEDDING
    • LIBRARY
  • DIY
    • DECOR
    • JEWELLERY
    • STATIONARY
    • NAIL ART
    • BAKING
    • CHRISTMAS
    • EASTER
  • SHOP
    • ART PRINTS
    • WEDDING STATIONARY
  • CONTACT

DIY // GEOMETRIC LIGHTSHADE

September 26, 2017 Isoscella M
DIY Geometric Light Shade by Isoscella

A few years ago, you'd be hard pressed not to find a DIY geometric light shade made from plastic straws on Pinterest. If like me, you never quite got on board with using plastic straws to make your decor but still love the idea of making your own geometric light shade, then this may be just the DIY for you!

Pendant light shades in all sorts of geometric shapes are still everywhere and it's not difficult to see why; they add a touch of modern minimalism to any room, allow lots of light into the room and create beautiful shadow patterns on your ceiling. Even better, this DIY light shade doesn't require any obscure materials (I had all of the materials already!) and although it may not look it, is super easy to make. Keep reading to find out what I used and how I made it...

Wooden skewers

Hot glue gun

Ruler

Pencil

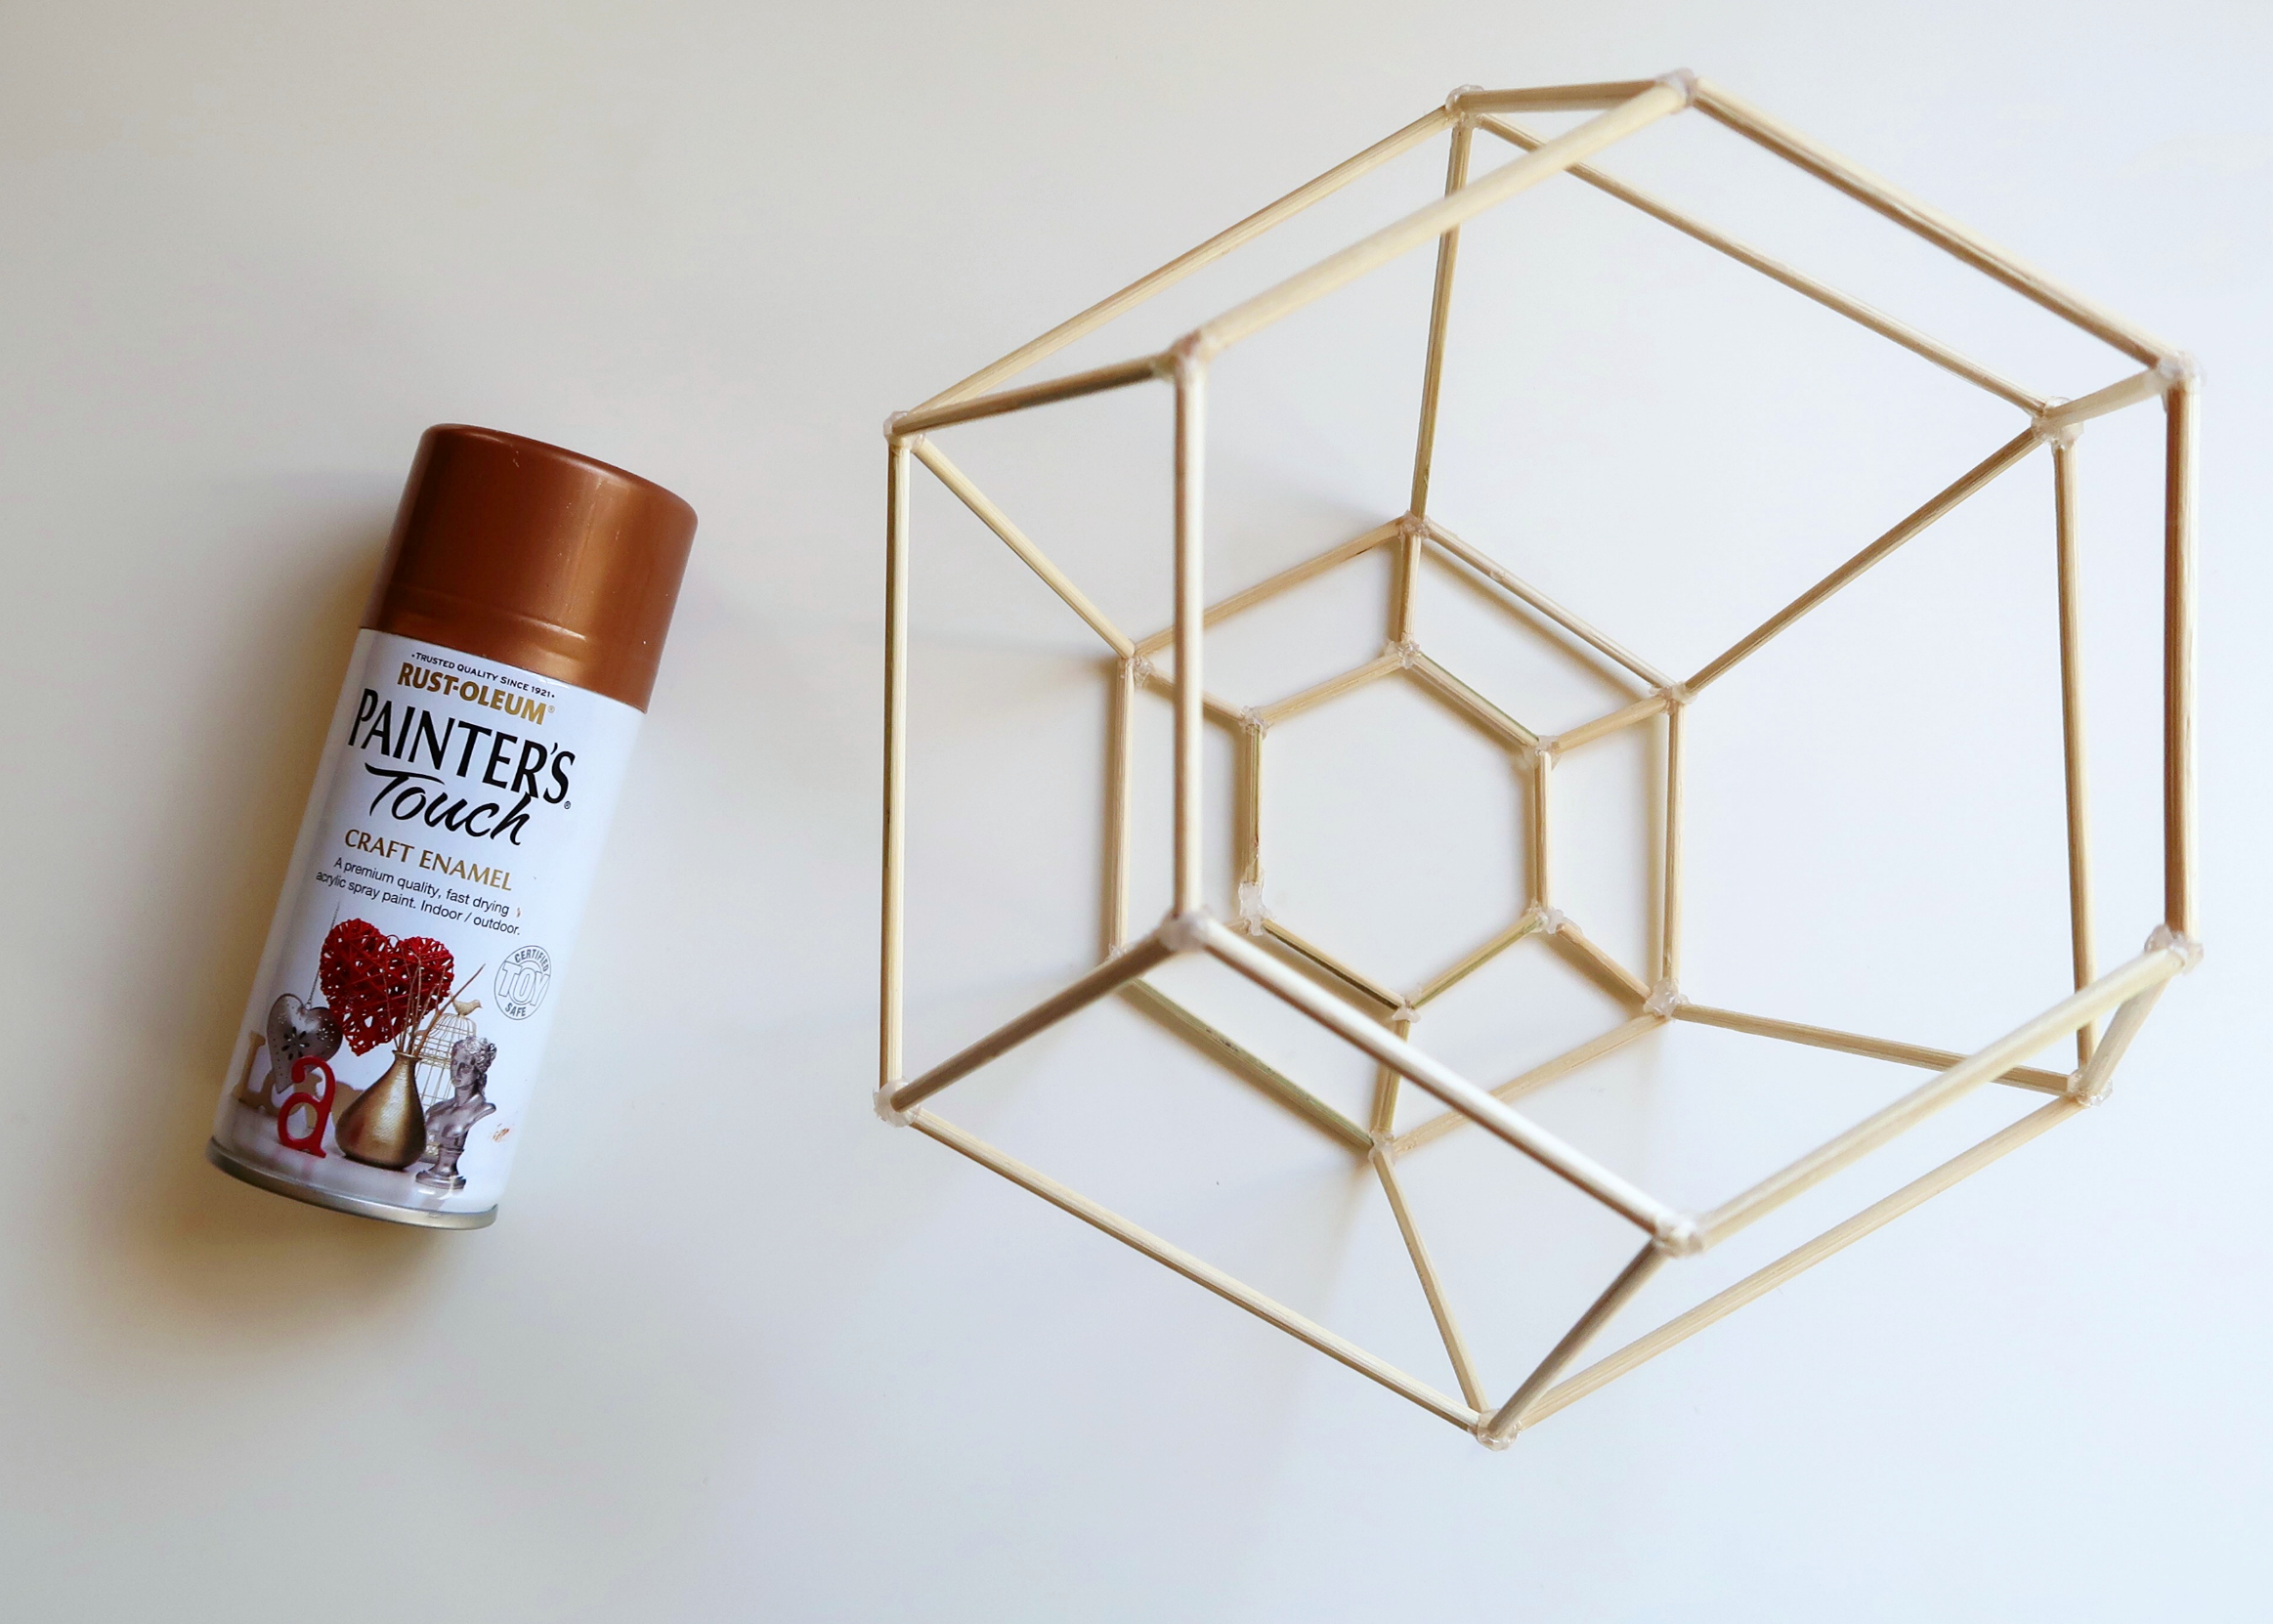
Spray paint

DIY Geometric Light Shade by Isoscella
Step 1

1.

The first thing you want to do is to measure and cut your skewers to the right length. I used a pair of wire cutters to cut lengths of 2.5cm (x6), 6cm (x 12) and 10cm (x 18).

Step 2

2.

Its helpful to draw out a hexagon first to guide your glueing. Once you're happy with your drawing, grab the 6cm skewers and glue them together. Do this one piece at a time, leaving them to dry in between, so that you can get the angle precise.

Step 3

3.

Repeat this process all the way around until you have closed the shape and have a nice sturdy hexagon with 6cm sides. You'll need two hexagons of this size, as these will form the top and bottom of the light shade so once you've done one, crack on with another!

Step 4

4.

Next you'll need to make a larger hexagonal shape using six 10cm skewers and a miniature hexagon using the 2.5cm skewers. The hexagon we drew out is helpful here to guide the angle you glue the pieces together at.

Step 5

5.

At this point you should have one large hexagon, two smaller hexagons, one miniature hexagon and twelve 10cm skewers. If you do, you're ready to assemble!

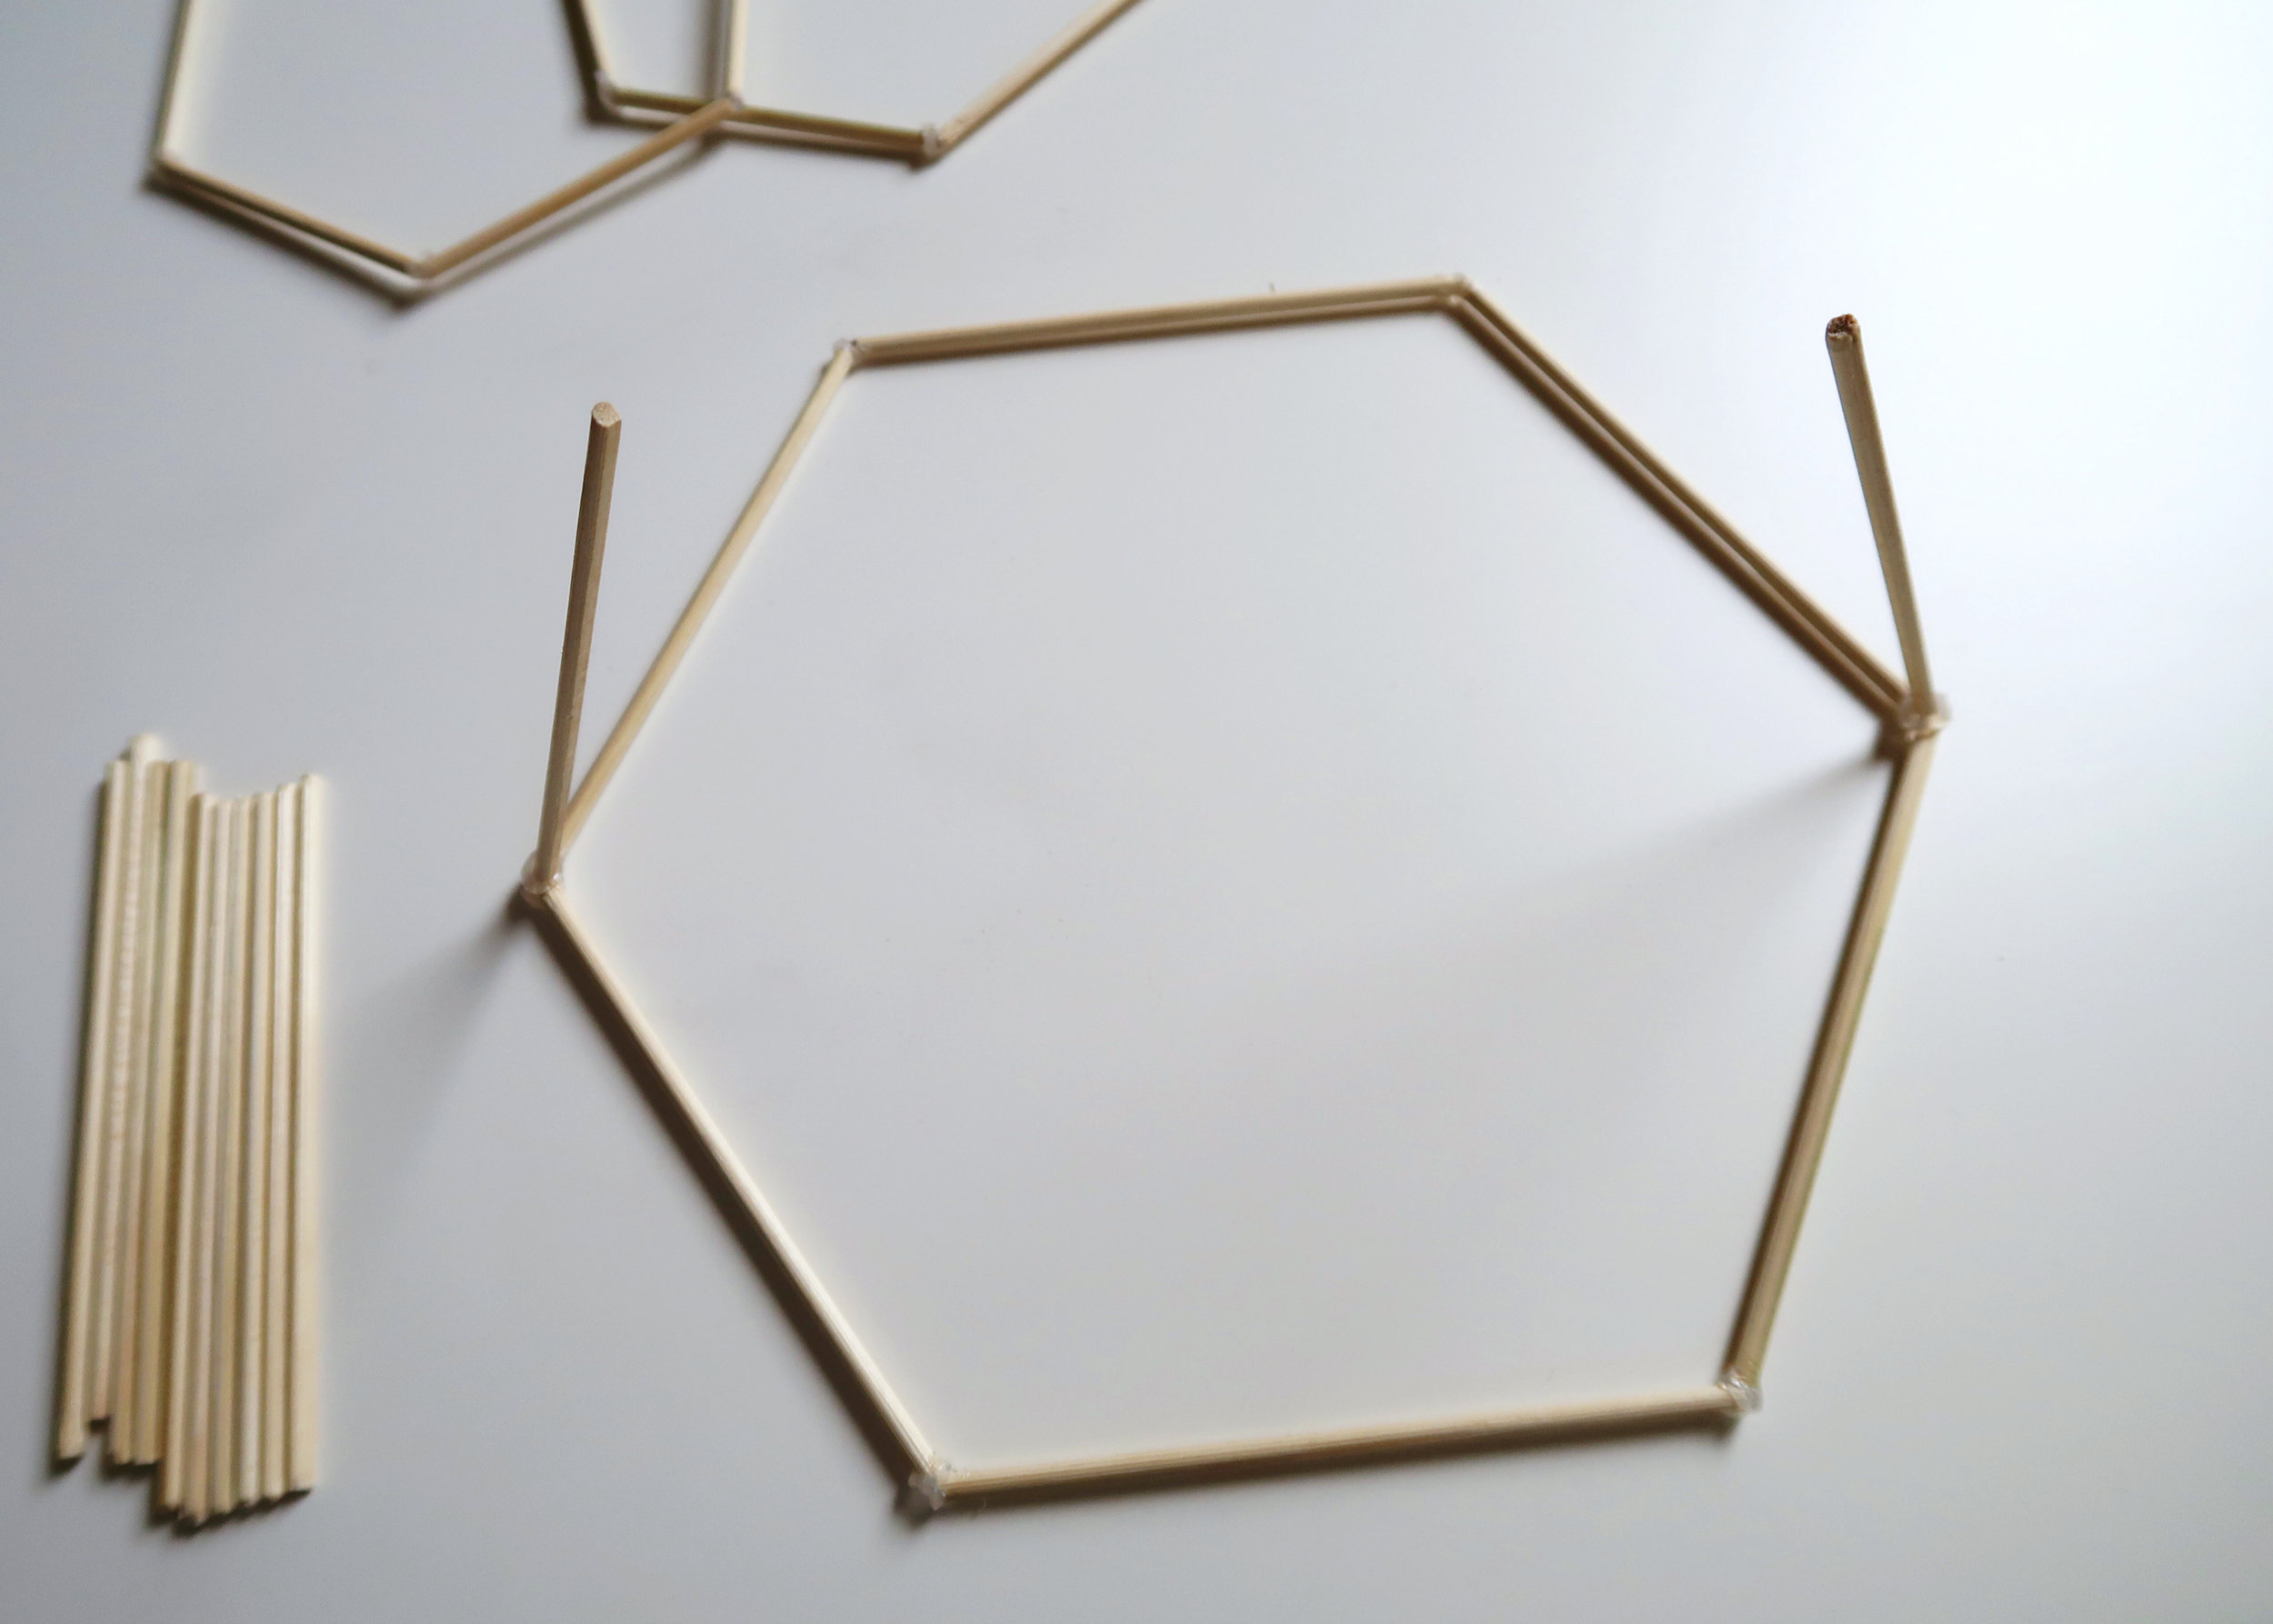
Step 6

6.

Place the large hexagon flat and stick two of the 10cm skewers to opposite corners with hot glue, angling them slightly inwards as you do.

Step 7

7.

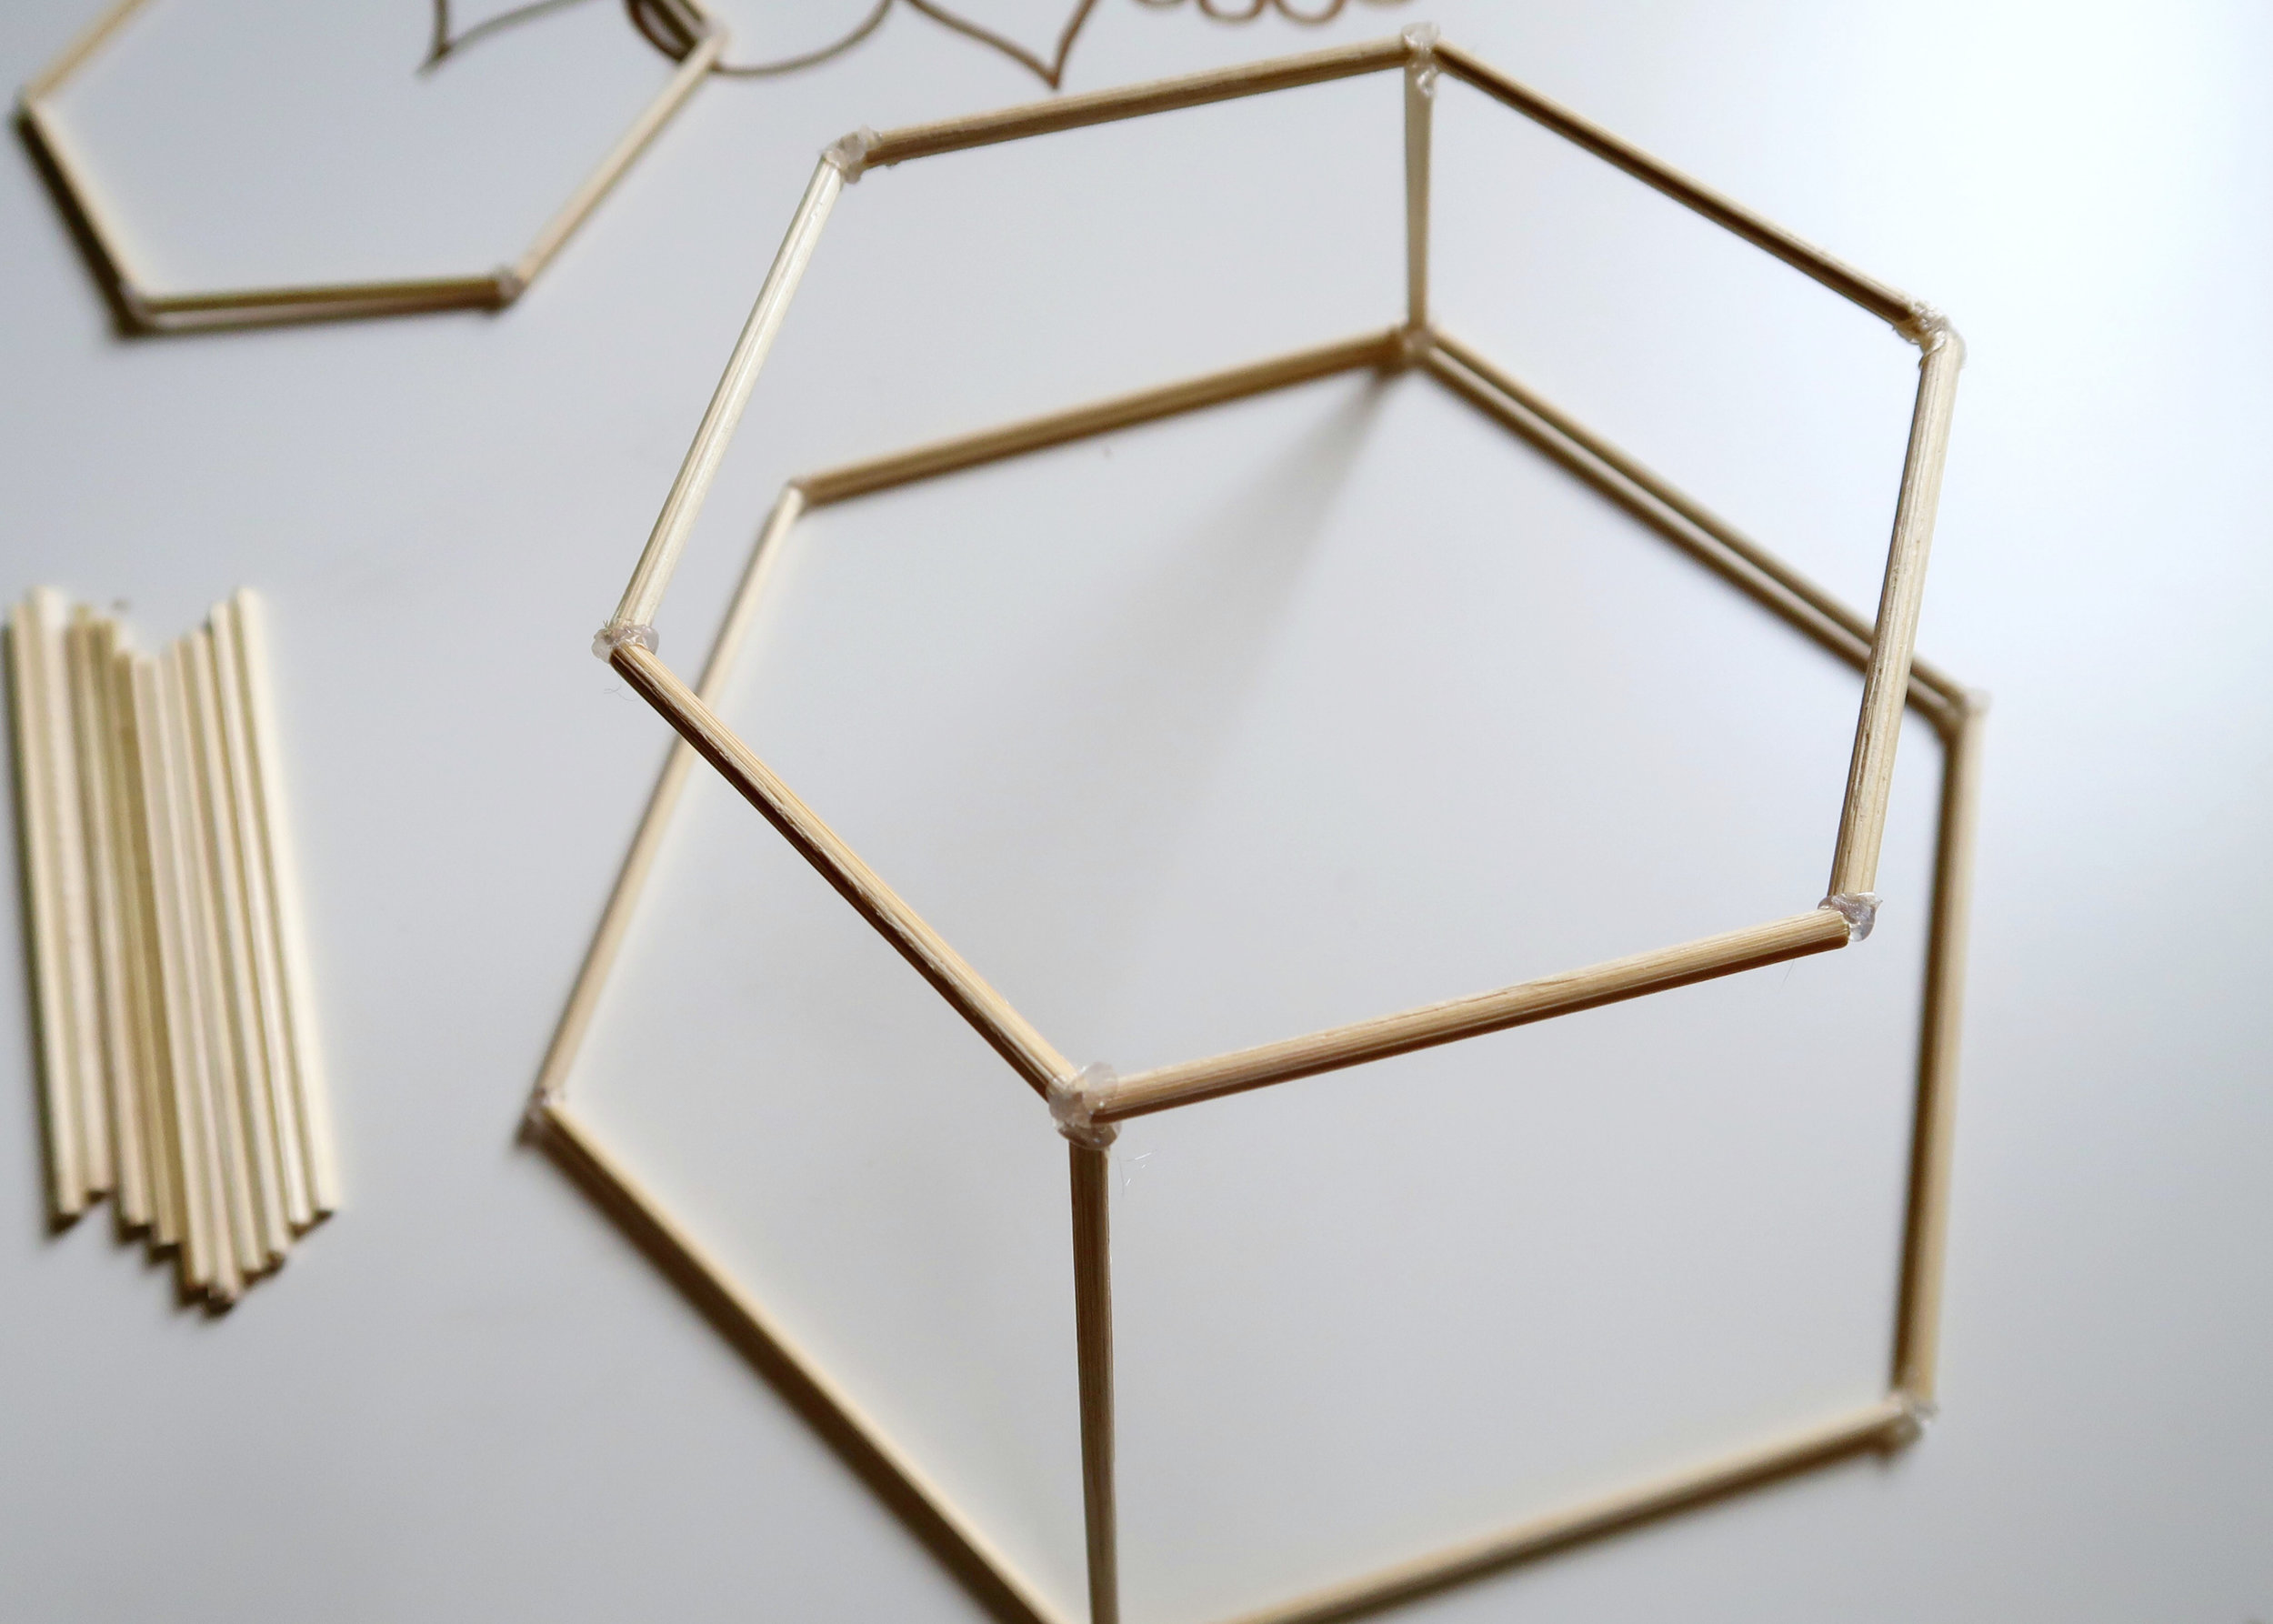
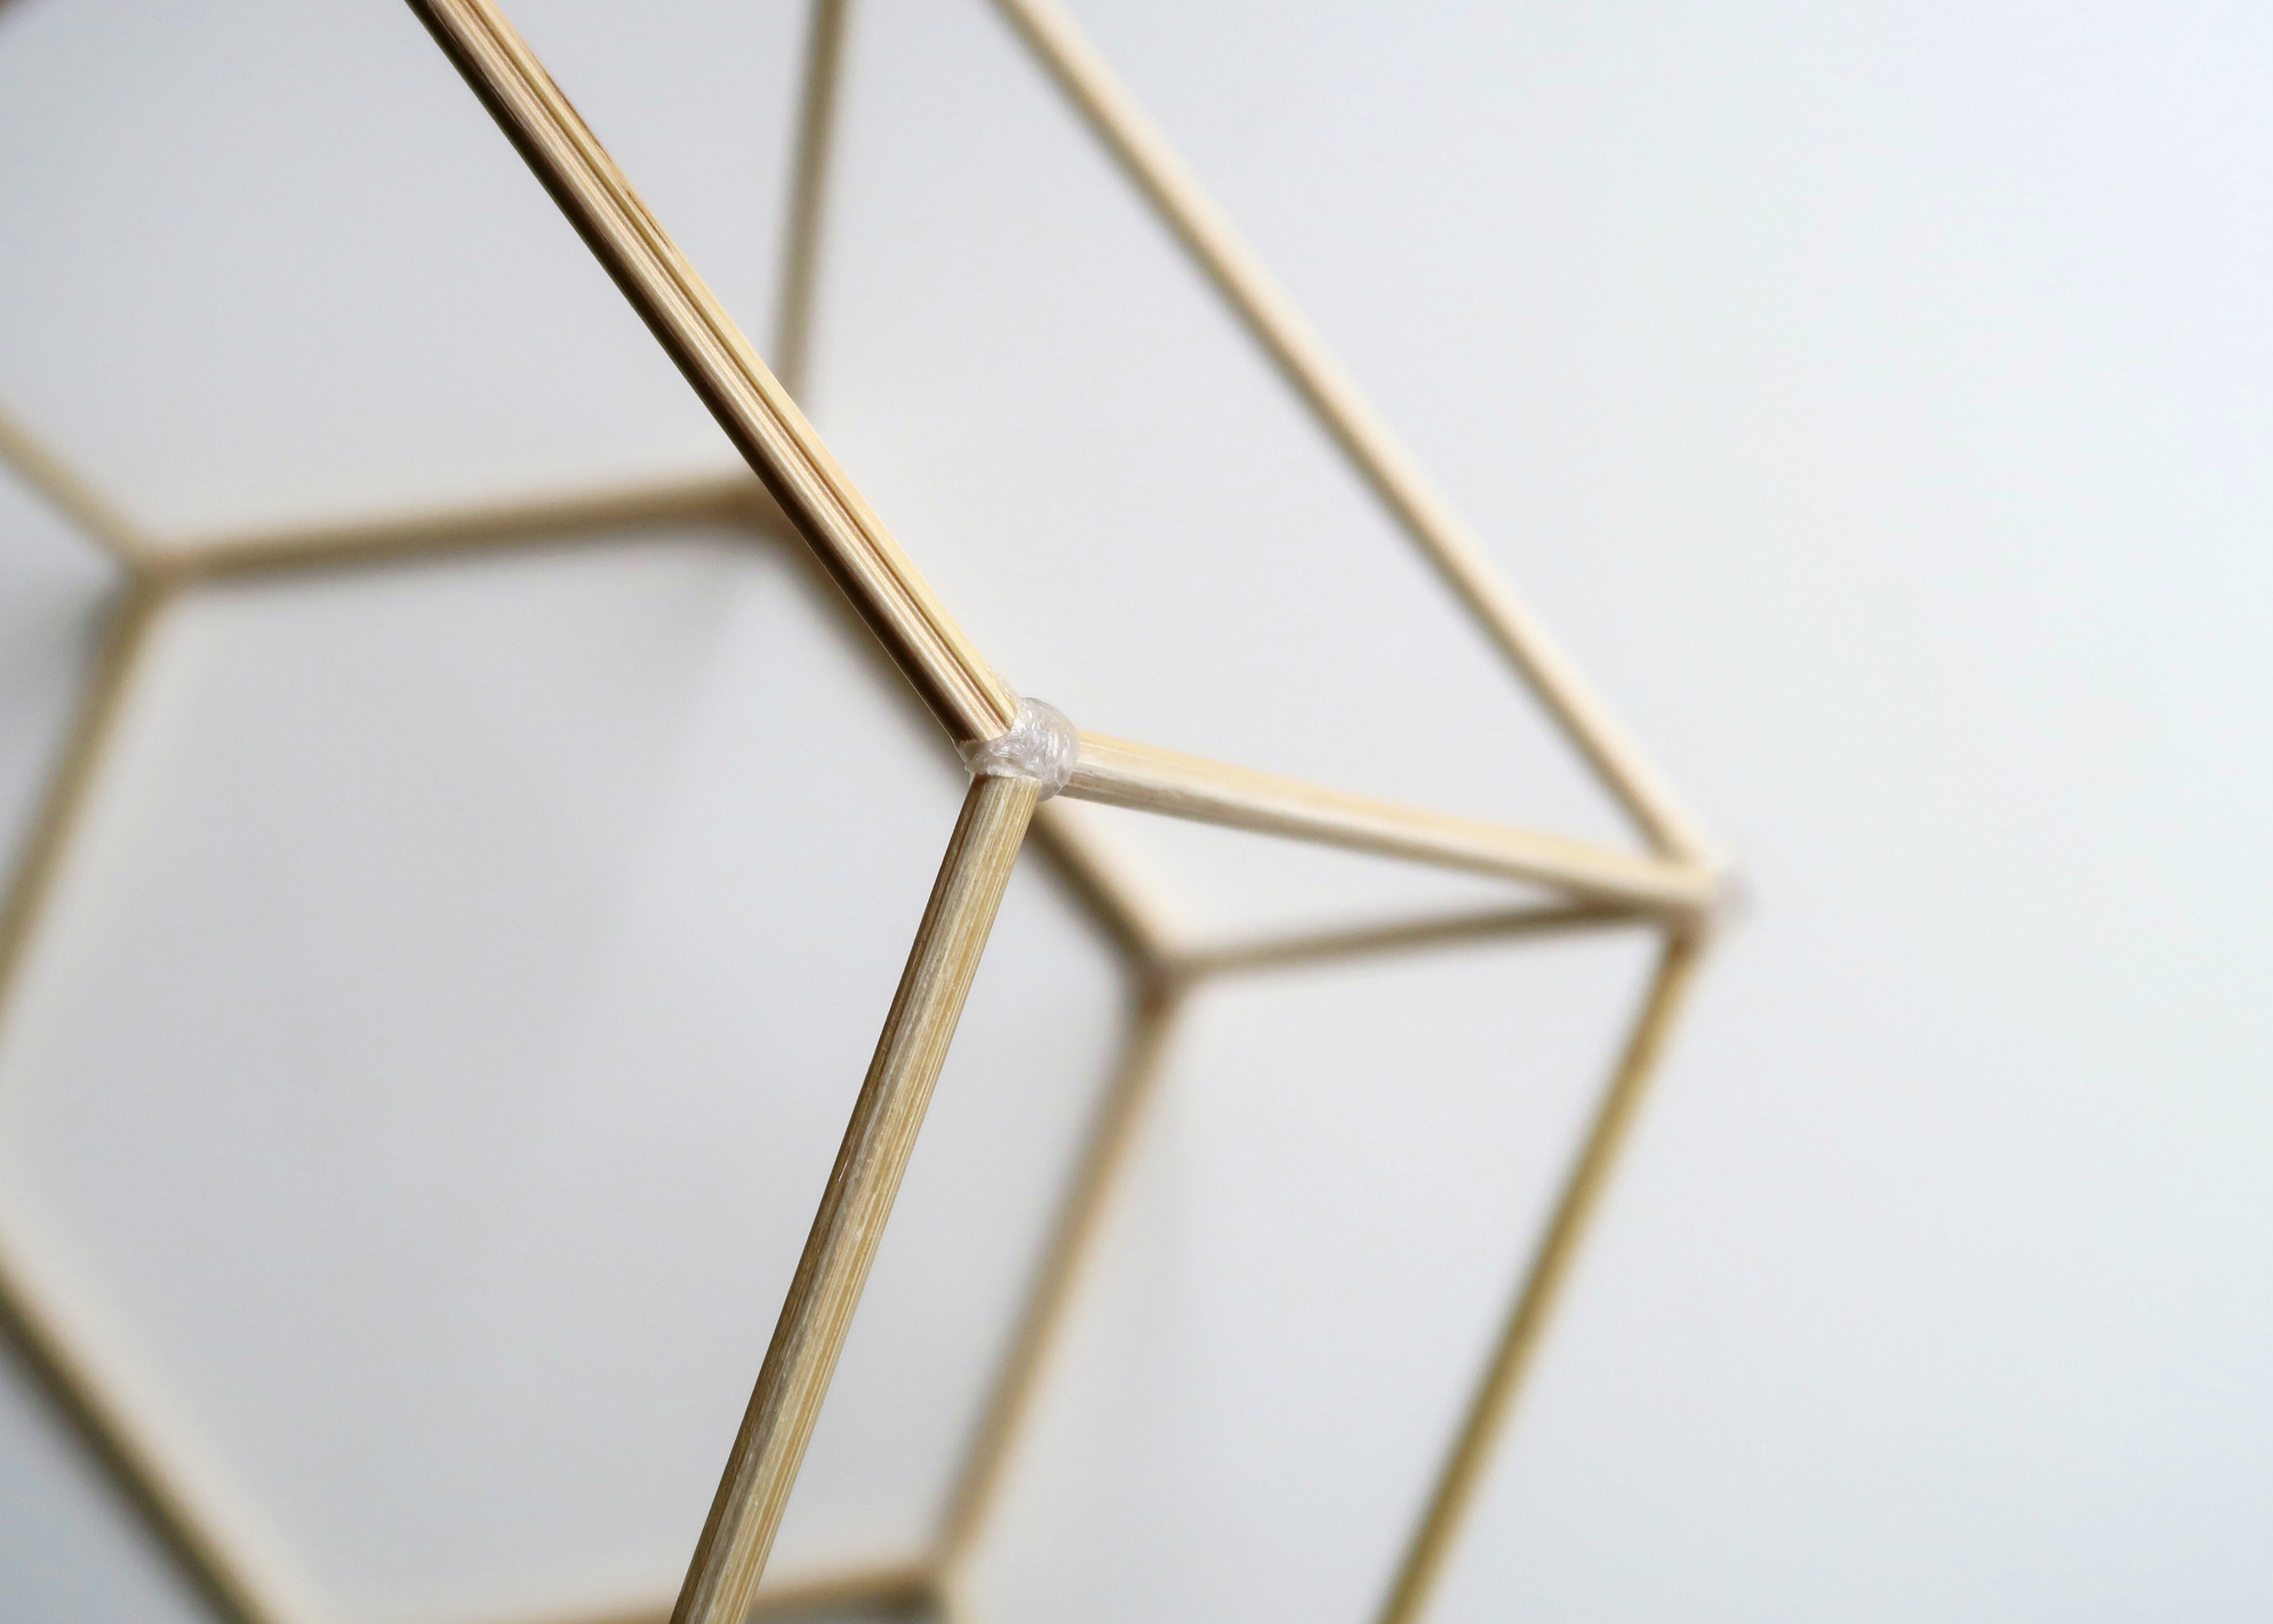
Once dry, stick one of the small hexagons on top of the two 10cm skewers you just glued to the large hexagon. When these are secure, stick the other four 10cm lengths between the large and small hexagon at each angle.

Step 8

8.

You need to do the other side now, so turn your structure over so that the small hexagon is flat against your work surface and the large hexagon is on top. As you did in Step 6, glue two 10cm lengths to opposite corners with hot glue, angling them slightly inwards.

Step 9

9.

Take the second (unused) small hexagon and as before, glue this on top of the two 10cm skewers you just glued to the large hexagon. Once secure, stick the other four 10cm lengths between the large and small hexagon at each angle.

Step 10

10.

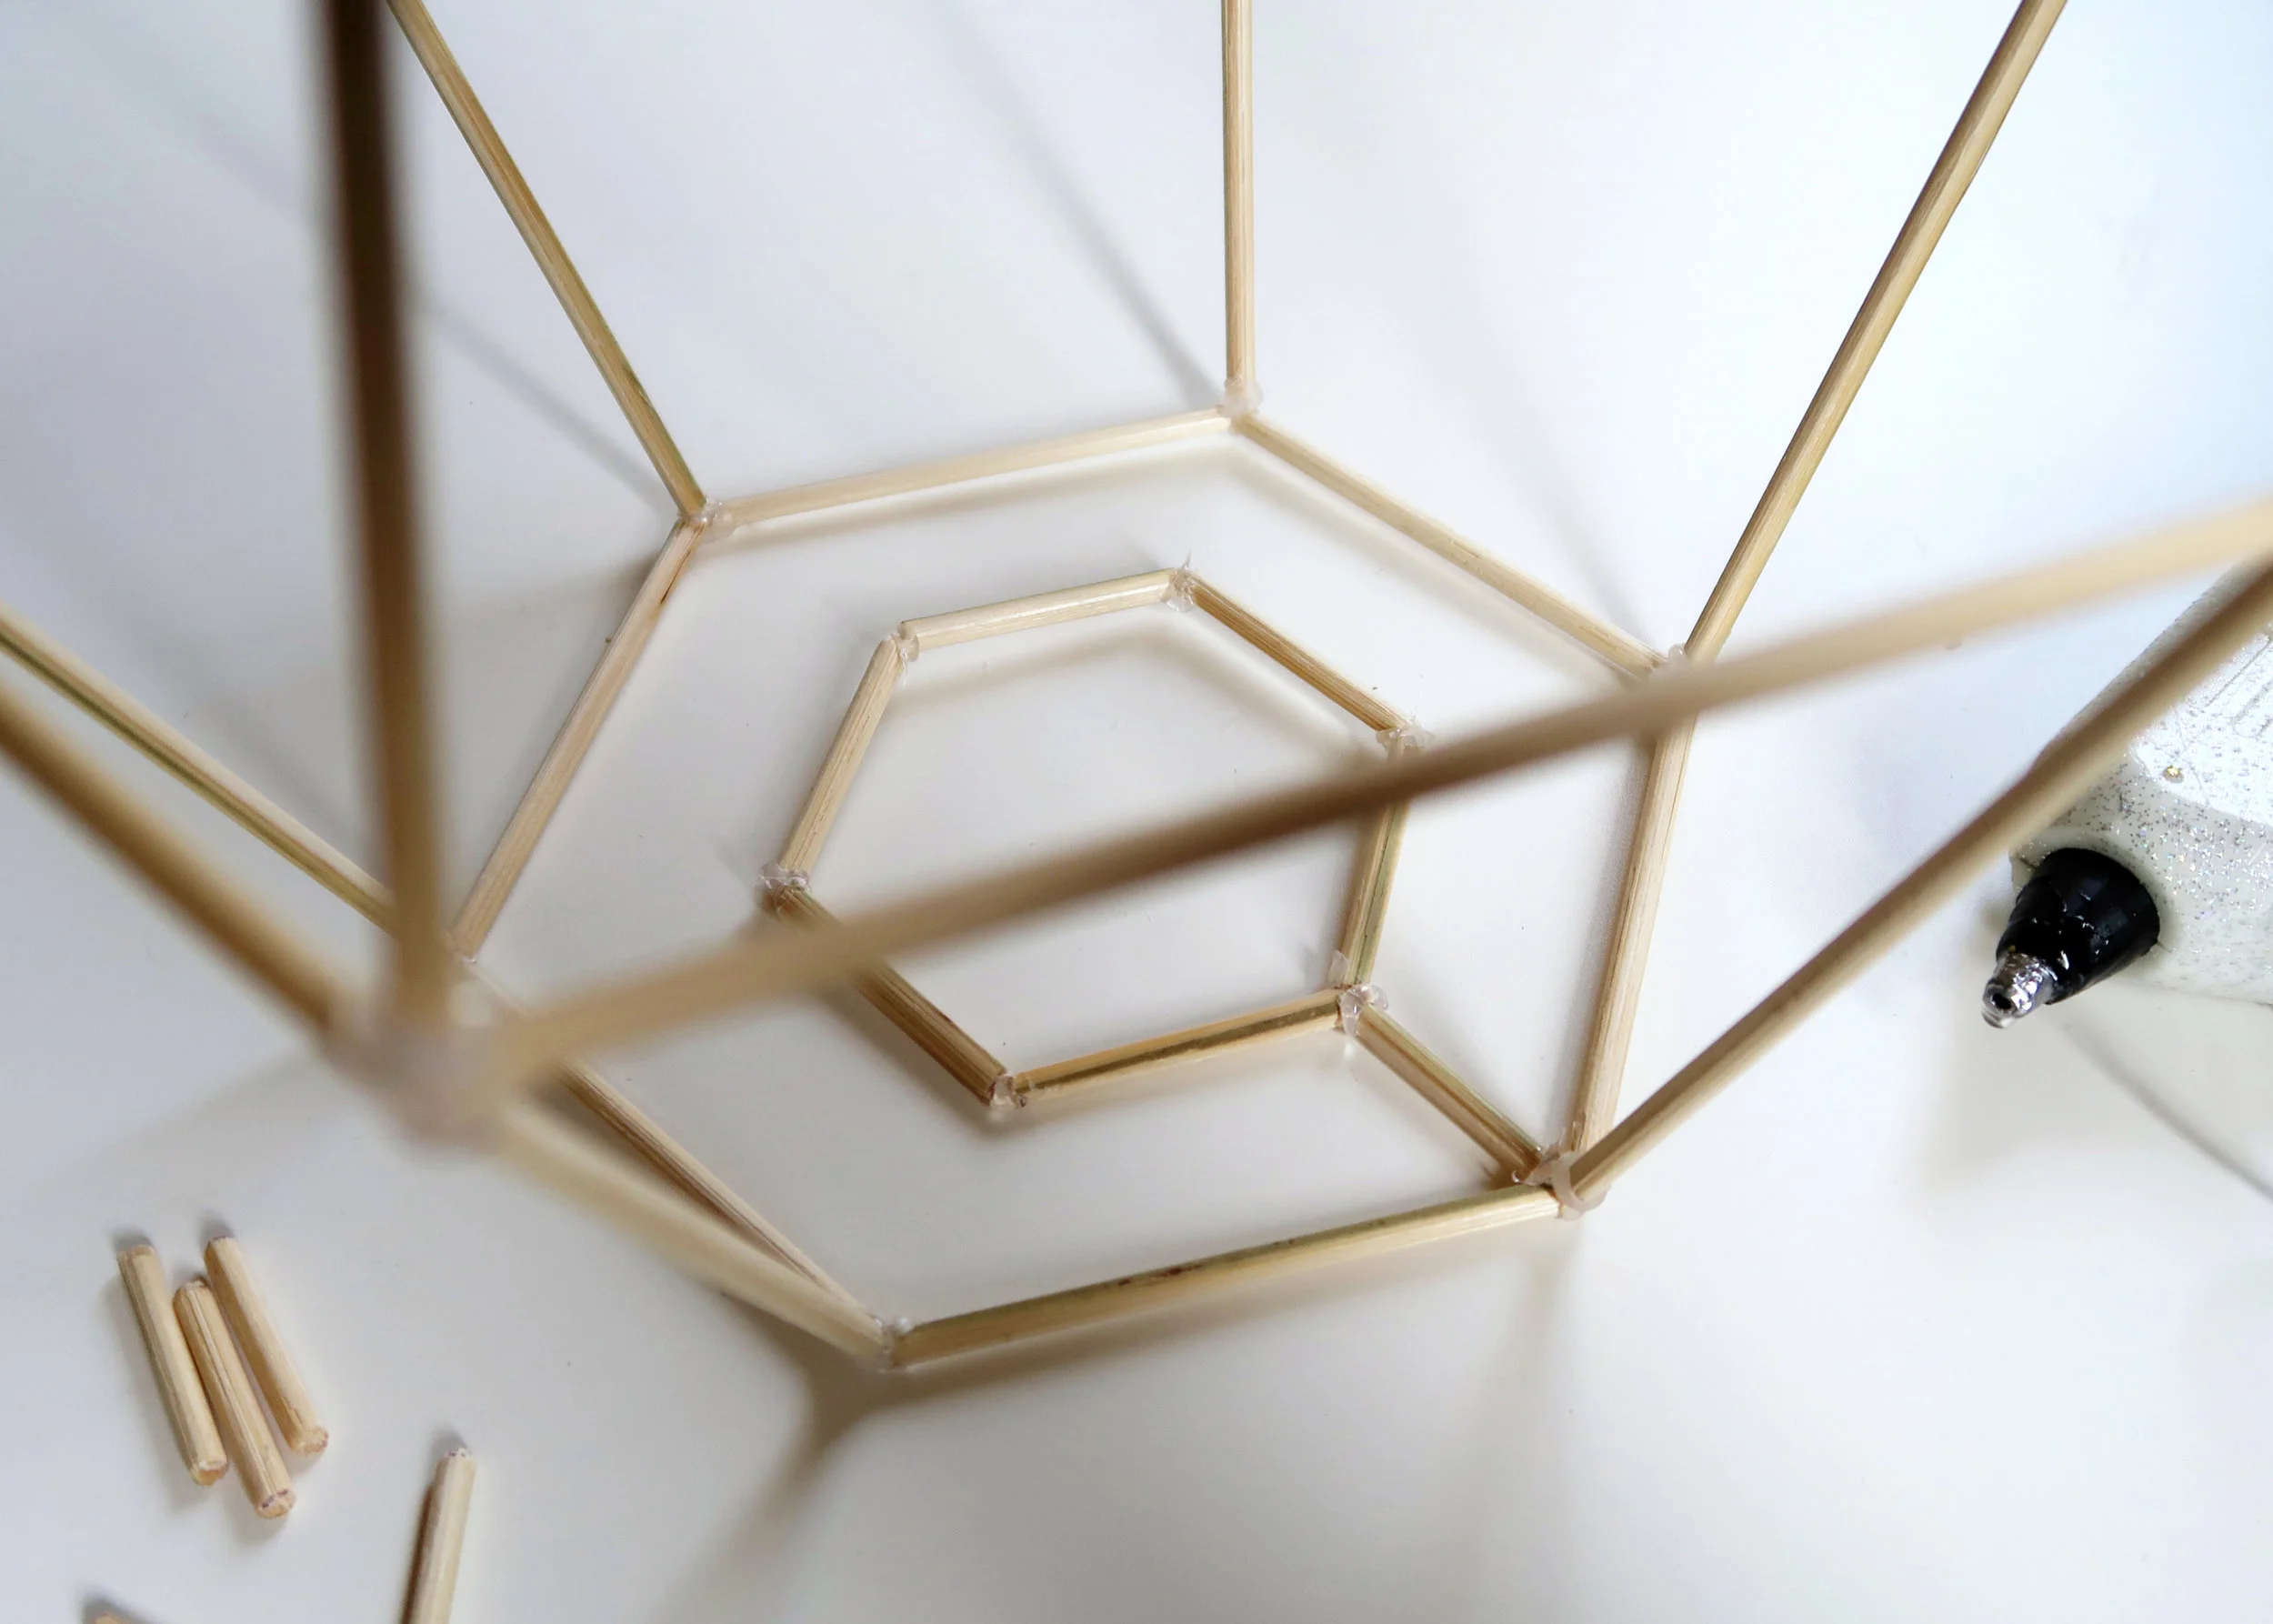
Next, take the miniature hexagon and place it in the middle of the small hexagon forming the top of your shade. Using leftover bits of skewer, glue this miniature hexagon to the small hexagon. This will form the structure on which your shade hangs from your light fixture.

Step 11

11.

Your structure is now done so all that is left to do is to spray it with a few coats of spray paint. I chose copper (you all know how much I love copper!) but it's entirely up to you what colour you go for.

Step 12

12.

Lastly, cut two lengths of wire and tie each at one end to the miniature hexagon. You want to tie them to that when died at their other end they'll form a cross. Next, push the structure up and over the light fixture (make sure the light is off and remove the bulb if need be!) and tire the wires to the shade at the other end on the opposite side.

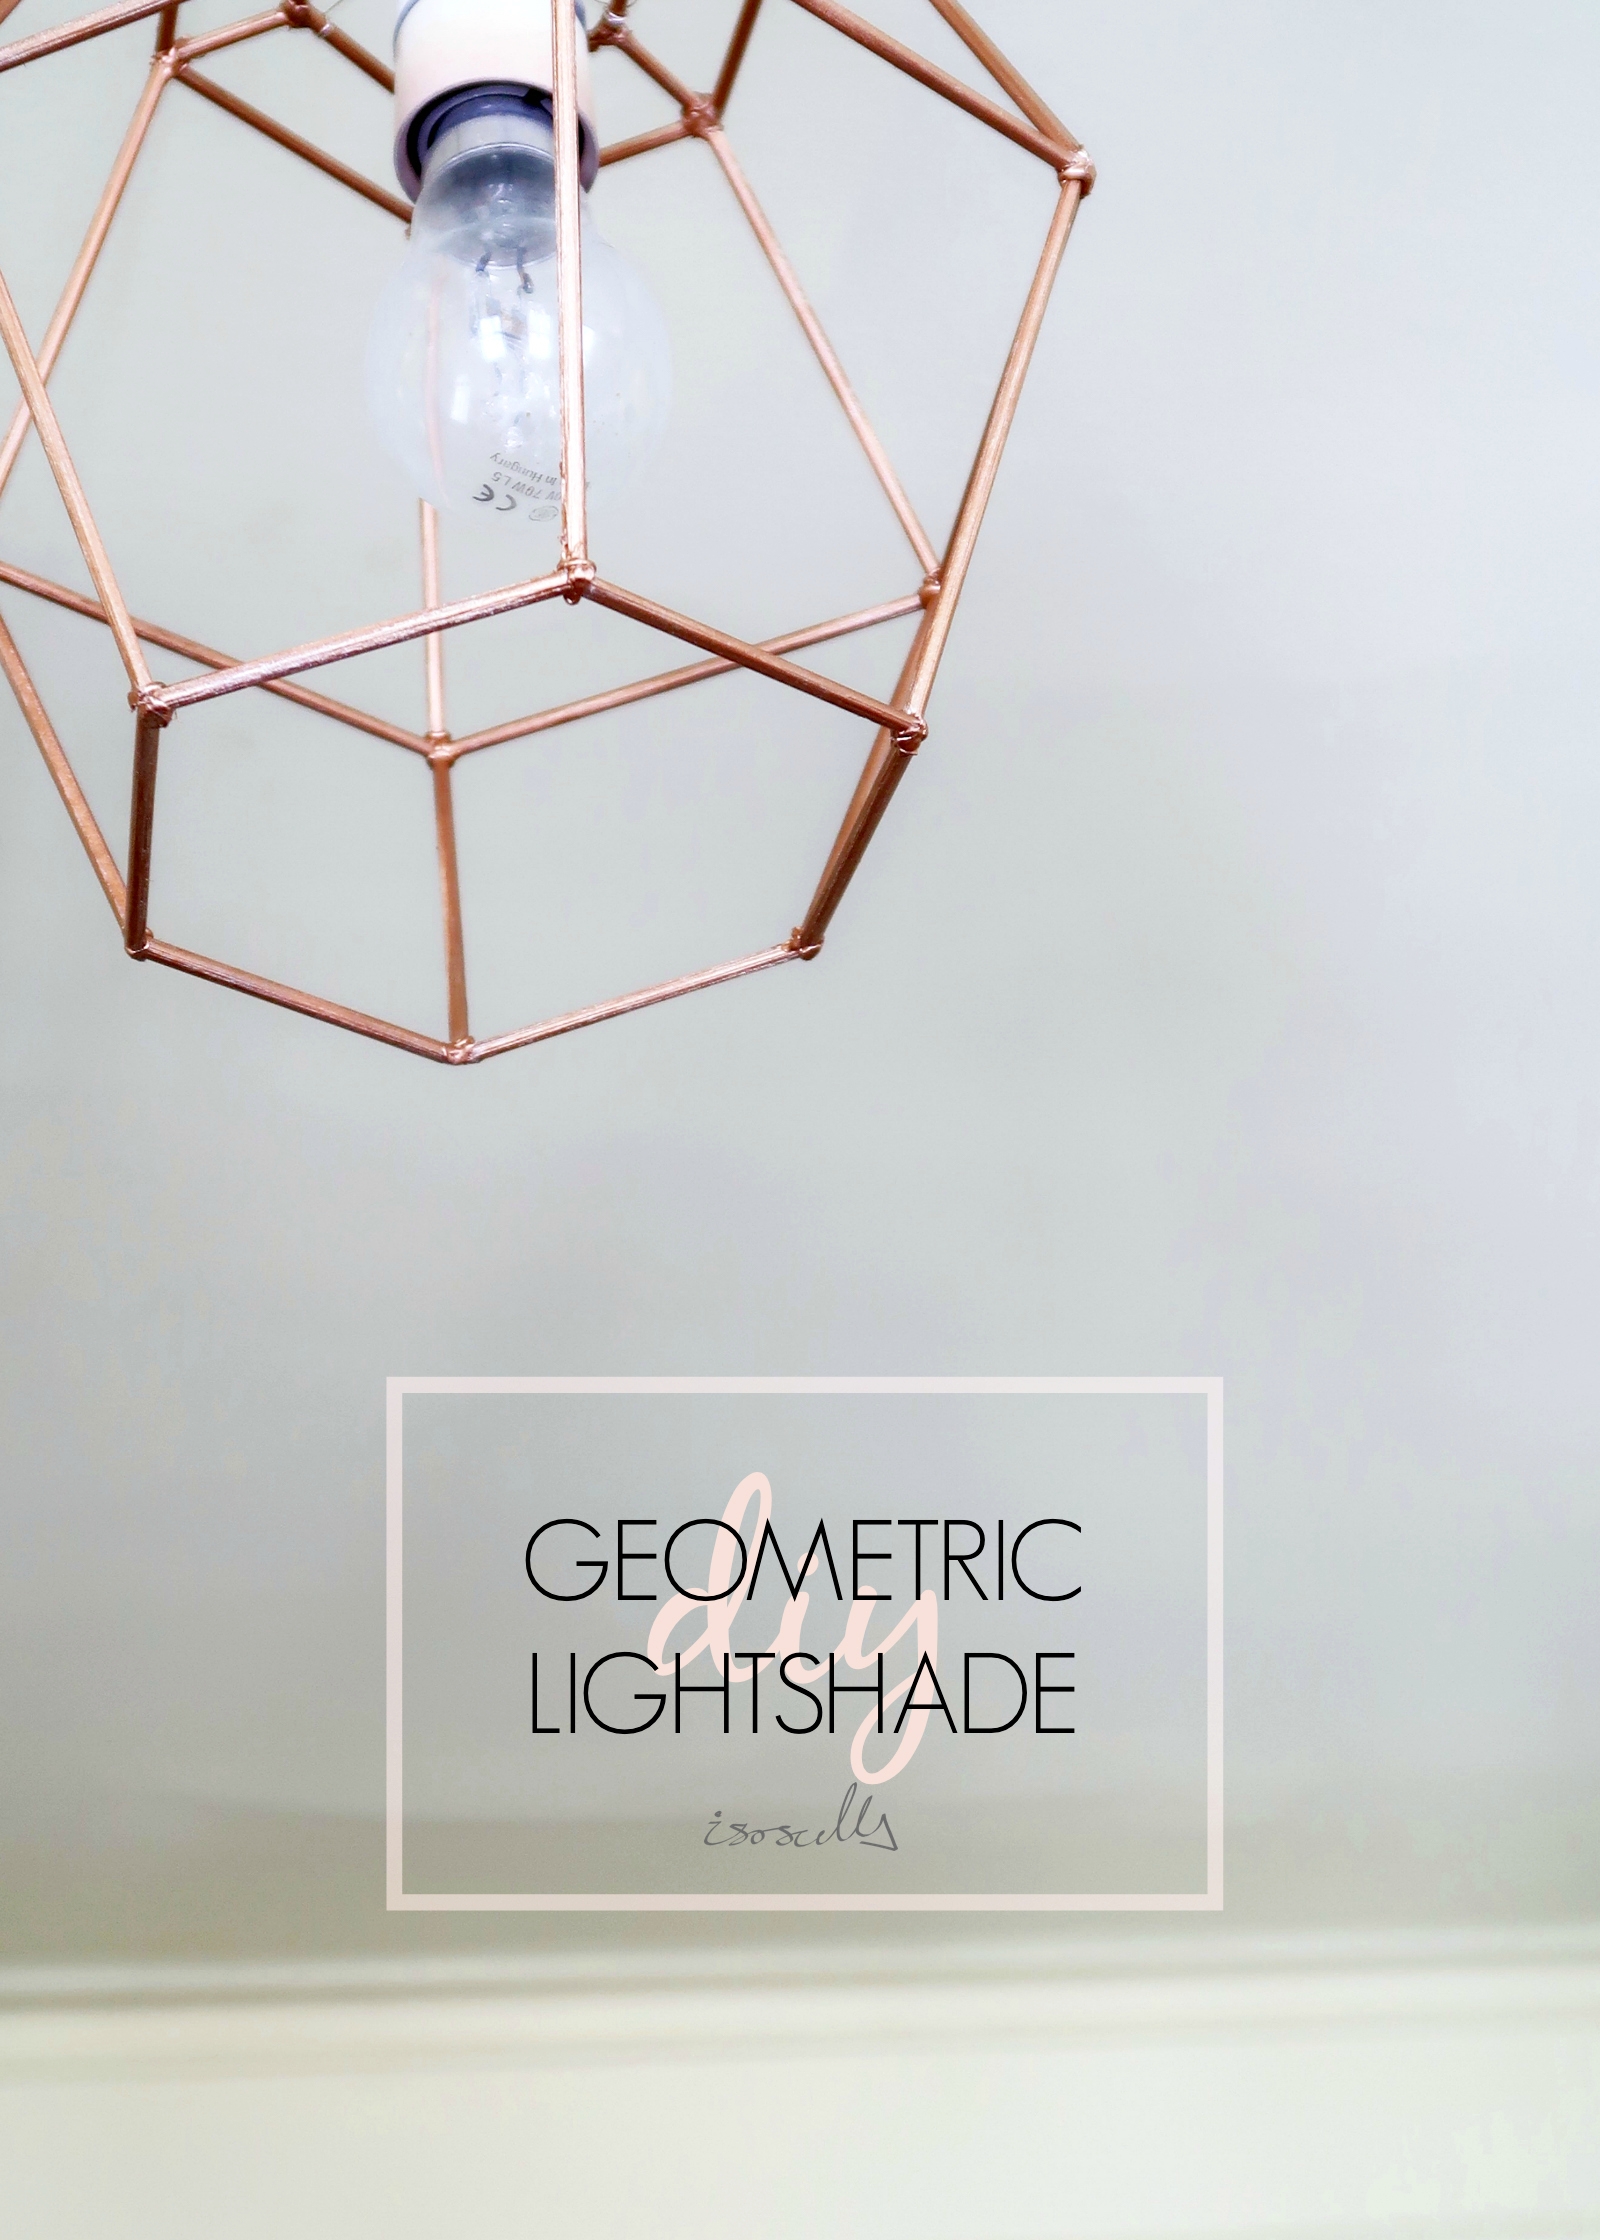
...AND THAT'S IT!

Dash.jpg
100 Bamboo wooden skewers 21cm Long Buy on Amazon
Rust Oleum Painter’s Touch Toy Safe Craft Enamel Copper 150ML Buy on Amazon
Dash.jpg
DIY Geometric Light Shade by Isoscella
YOU MIGHT ALSO LIKE...
Wooden Mushroom Decor
Apr 26, 2025
Wooden Mushroom Decor
Apr 26, 2025
Apr 26, 2025
Hand-Painted Floral Mural Arch
Mar 29, 2025
Hand-Painted Floral Mural Arch
Mar 29, 2025
Mar 29, 2025
Easy IKEA Antilop Makeover
Mar 1, 2025
Easy IKEA Antilop Makeover
Mar 1, 2025
Mar 1, 2025
In DIY Tags home
← DIY // AUTUMN WIRE LEAVES MOBILEDIY // MINIMAL CLAY PHONE STAND →
 

Decorating, DIY-ing and doodling my way through life. Have a look around and let’s get creative!

>> FIND OUT MORE <<

Follow
The office is still one of my favourite transformations in the house! 😍

I started by panelling the wall with MDF strips and then painted the wall with a mix of colours. I used three IKEA drawer units for the base of the desk and then secured the de

ART

DIY

LIFE


THE LATEST

Featured
Wooden Mushroom Decor
Apr 26, 2025
Wooden Mushroom Decor
Apr 26, 2025
Apr 26, 2025
Hand-Painted Floral Mural Arch
Mar 29, 2025
Hand-Painted Floral Mural Arch
Mar 29, 2025
Mar 29, 2025
Easy IKEA Antilop Makeover
Mar 1, 2025
Easy IKEA Antilop Makeover
Mar 1, 2025
Mar 1, 2025
Clay Leaf Shelf
Jun 29, 2024
Clay Leaf Shelf
Jun 29, 2024
Jun 29, 2024
Nursery Feature Wall
Jun 15, 2024
Nursery Feature Wall
Jun 15, 2024
Jun 15, 2024


THE GREATEST

Featured
DIY // IKEA LACK TABLE INDUSTRIAL HACK
Sep 22, 2020
DIY
DIY // IKEA LACK TABLE INDUSTRIAL HACK
Sep 22, 2020
DIY
Sep 22, 2020
DIY
DIY // CLAY ALL-SEEING EYE MIRROR
Aug 14, 2020
DIY
DIY // CLAY ALL-SEEING EYE MIRROR
Aug 14, 2020
DIY
Aug 14, 2020
DIY
DIY // CLAY FACE DISH
Apr 29, 2020
DIY
DIY // CLAY FACE DISH
Apr 29, 2020
DIY
Apr 29, 2020
DIY
DIY // ABSTRACT ART FLORAL EGGS
Mar 25, 2020
DIY
DIY // ABSTRACT ART FLORAL EGGS
Mar 25, 2020
DIY
Mar 25, 2020
DIY
DIY // WIRE FACE EARRINGS
Feb 16, 2020
DIY
DIY // WIRE FACE EARRINGS
Feb 16, 2020
DIY
Feb 16, 2020
DIY

Follow
^^ BACK TO TOP
How does Monday come round so quick?!Wishing I could cosy up here today ✨

#mondaymood #storyofmyhome #mydailyhomesquare #interiordesign #budgetdiy #realstylishhomes #ourdiyhomes #femalediycollective #discoverunder5k #myhousethismonth #myhousedownsou
I&rsquo;ve got the day off today (woop!) and although it&rsquo;s not quite warm enough to sit out here yet, the sun is shining and I think a little walk to blow out the cobwebs is exactly what I need. Hope Monday is treating you well! ☀️

#summerdrea
Had such a lovely day seeing one of my besties and her adorable new baby that I completely forgot to share today&rsquo;s new blog post!

Head over to the blog for all the details of this easy DIY ring dish 🔝✨

#diy #diyhomedecor #diyhome #diyvalenti
That sunshine 👌🏻☀️

#mycosyhome #livingroomdecor #livingroominspo #mydiymydecor #homeobsessed #lovemydecor #homeinterioruk #discoverunder5k #diyhome #diyhomedecor #myhousethismonth #myhousedownsouth #realstylishhomes #ourdiyhomes #happythursday #in
A little corner our home on this chilly Tuesday morning ✨
.
.
#interior #homeobsessed #mycosyhome #homeinterioruk #instadecorating #homesofinstagram #happymonday #mondaymotivation #instainteriors #cornersofmyhome #myhousethismonth #myhousedownsouth #

Copyright 2021 isoscella. All rights reserved.

Powered by Squarespace