• ABOUT ME
    • PRIVACY POLICY
  • COLLABORATE
  • BLOG
    • ART
    • WEDDING
    • LIBRARY
    • DECOR
    • JEWELLERY
    • STATIONARY
    • NAIL ART
    • BAKING
    • CHRISTMAS
    • EASTER
    • ART PRINTS
    • WEDDING STATIONARY
  • CONTACT
Menu

ISOSCELLA

Street Address
City, State, Zip
Phone Number

Your Custom Text Here

ISOSCELLA

  • ABOUT
    • ABOUT ME
    • PRIVACY POLICY
  • COLLABORATE
  • BLOG
  • ART
    • ART
    • WEDDING
    • LIBRARY
  • DIY
    • DECOR
    • JEWELLERY
    • STATIONARY
    • NAIL ART
    • BAKING
    • CHRISTMAS
    • EASTER
  • SHOP
    • ART PRINTS
    • WEDDING STATIONARY
  • CONTACT

DIY Ladder Herb Shelf

August 21, 2021 Isoscella M
IMG_3882.jpeg
IMG_3884.jpeg

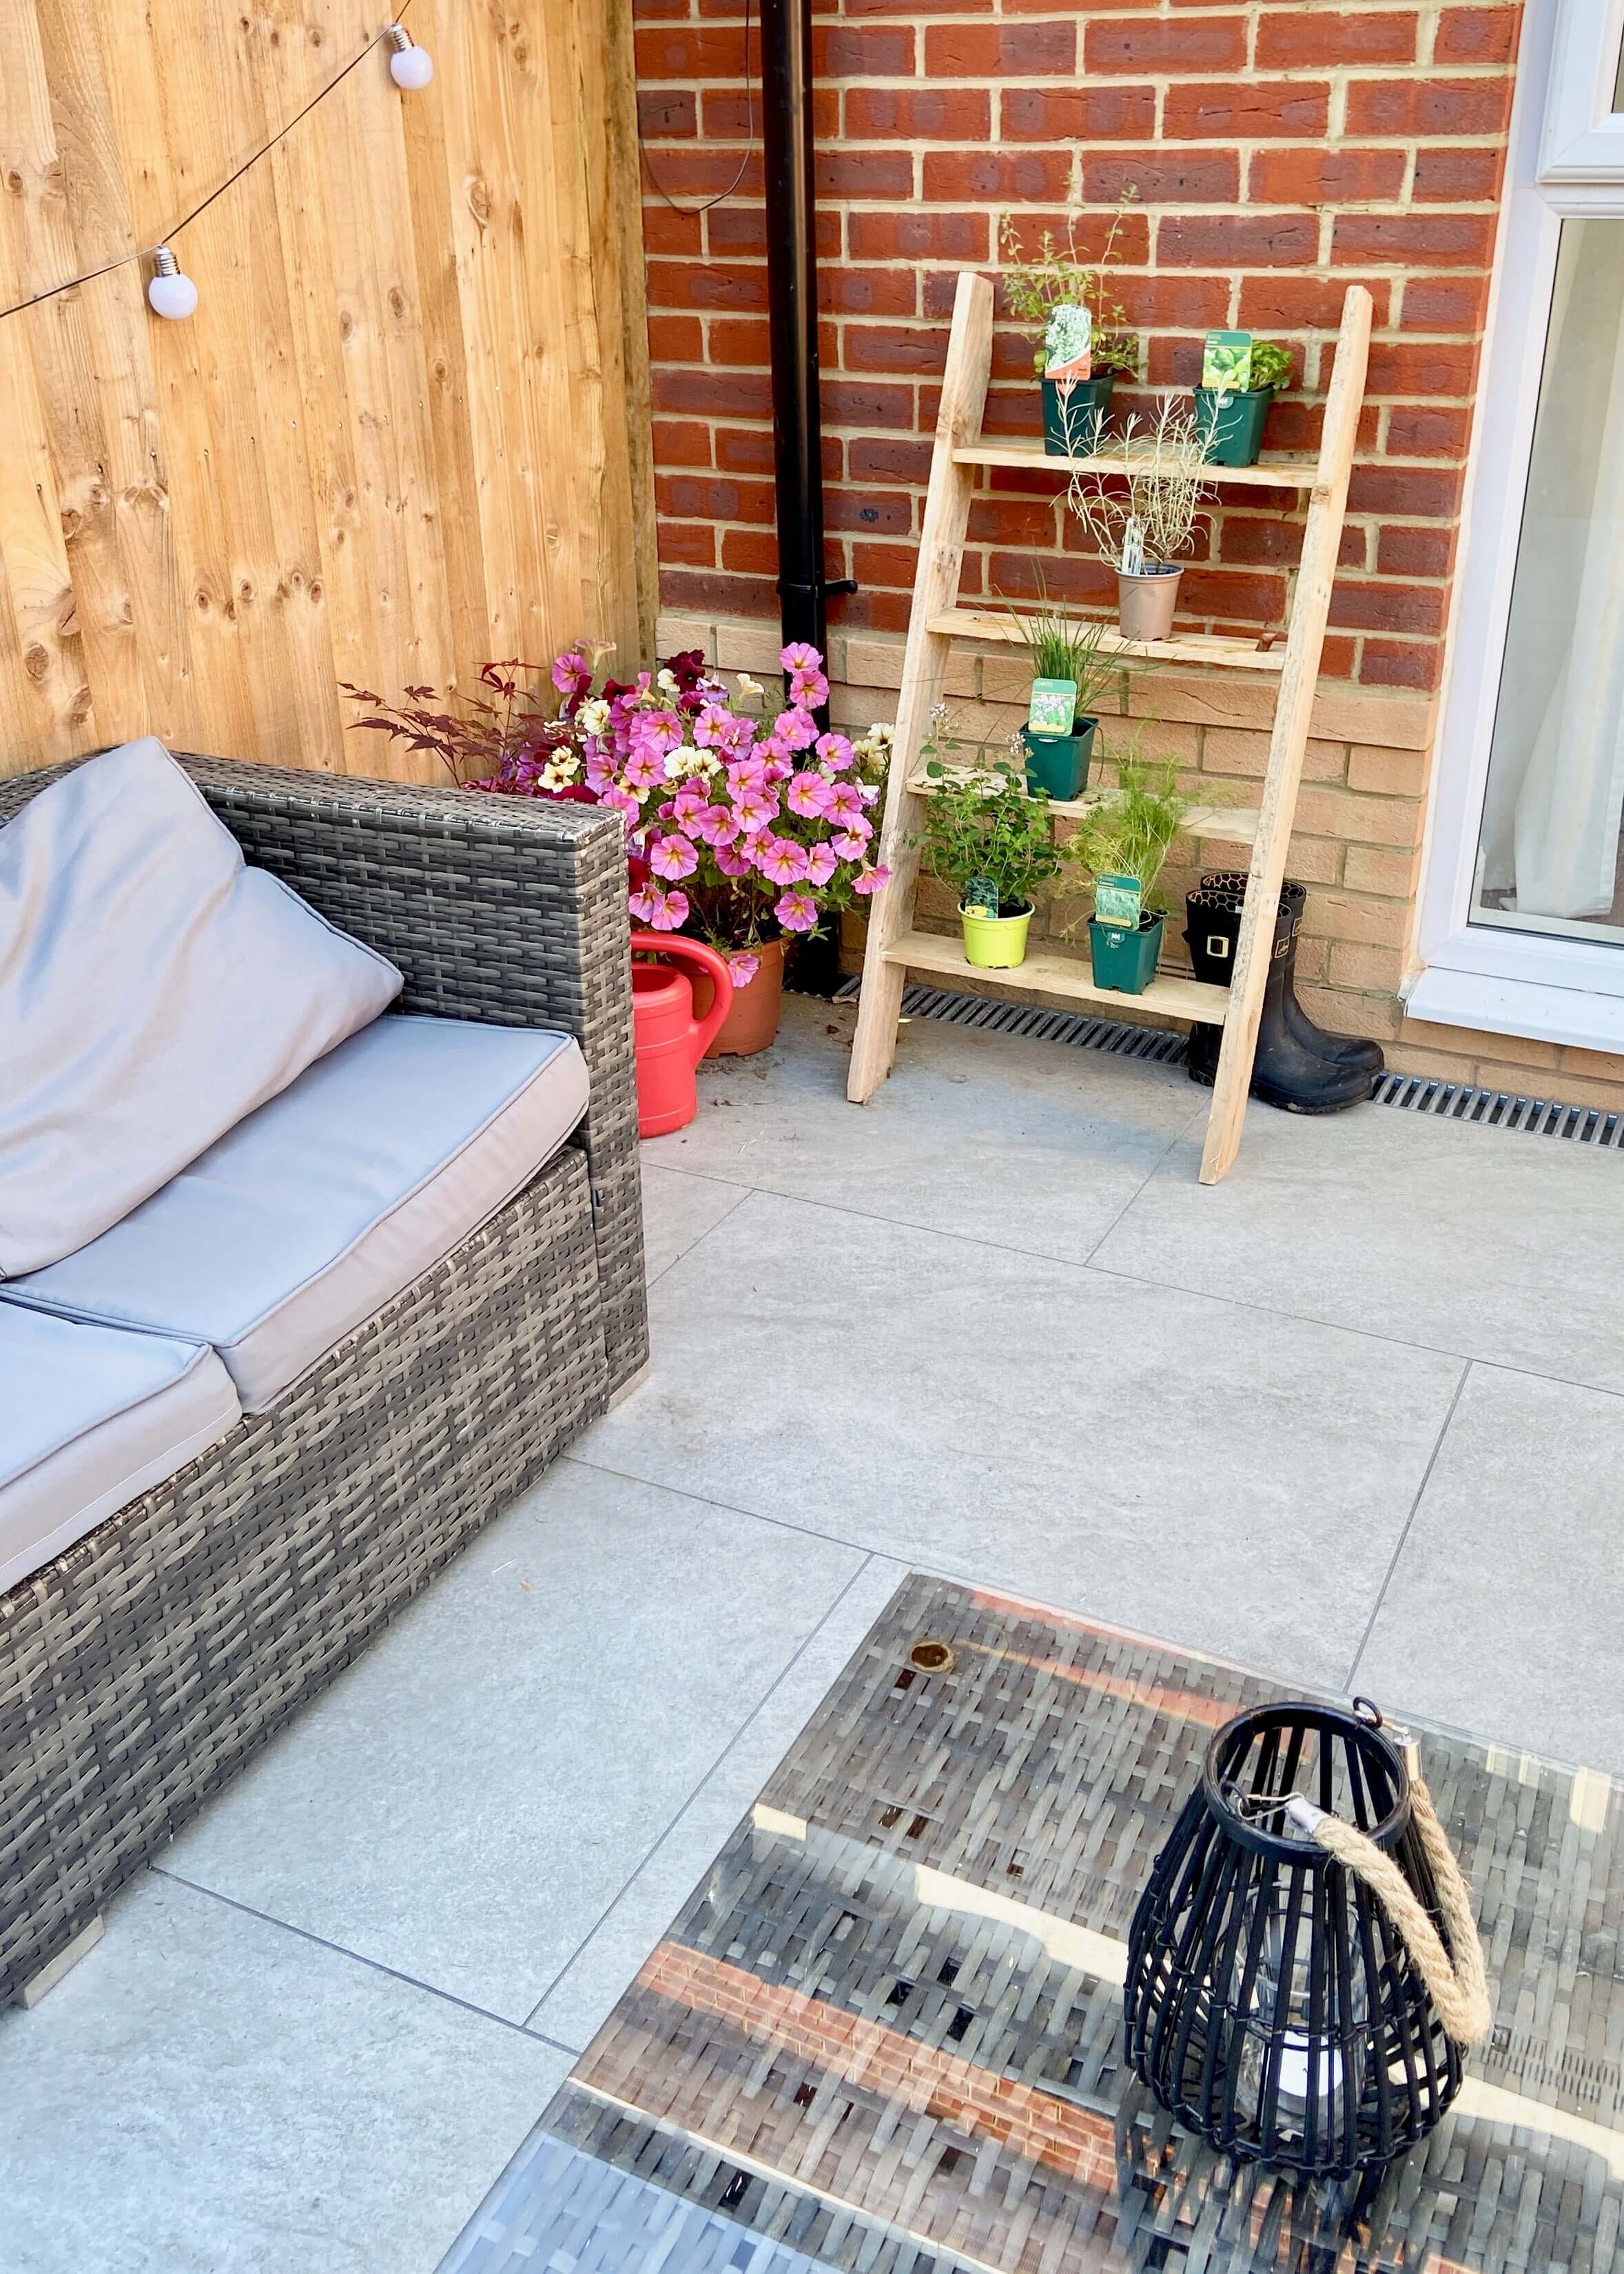
Repurpose a wooden pallet into a garden ladder herb shelf

After our garden patio was finished, we had so much tidying and clearing to do from all the rubbish and materials left over. One of the items we gained was a wooden pallet, which I believe some of the patio slabs came on. The other half quite rightly knew I would want to keep it and attempt to make something from it, so he put it to one side for me. I’ve seen a fair few wooden pallet’s used in DIY projects on Pinterest and Instagram, and so I knew it was possible to repurpose it into something that we could both use and love. Something that we’ve been wanting to get for the garden for some time were ladder shelves to store and display our herbs on. My partner is a massive foodie and it’s always been his dream to have herbs readily available in the garden, and so this felt like the perfect idea to try and create. Actually dismantling the wooden pallet was the hardest part of this project, and I had a few mishaps with the drill, but with a bit of team work, we managed to get this done in less than a day. I love how it looks, and at some point I will probably stain or treat it but I want to try out a few options before I commit to a colour. Follow me on instagram if you want to see what I choose, and keep reading to find out what I used and how I did it…

Wooden Pallet

Drill

Wood saw

Screws

Varnish

IMG_3847.jpeg

1.

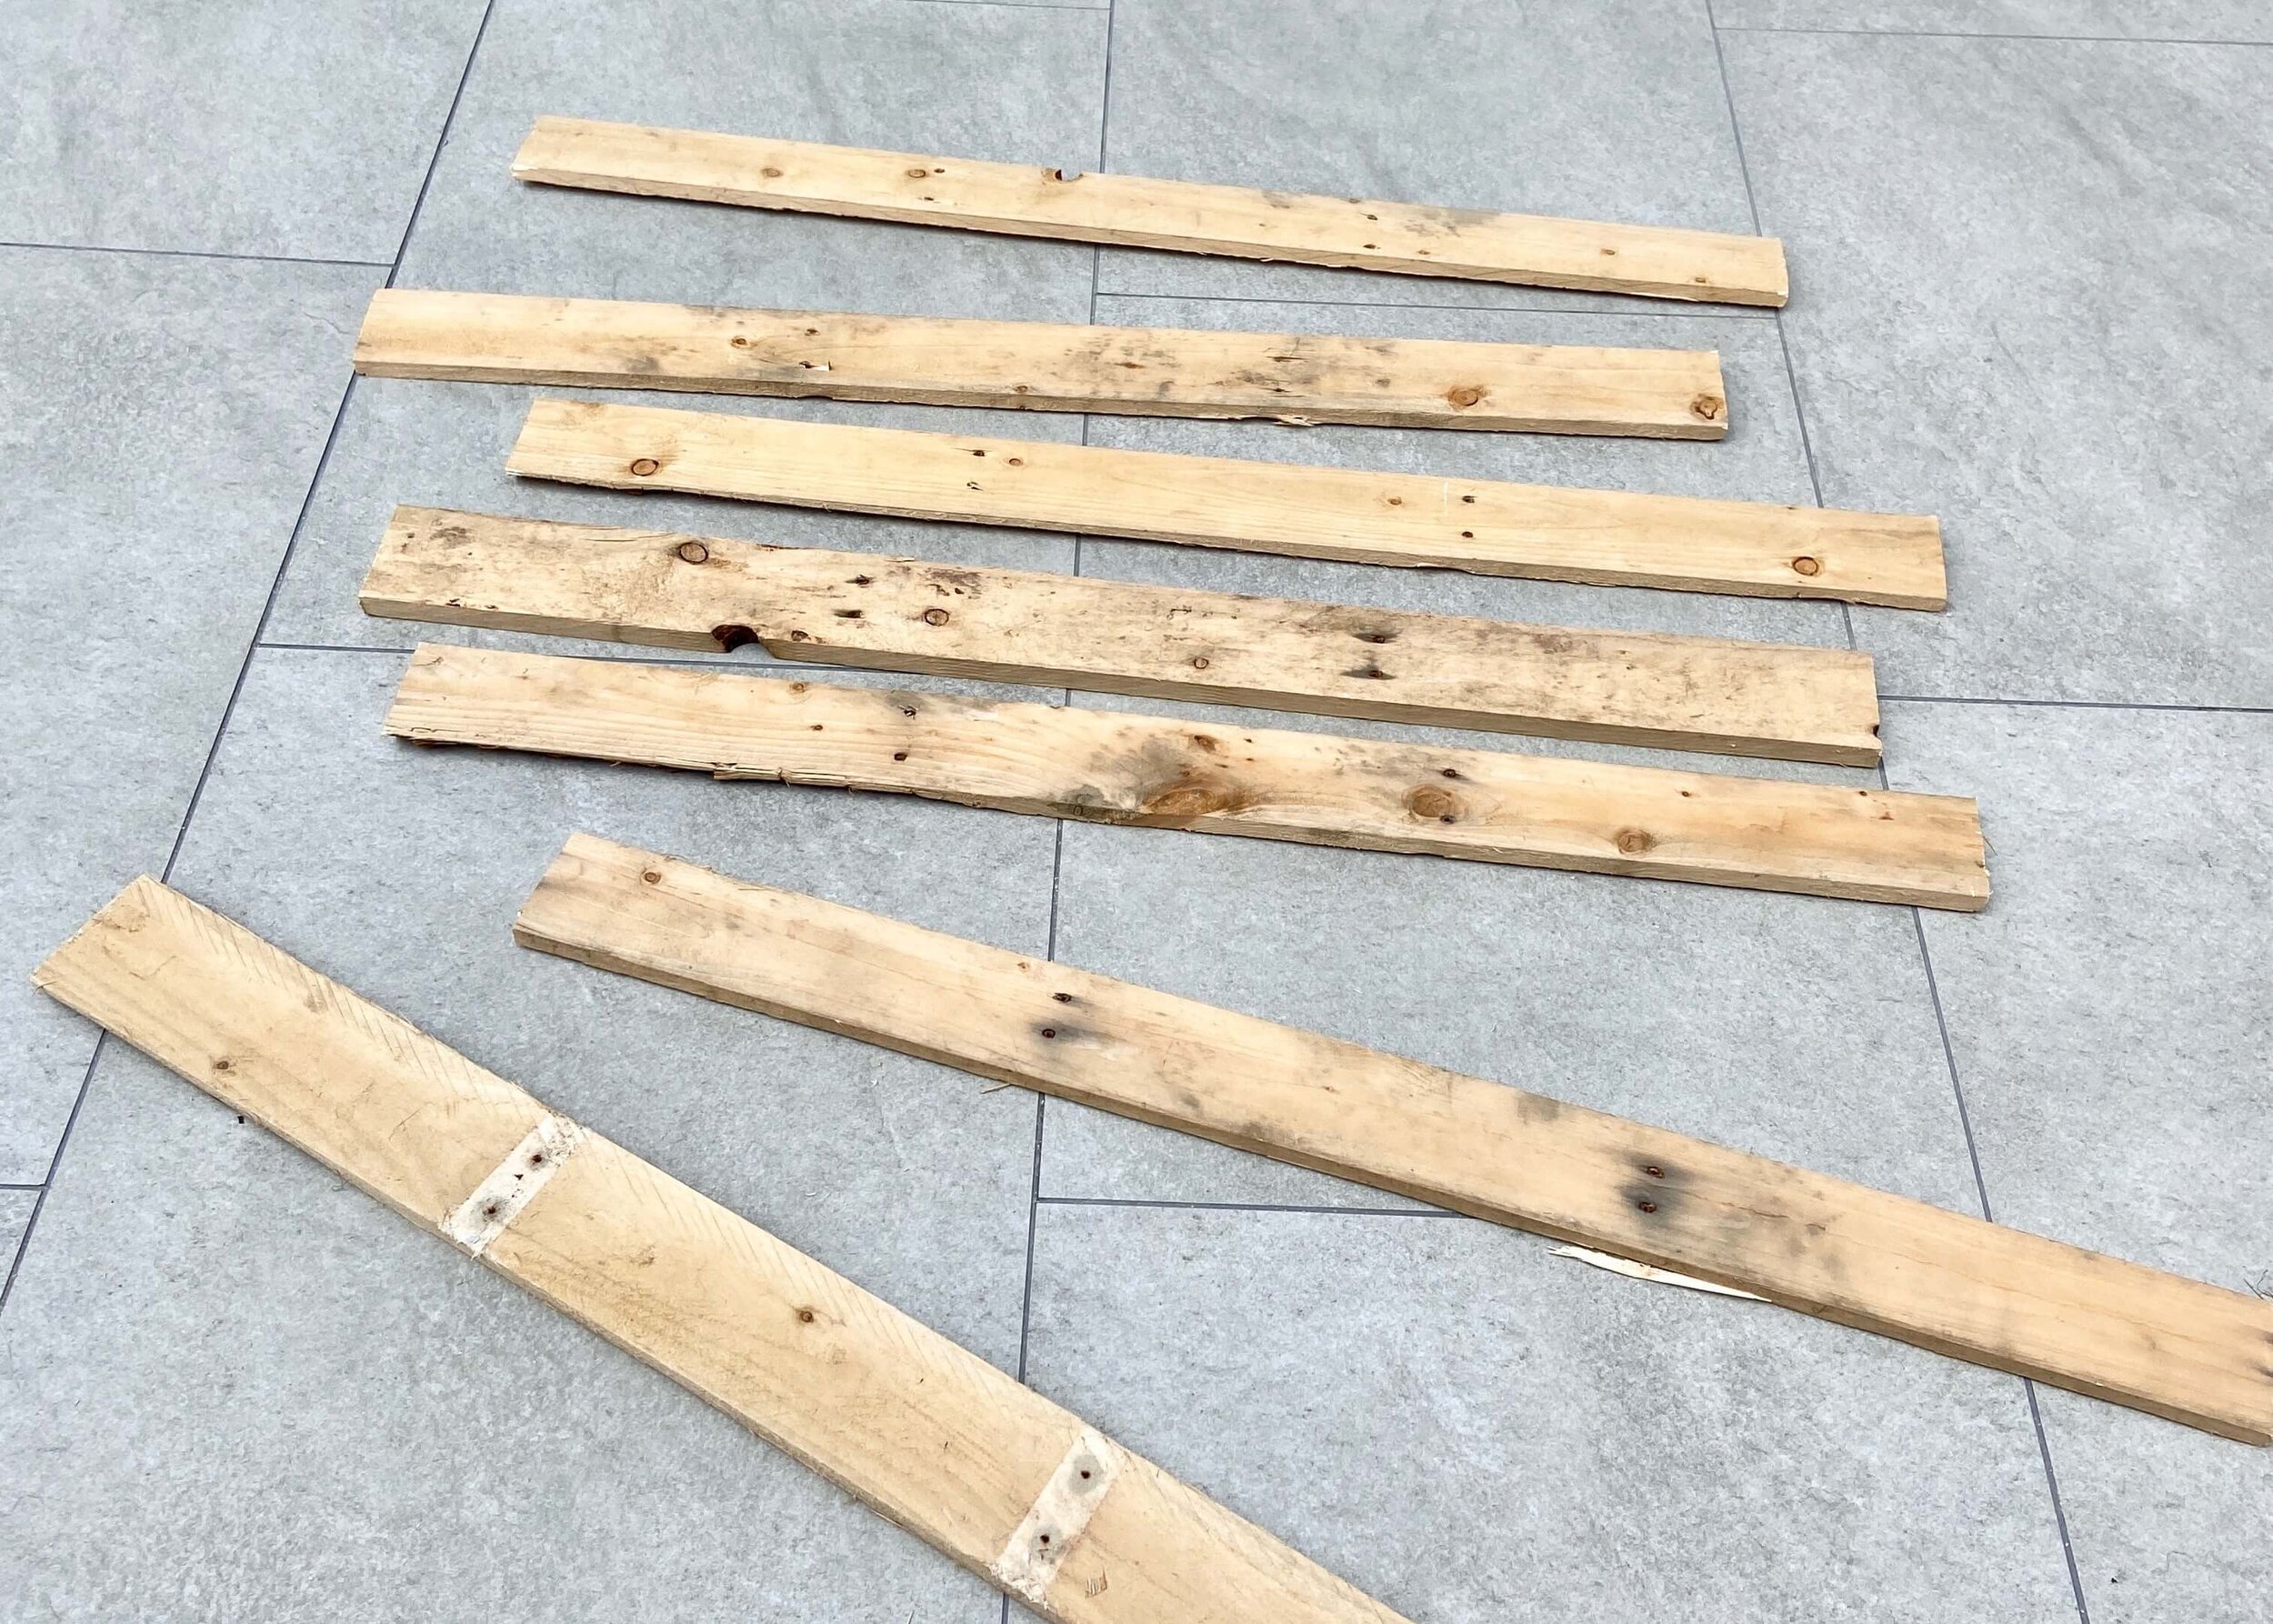
First of all, you’ll need to dismantle your wooden pallet. If like mine the nails are hammered really far into the wood, you may need to saw off the ends and use a combination or a hammer, chisel and crowbar to release the nails in the middle of each wooden board.

IMG_3856.jpeg

2.

Once you have freed your wooden boards, decide which ones you want to use and where. I used slightly chunkier planks for the sides of my shelves, and chose the boards that were the least mouldy/beaten up for the shelves.

IMG_3858.jpeg

3.

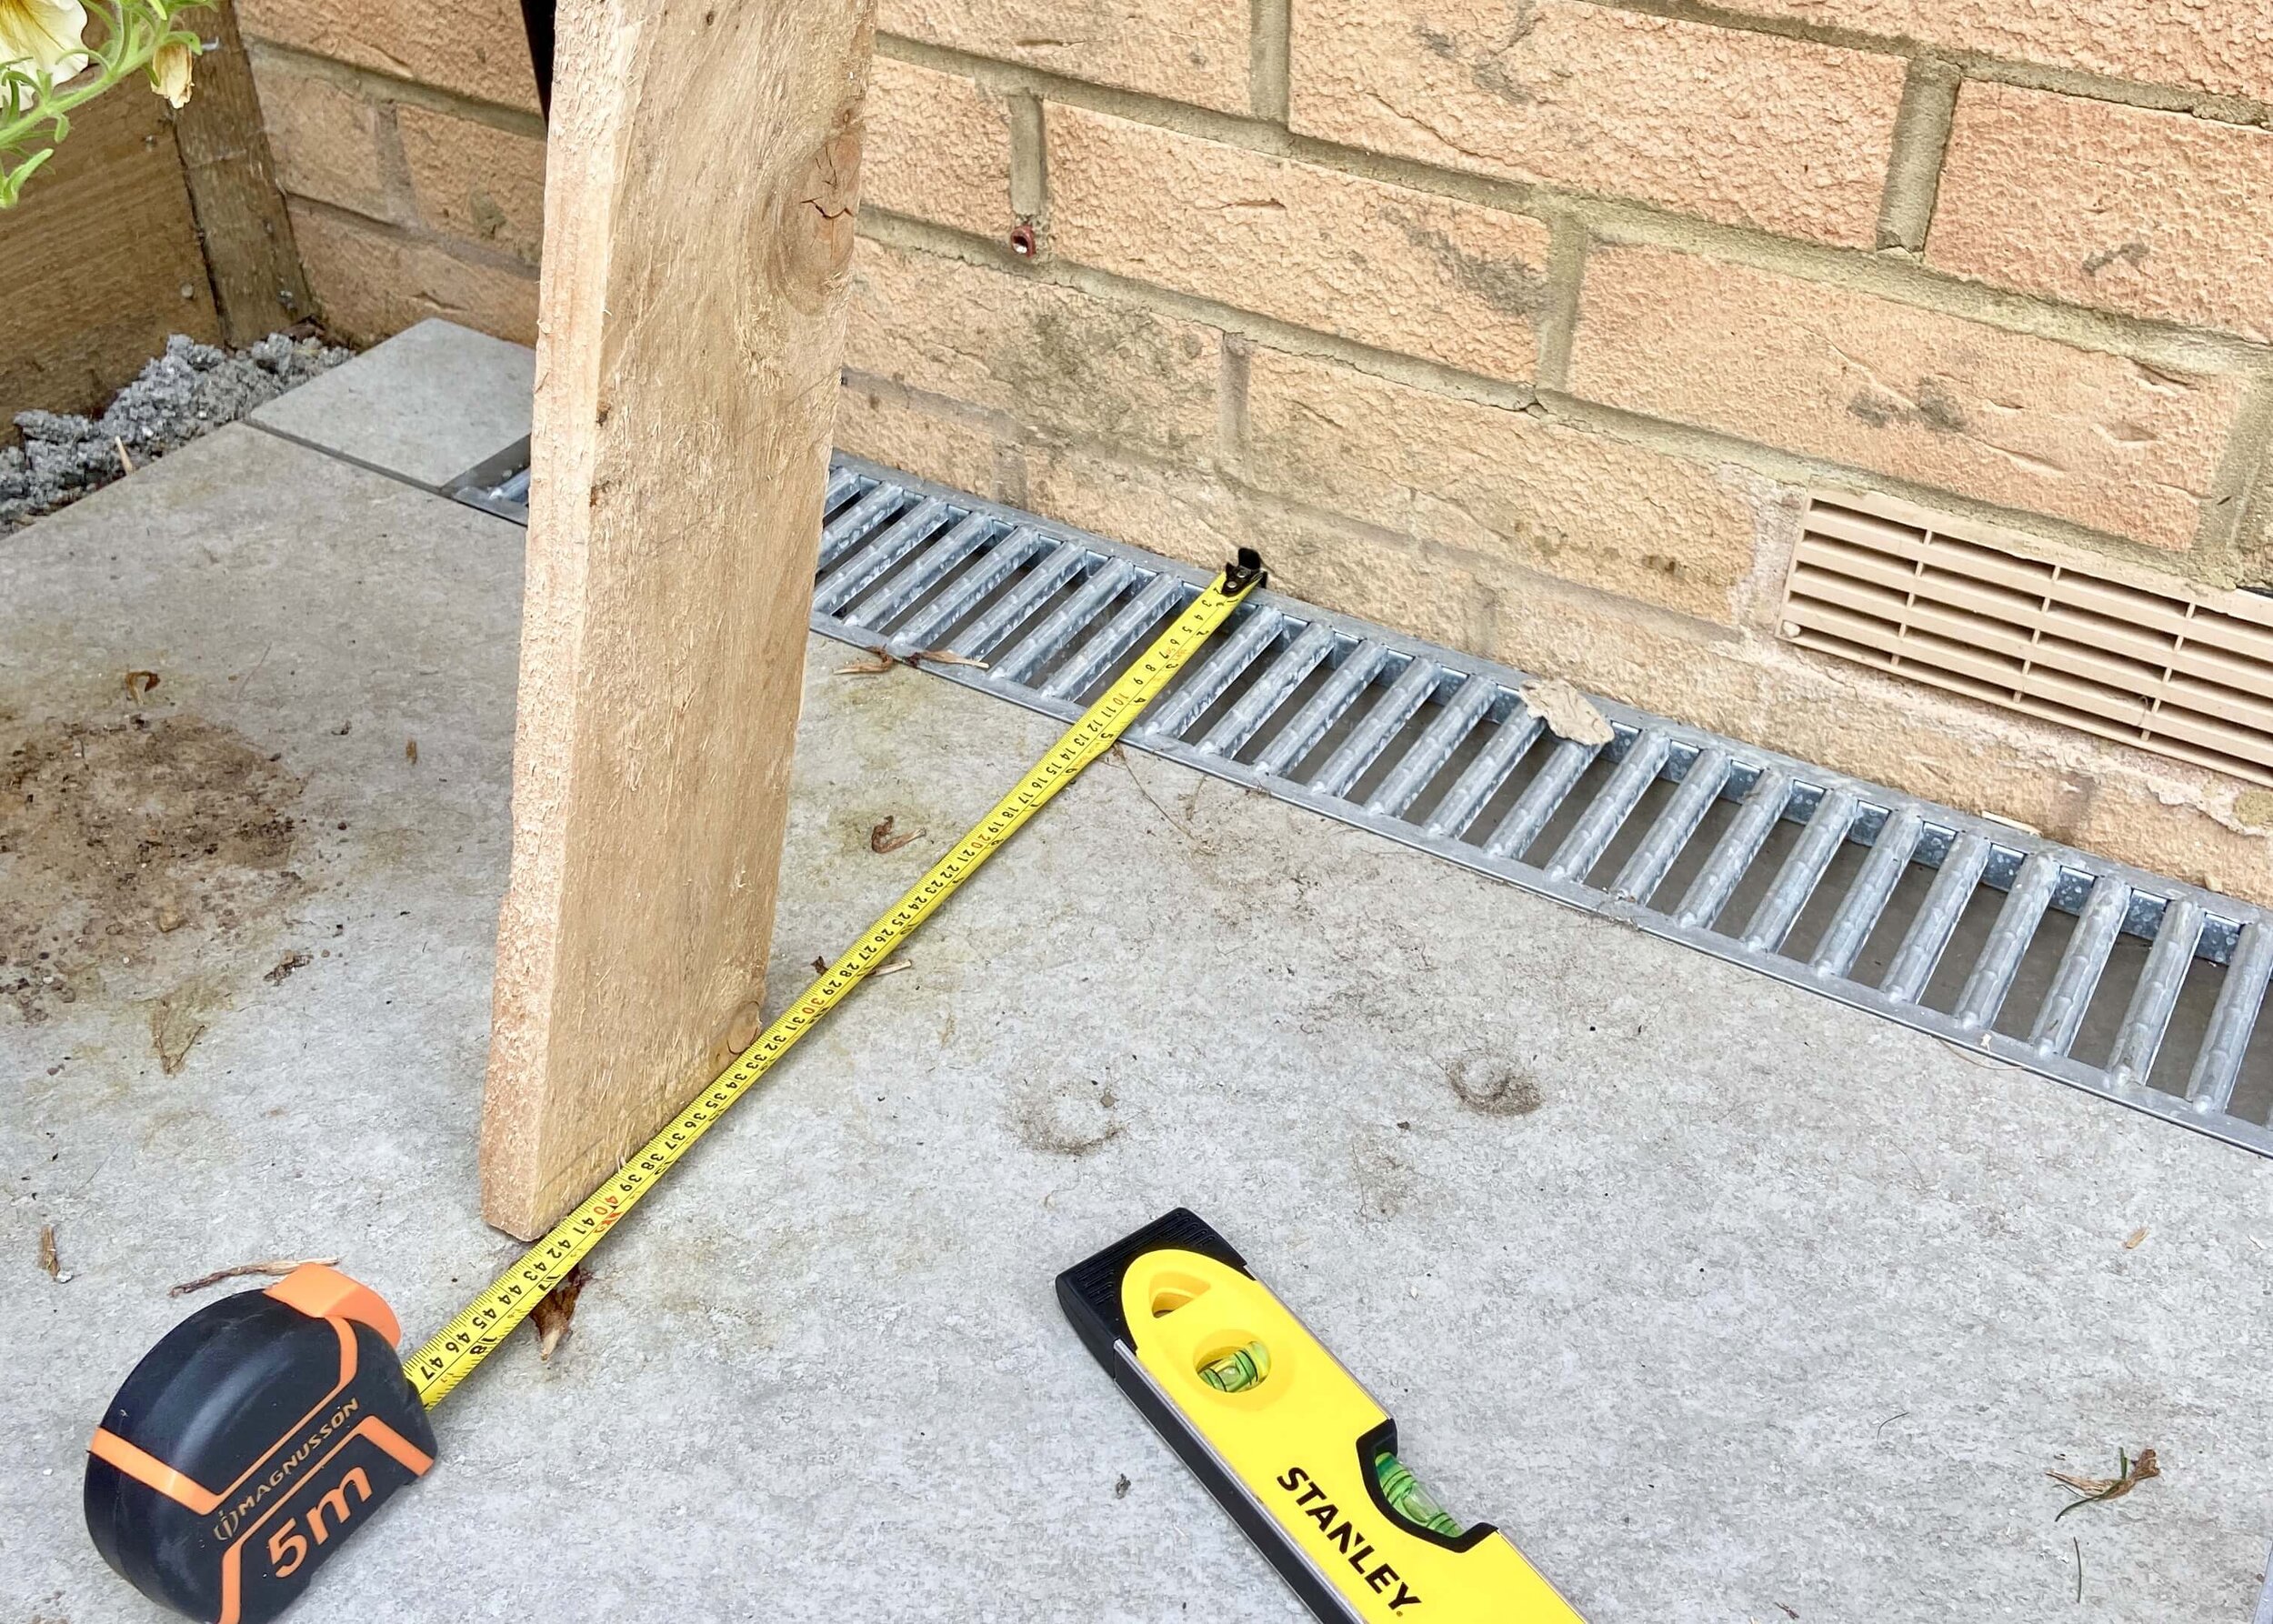
Take your two planks that will make the sides of your shelves and lean them against the wall at the angle you want them to sit at. Use another board to mark off this angle at the bottom of each plank (perpendicular to the floor) and at the top of the plank (perpendicular to the wall).

IMG_3862.jpeg

4.

Use a saw to cut the top and the bottom of these two planks at the angle drawn on in step 3. Check that you are happy with how they fit against the floor and the wall.

IMG_3864.jpeg

5.

Next, decide how wide you want your shelving unit to be, and cut 4 (or however many shelves you want) as this length. I decided to have 4 shelves, each at 50cm in length.

IMG_3865.jpeg

6.

Next work out where you want your shelves to be positioned. I chose to have mine approximately 23cm apart from each other. I then measured 22cm up from the bottom of the left side plank (both at the front and the back) and drew a line between these two points.

IMG_3867.jpeg

7.

Use a drill to create pilot holes on the inside of one of the side planks below this line and hold your shelves at the correct angle whilst you put in screws to attach it from the outside.

IMG_3872.jpeg

9.

Next, position the sides and shelf against the wall and use a level to mark on the other side of the shelving unit where the shelf will sit. Drill pilot holes where the shelf will go, hold the shelf in place here and then use screws to secure.

IMG_3869.jpeg

8.

Repeat the steps above for the other shelves, ensuring each time that the shelves are level to the ground and not tilting forward or backward.

IMG_3879.jpeg

10.

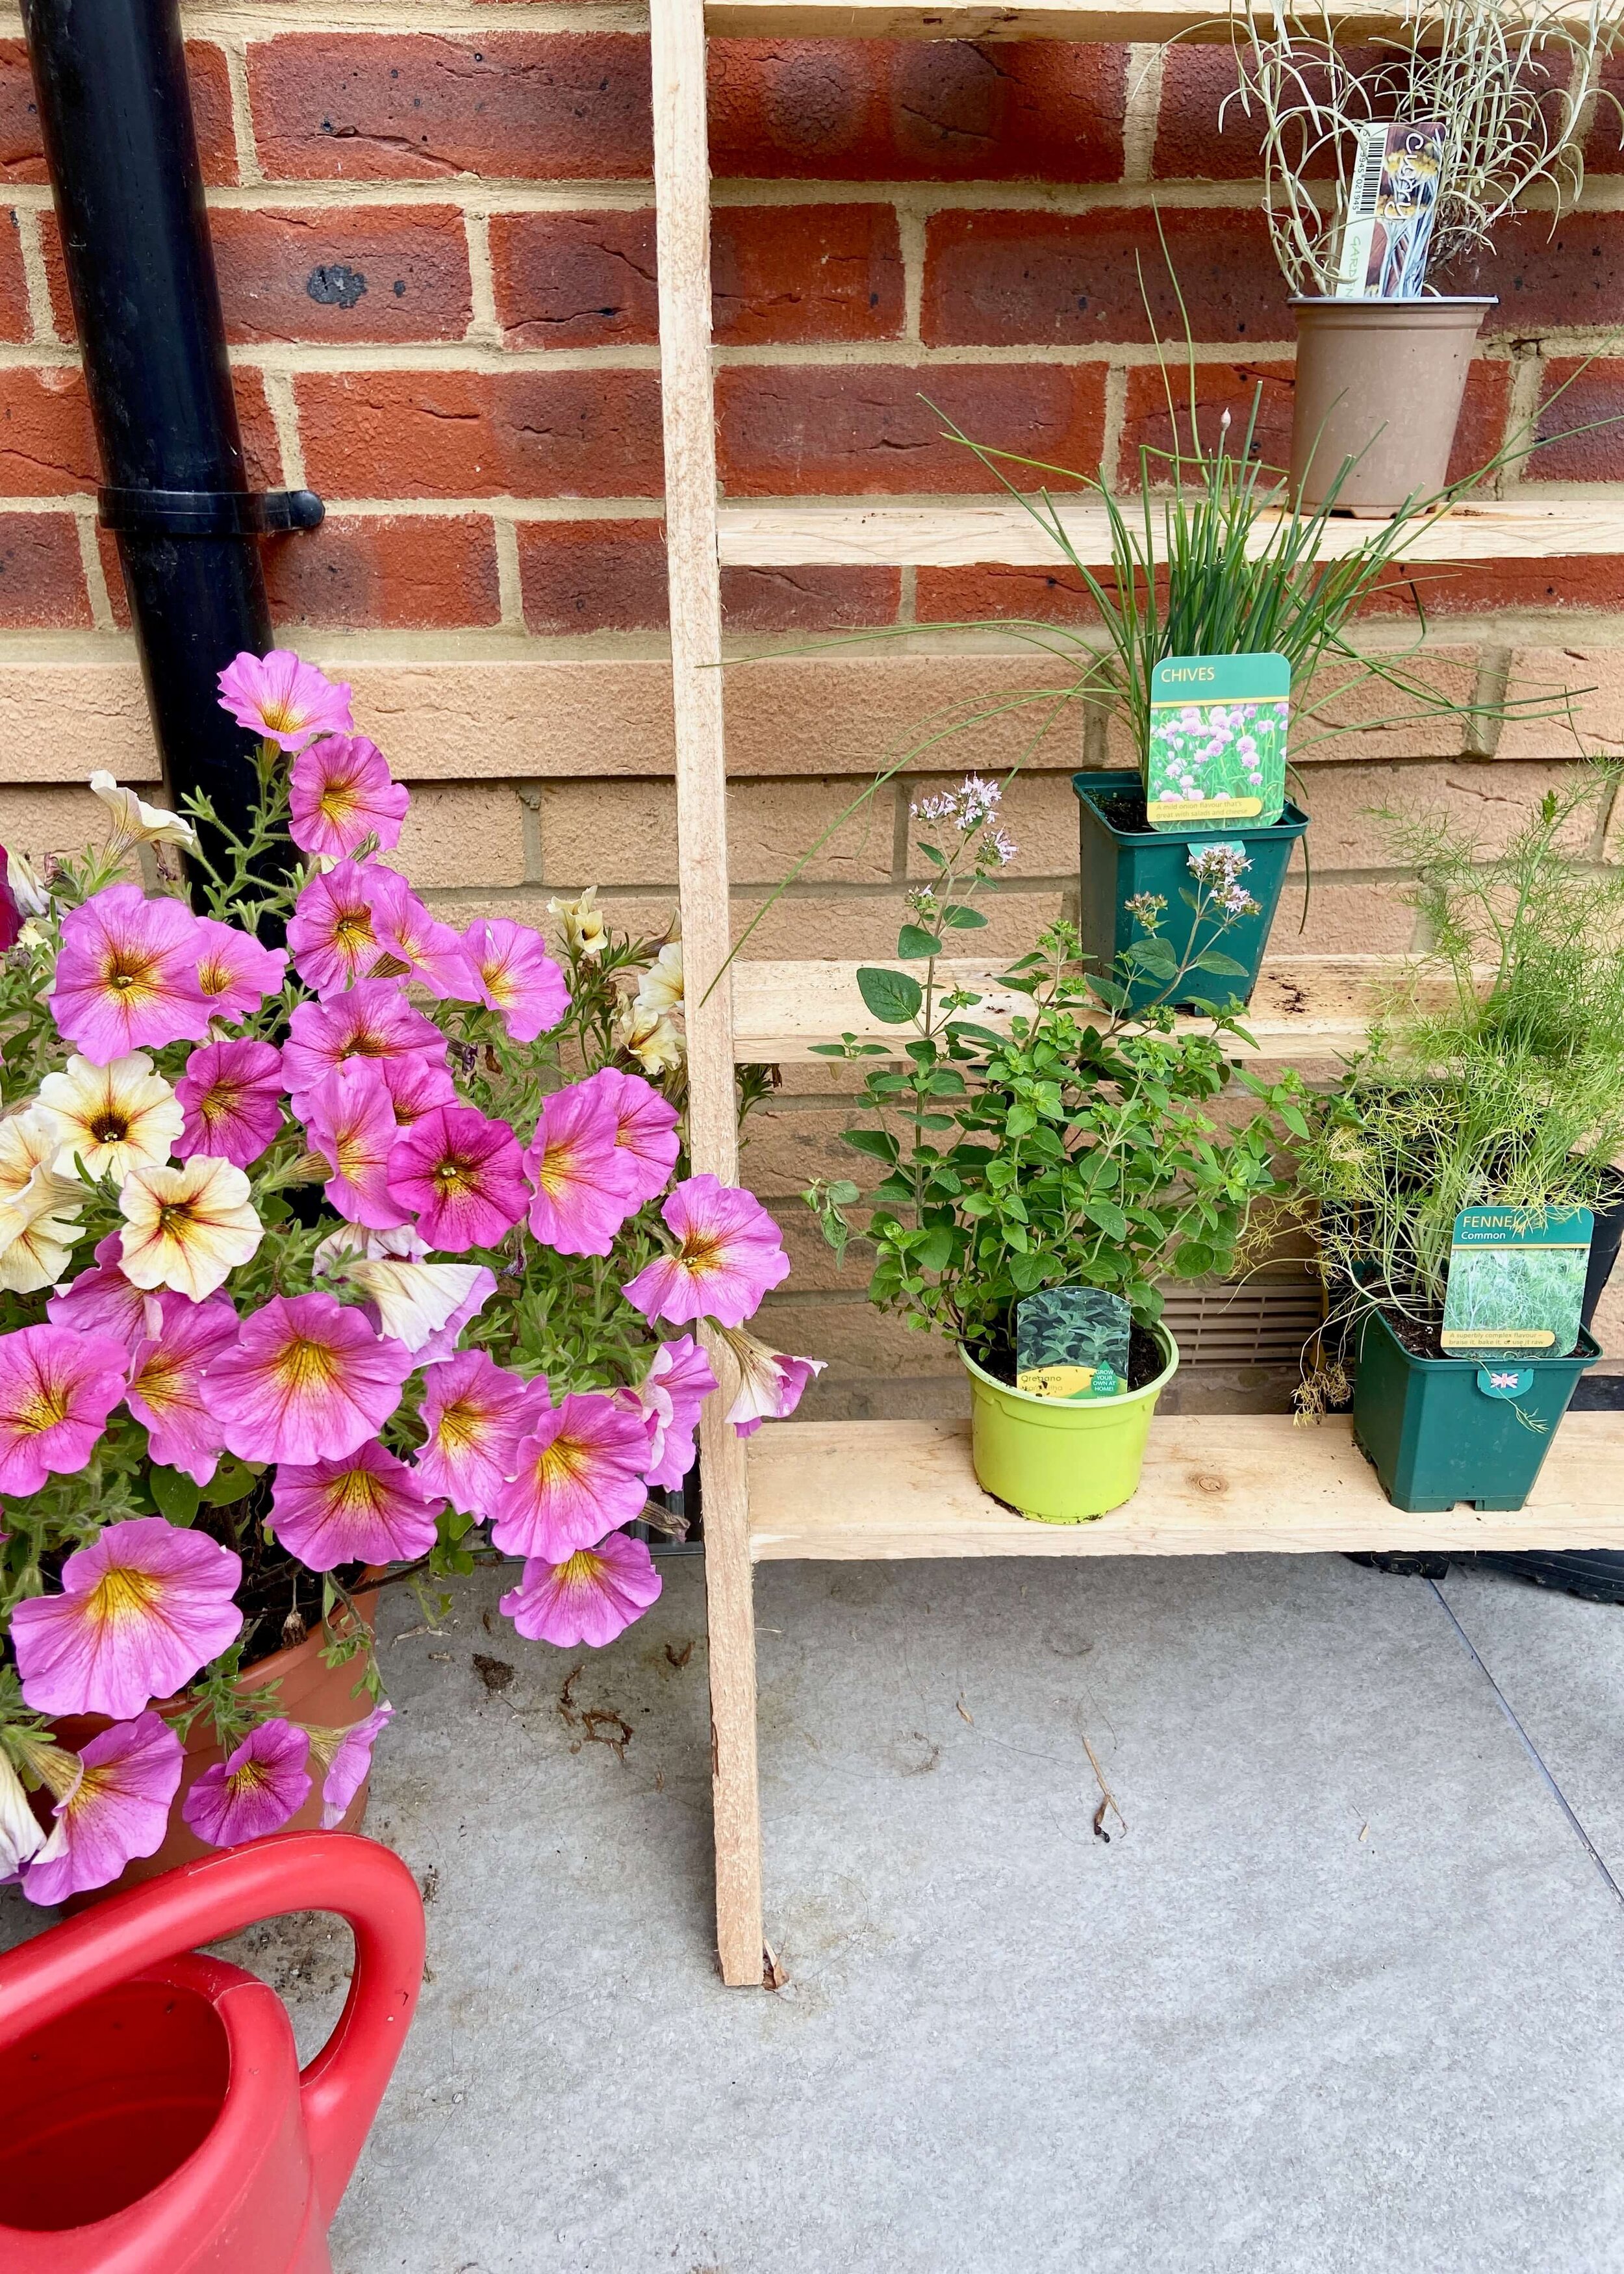
Once all of your shelves are attached, you can stain or varnish, and when dry, add your herbs or plant pots.

…AND THAT’S IT!

IMG_3882.jpeg
this is the alt text
YOU MIGHT ALSO LIKE...
Wooden Mushroom Decor
Apr 26, 2025
Wooden Mushroom Decor
Apr 26, 2025
Apr 26, 2025
Hand-Painted Floral Mural Arch
Mar 29, 2025
Hand-Painted Floral Mural Arch
Mar 29, 2025
Mar 29, 2025
Easy IKEA Antilop Makeover
Mar 1, 2025
Easy IKEA Antilop Makeover
Mar 1, 2025
Mar 1, 2025
Clay Leaf Shelf
Jun 29, 2024
Clay Leaf Shelf
Jun 29, 2024
Jun 29, 2024
Nursery Feature Wall
Jun 15, 2024
Nursery Feature Wall
Jun 15, 2024
Jun 15, 2024
Hallway Wall Niche
Jun 8, 2024
Hallway Wall Niche
Jun 8, 2024
Jun 8, 2024
Ikea Hemnes Drawer Hack
May 4, 2024
Ikea Hemnes Drawer Hack
May 4, 2024
May 4, 2024
Pressed Flower Taper Candle
Apr 20, 2024
Pressed Flower Taper Candle
Apr 20, 2024
Apr 20, 2024
Floral Rabbit Nursery Print
Apr 13, 2024
Floral Rabbit Nursery Print
Apr 13, 2024
Apr 13, 2024
Pressed Flower Egg Ornaments
Apr 10, 2024
Pressed Flower Egg Ornaments
Apr 10, 2024
Apr 10, 2024
In DIY Tags home
← DIY Colour Block Gallery WallDIY Gold Arch Earrings →
 

Decorating, DIY-ing and doodling my way through life. Have a look around and let’s get creative!

>> FIND OUT MORE <<

Follow
The office is still one of my favourite transformations in the house! 😍

I started by panelling the wall with MDF strips and then painted the wall with a mix of colours. I used three IKEA drawer units for the base of the desk and then secured the de

ART

DIY

LIFE


THE LATEST

Featured
Wooden Mushroom Decor
Apr 26, 2025
Wooden Mushroom Decor
Apr 26, 2025
Apr 26, 2025
Hand-Painted Floral Mural Arch
Mar 29, 2025
Hand-Painted Floral Mural Arch
Mar 29, 2025
Mar 29, 2025
Easy IKEA Antilop Makeover
Mar 1, 2025
Easy IKEA Antilop Makeover
Mar 1, 2025
Mar 1, 2025
Clay Leaf Shelf
Jun 29, 2024
Clay Leaf Shelf
Jun 29, 2024
Jun 29, 2024
Nursery Feature Wall
Jun 15, 2024
Nursery Feature Wall
Jun 15, 2024
Jun 15, 2024


THE GREATEST

Featured
DIY // IKEA LACK TABLE INDUSTRIAL HACK
Sep 22, 2020
DIY
DIY // IKEA LACK TABLE INDUSTRIAL HACK
Sep 22, 2020
DIY
Sep 22, 2020
DIY
DIY // CLAY ALL-SEEING EYE MIRROR
Aug 14, 2020
DIY
DIY // CLAY ALL-SEEING EYE MIRROR
Aug 14, 2020
DIY
Aug 14, 2020
DIY
DIY // CLAY FACE DISH
Apr 29, 2020
DIY
DIY // CLAY FACE DISH
Apr 29, 2020
DIY
Apr 29, 2020
DIY
DIY // ABSTRACT ART FLORAL EGGS
Mar 25, 2020
DIY
DIY // ABSTRACT ART FLORAL EGGS
Mar 25, 2020
DIY
Mar 25, 2020
DIY
DIY // WIRE FACE EARRINGS
Feb 16, 2020
DIY
DIY // WIRE FACE EARRINGS
Feb 16, 2020
DIY
Feb 16, 2020
DIY

Follow
^^ BACK TO TOP
How does Monday come round so quick?!Wishing I could cosy up here today ✨

#mondaymood #storyofmyhome #mydailyhomesquare #interiordesign #budgetdiy #realstylishhomes #ourdiyhomes #femalediycollective #discoverunder5k #myhousethismonth #myhousedownsou
I&rsquo;ve got the day off today (woop!) and although it&rsquo;s not quite warm enough to sit out here yet, the sun is shining and I think a little walk to blow out the cobwebs is exactly what I need. Hope Monday is treating you well! ☀️

#summerdrea
Had such a lovely day seeing one of my besties and her adorable new baby that I completely forgot to share today&rsquo;s new blog post!

Head over to the blog for all the details of this easy DIY ring dish 🔝✨

#diy #diyhomedecor #diyhome #diyvalenti
That sunshine 👌🏻☀️

#mycosyhome #livingroomdecor #livingroominspo #mydiymydecor #homeobsessed #lovemydecor #homeinterioruk #discoverunder5k #diyhome #diyhomedecor #myhousethismonth #myhousedownsouth #realstylishhomes #ourdiyhomes #happythursday #in
A little corner our home on this chilly Tuesday morning ✨
.
.
#interior #homeobsessed #mycosyhome #homeinterioruk #instadecorating #homesofinstagram #happymonday #mondaymotivation #instainteriors #cornersofmyhome #myhousethismonth #myhousedownsouth #

Copyright 2021 isoscella. All rights reserved.

Powered by Squarespace