

We're well into autumn now and according to Google, autumn here in the UK doesn't end until 20th December. I'm not sure how I've managed to go this long without realising that but it really surprised me how close it's end is to Christmas. We usually crack the winter and christmas decor out as soon as we hit the 1st December and so in my mind winter pretty much starts from then. It's a bit of a shame really as I love Autumn; particularly on those cold and dry days where the trees and ground are littered with leaves in various shades of reds, yellows and oranges.
Read moreDONE LIST // JULY & AUGUST 2016

If you caught my Done List May 2016 post, you'll know that in a bid to be a bit healthier and more mindful with my list writing, I've started a monthly 'Done List' sharing snippets of the past month. These snippets might simply be things that made me happy, things I've done, things I've made or things I've achieved.
It's been such a long time since I did a Done List, which is a real shame because I really enjoy the process of looking back at the things I've made or done over the past month. I had a pretty busy summer with lots of opportunities for crafting and although I had already put these collages together they got a tad forgotten with the move of the blog. So that I don't miss any months, here's what I got up to in July and August and in my next post I'll share September and October. Once I'm up to date I'll get back to doing a Done List at the end of each month.


1. A weekend in beautiful Abergavenny for one of my besties weddings
2. Making these air dry clay keepsakes for my sister's hens
3. Taking the time to remember the important things in life whilst practising handlettering
4. Treating myself to a pair of Carvela shoes from Kurt Geiger in the sales
5. Drawing some of my favourite beauty products
6. Enjoying some of the sunshine on the beach with the boyf
7. Combining my copper and cactus love to create this candle votive
8. Being completely honoured to be a bridesmaid
9. Loving using my art and crafts skills in an art therapy session at uni
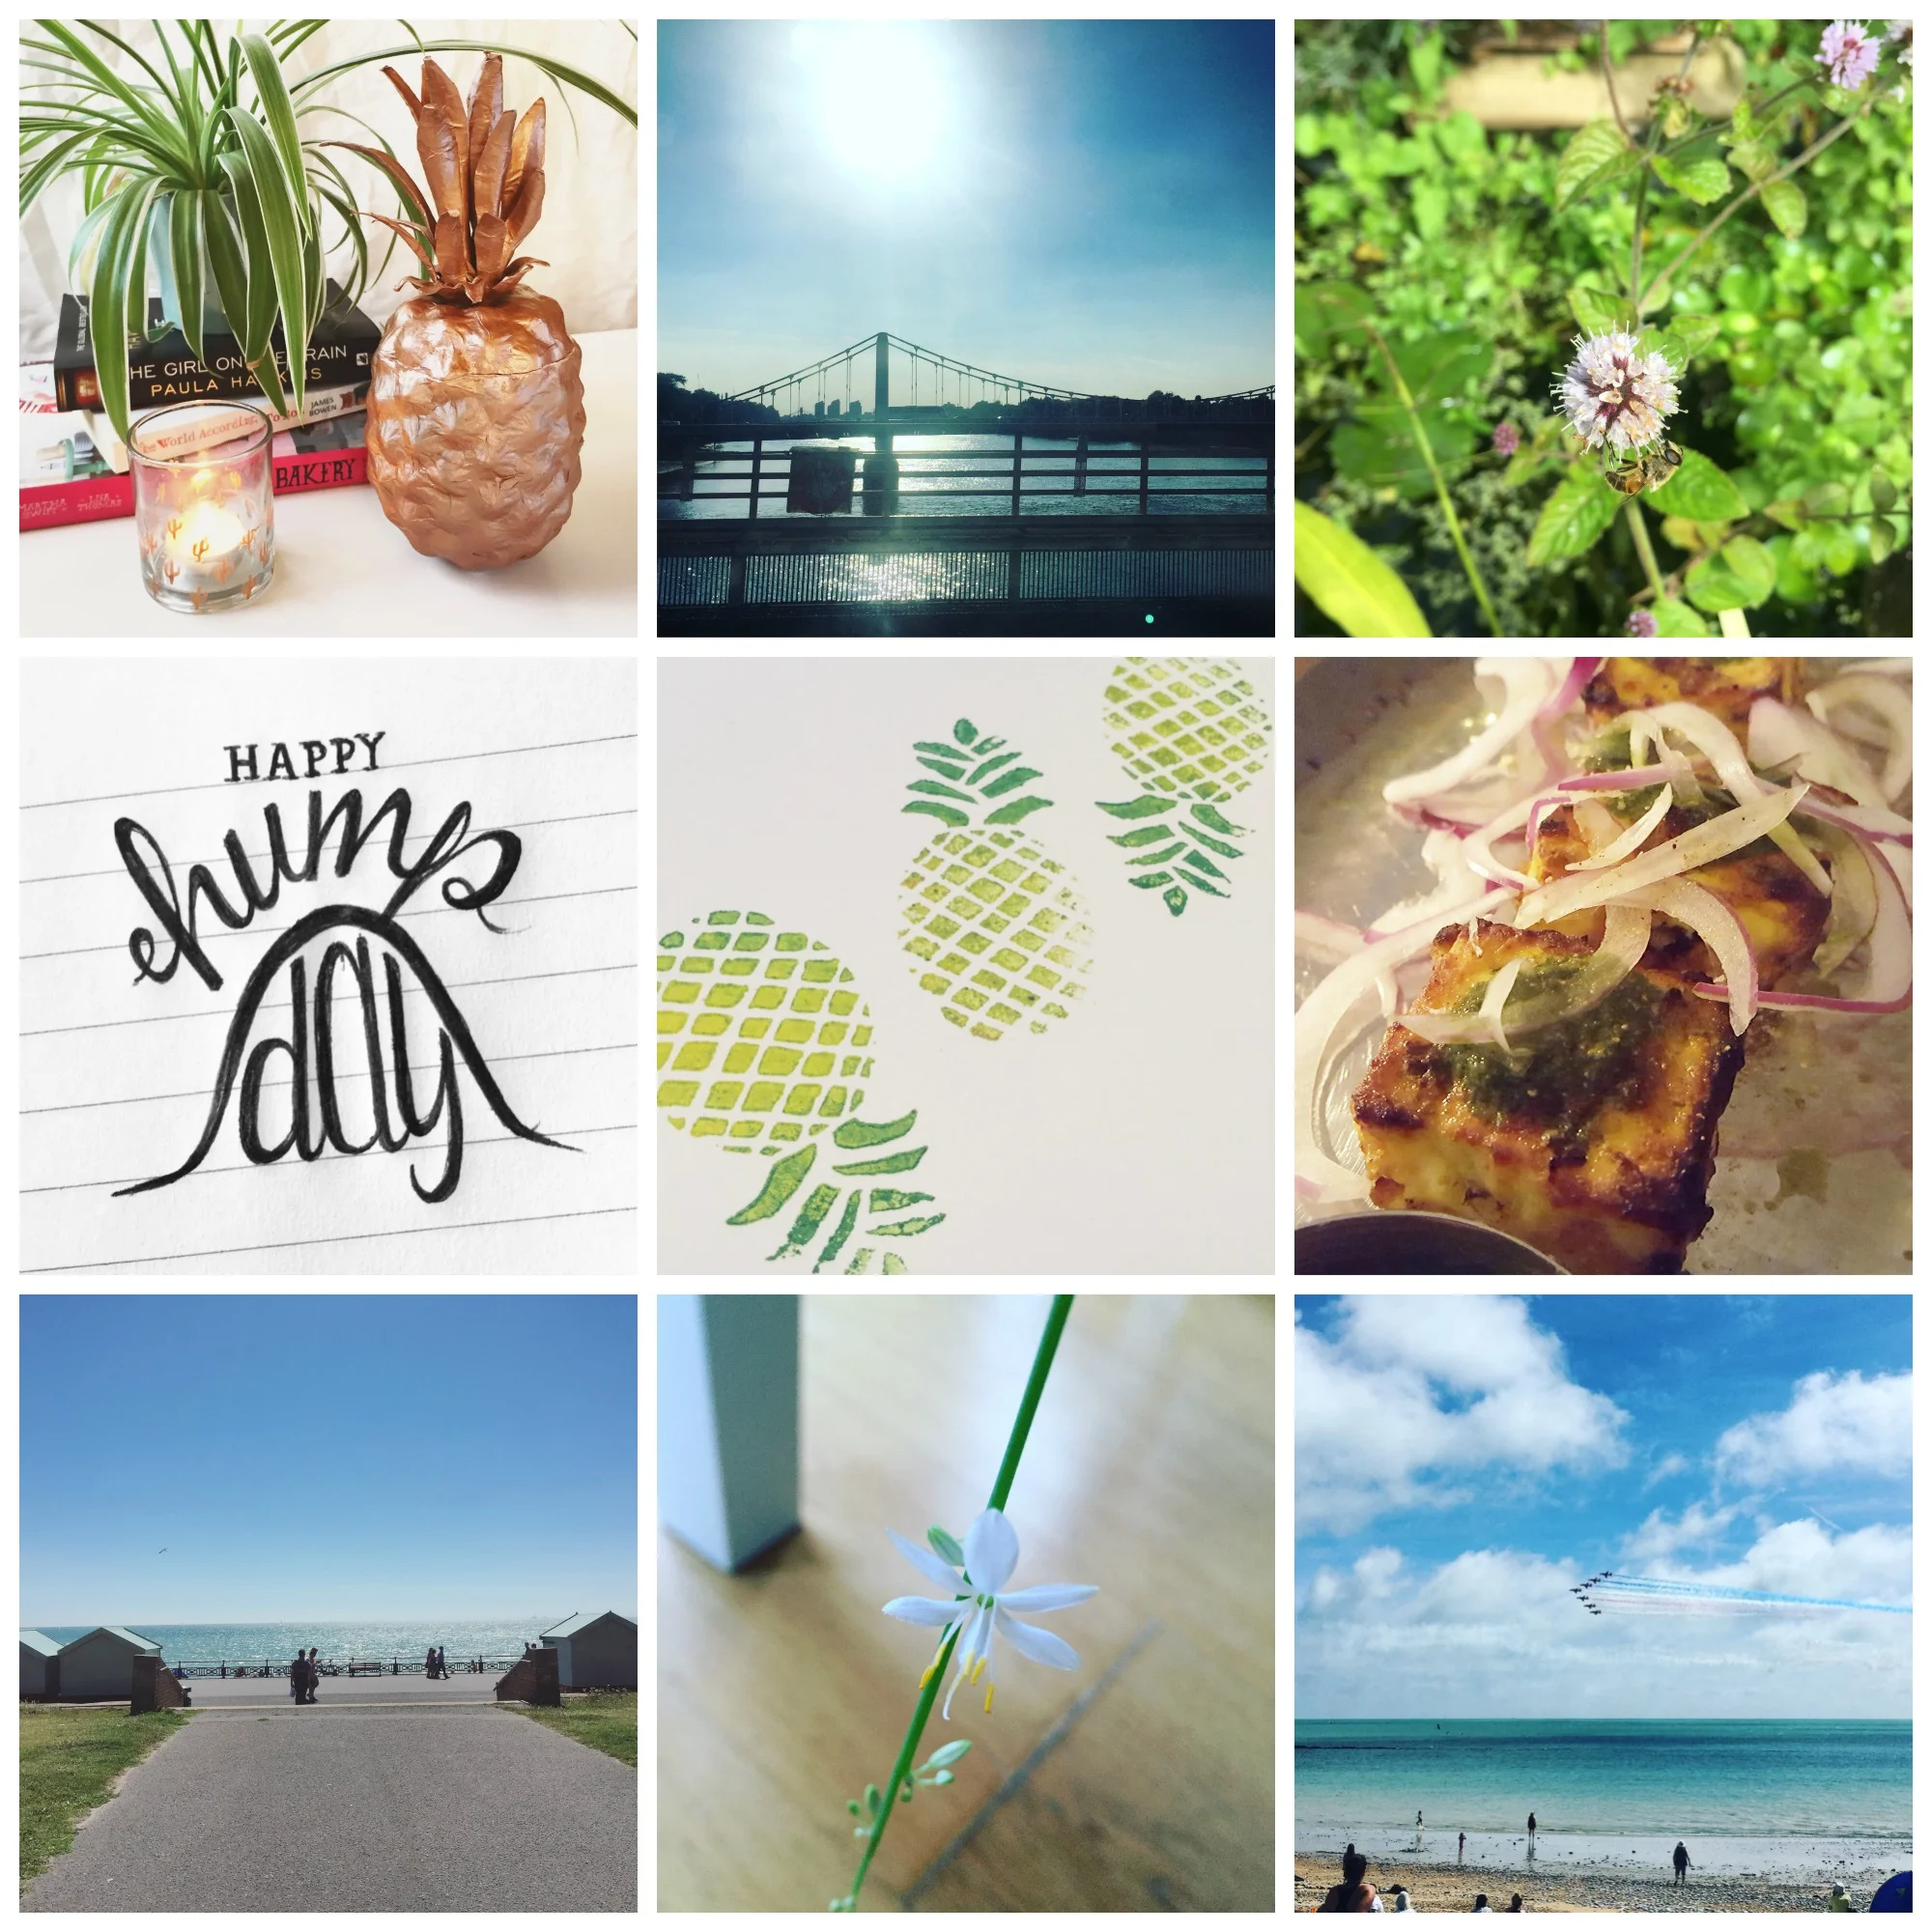
1. Making this pineapple storage pot inspired by Oliver Bonas
2. No more commutes to London on #SouthernFail
3. Enjoying the sunshine in my parents nature-reserve-of-a-garden
4. The joys of realising you're half way through the week and having a cheeky doodle
5. Continuing with the pineapple obsession and making this pineapple print card for one of my besties
6. Eating the most amazing paneer starter at Indian Summer in Brighton
7. Summery walks with iced lattes along the seafront
8. Managing to keep my only surviving plant healthy enough that it sprouted a flower
9. Watching Eastbourne Airshow on the beach with my family like the old days

Well, better late than never, eh!
How was your summer?
Let me know in the comments below!
♥


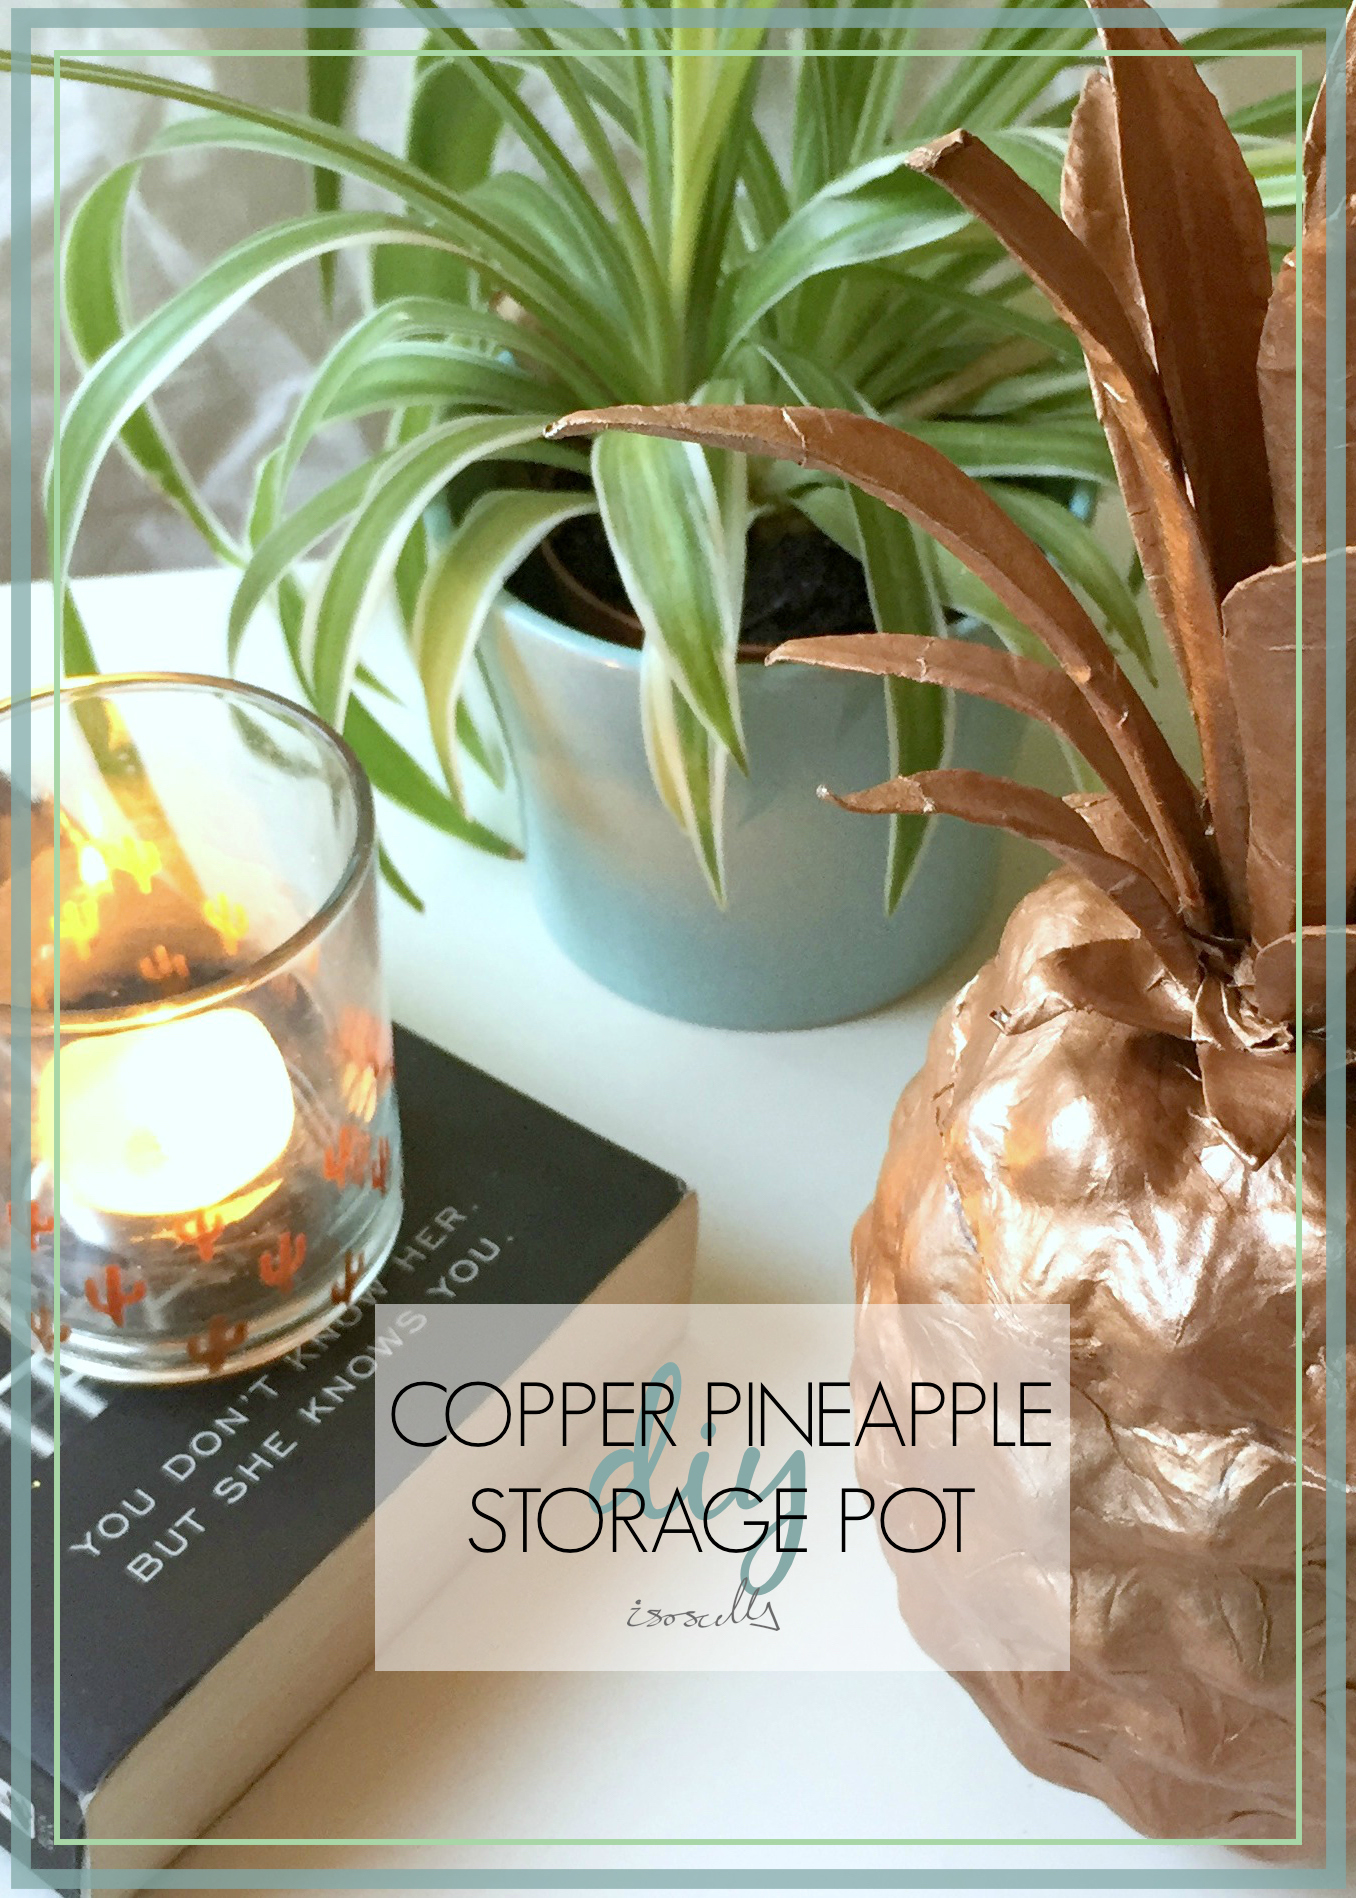
DIY // COPPER PINEAPPLE STORAGE POT

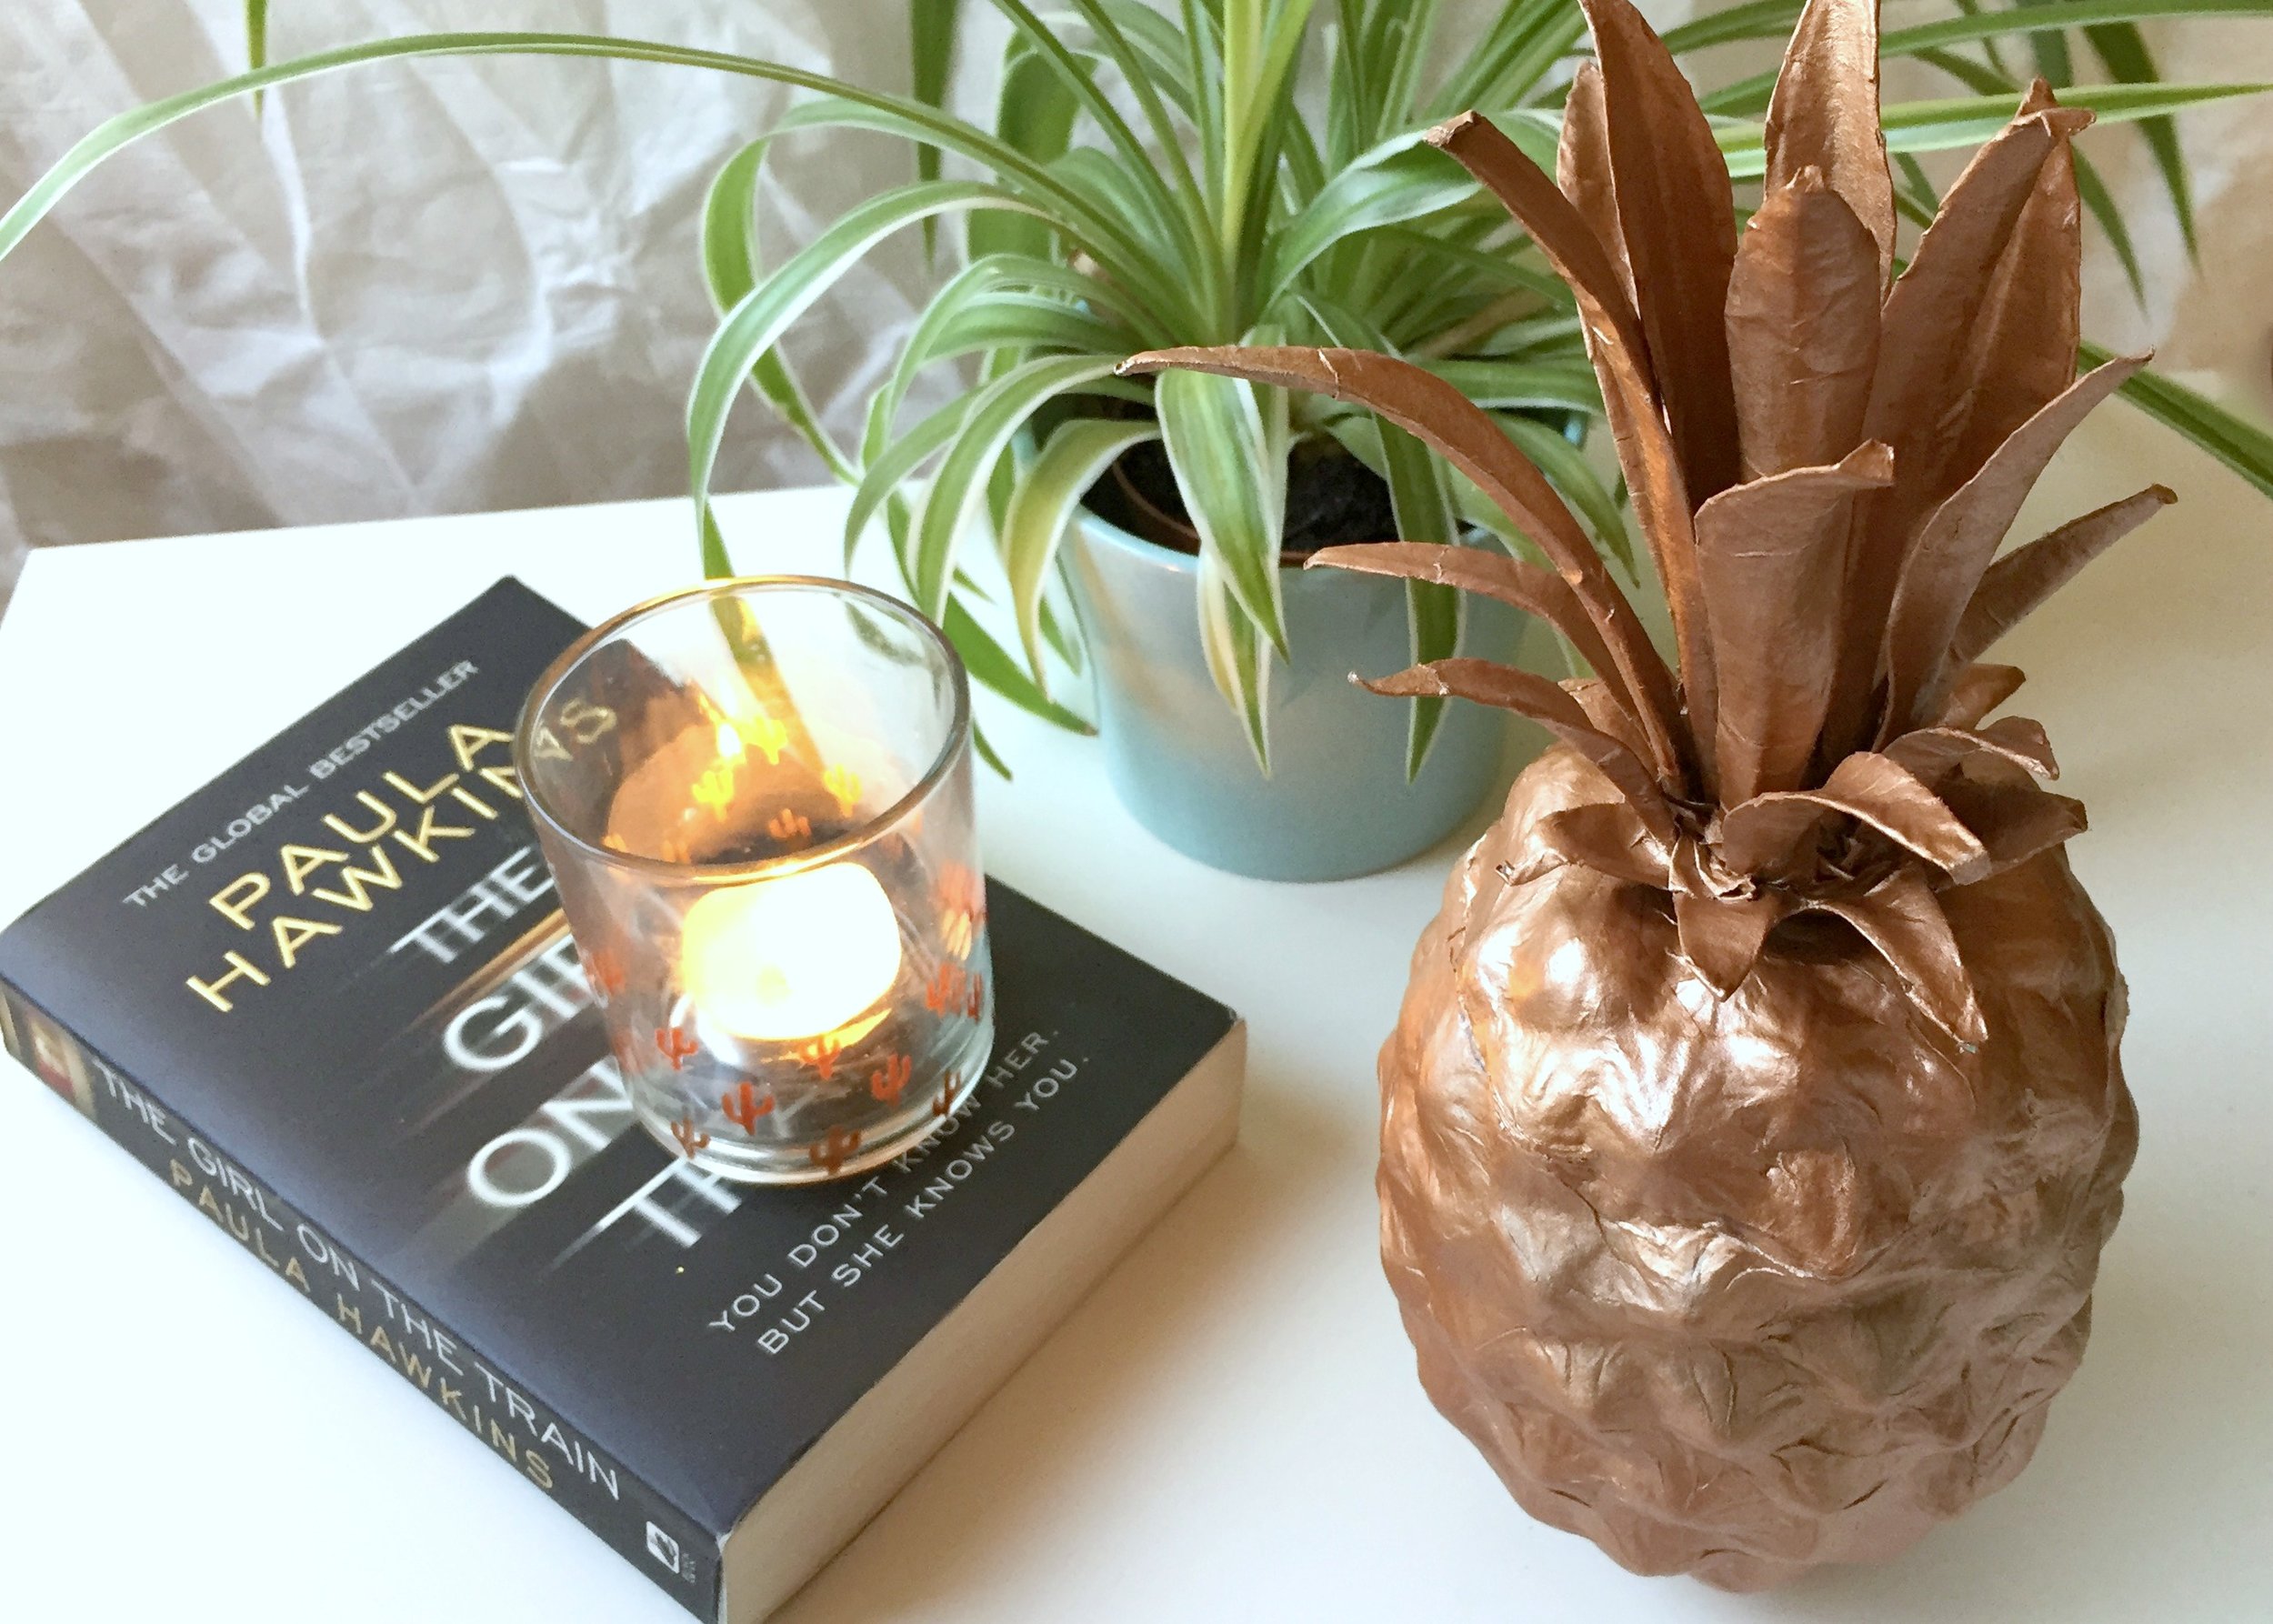
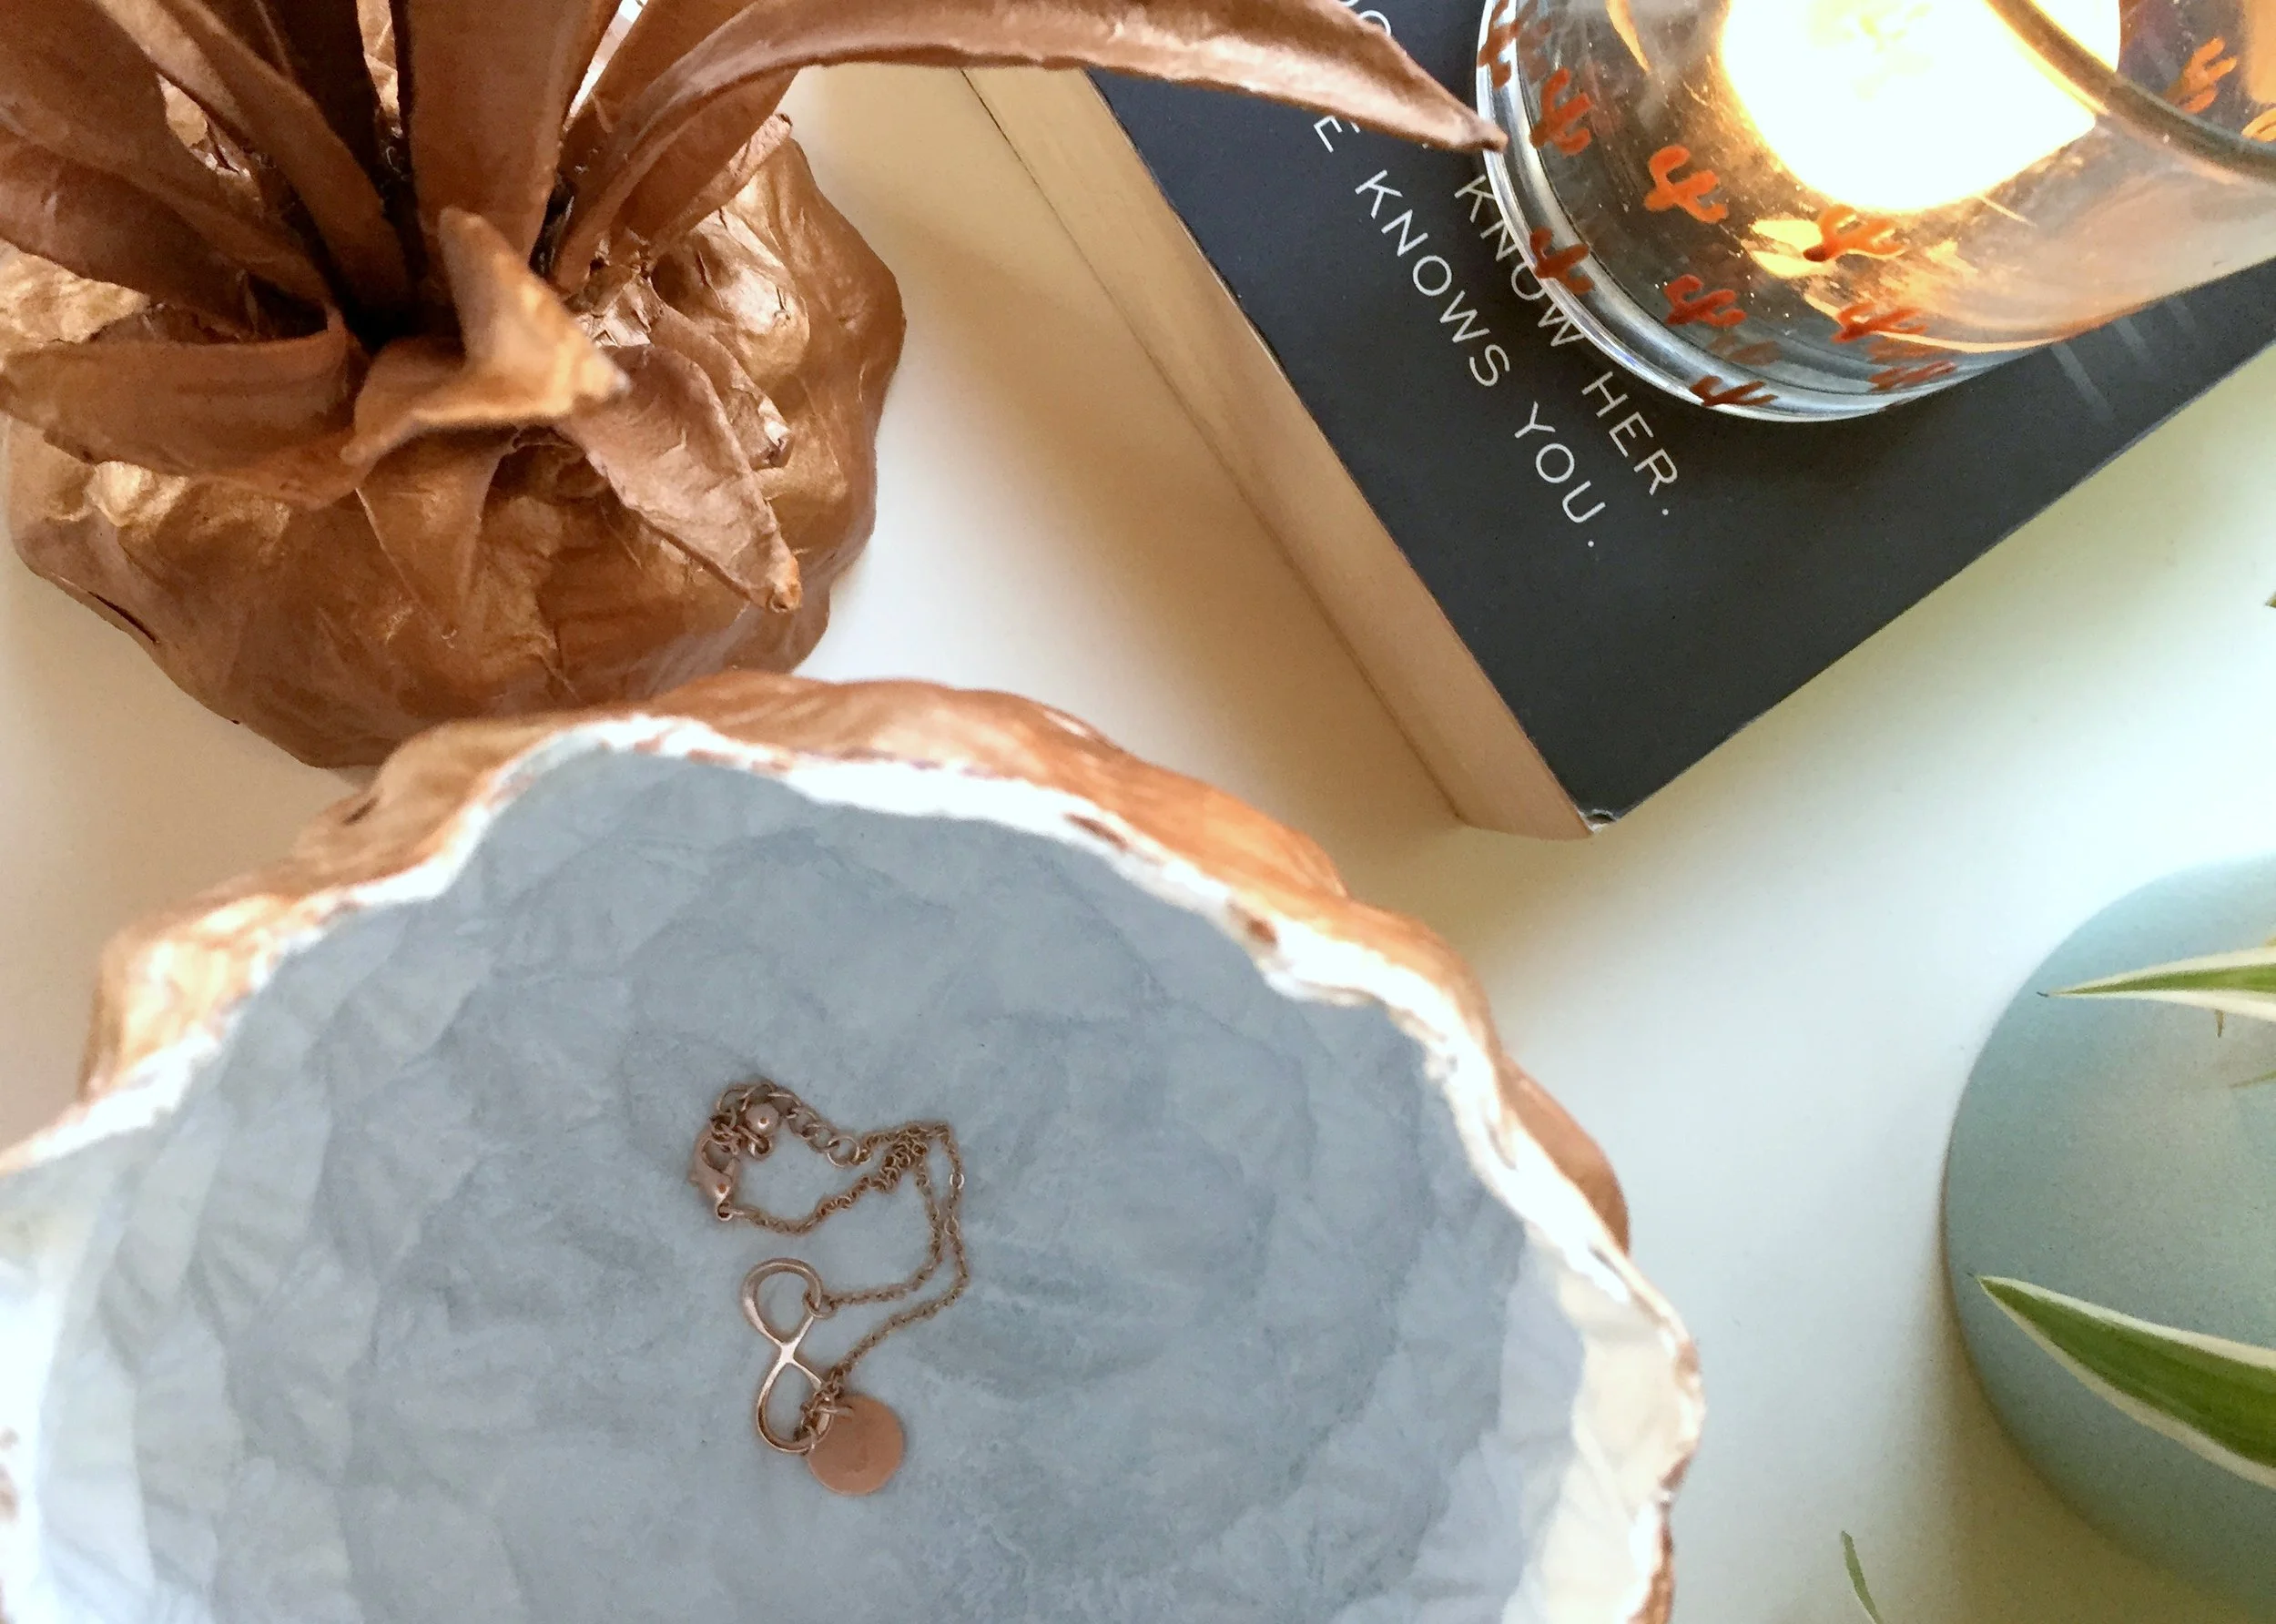
I've been loving this Copper Pineapple Storage Pot on Oliver Bonas for a while, so when I found this ready-made paper mache pineapple in Hobbycraft, I knew exactly what I wanted to do! Of course, its not metal and doesn't have quite the same high quality finish, but it's quenched my "I need a copper pineapple storage pot in my life" urge and saved me £24 in the process! It was also really fun to make and I love how it adds a little bit of fun (and ofcourse a splash of copper!) to my bedside table whilst keeping my everyday jewellery tidy and safe. Keep reading to find out what I used and how I did it...


1. Mark where you want to cut the pineapple in two. To do this I used a black permanent marker and as you're painting over this it doesn't matter if you don't cut along this exactly.
2. Carefully cut along this line. I did this with a sharp knife. You want to try and do this as gently as you can so that you don't get any jagged edges. Though if you do, use some sandpaper to tidy it up.
3. Seal where the paper mache has split. Much to my surprise the inside of my paper mache pineapple was plastic and where I had cut it the paper mache had come away from this slightly. So using some glue and paint, I sealed it back together.
4. Paint the inside with a layer of acrylic paint. I wanted to be sure that I got a nice even coat of spray paint (and because the inside was plastic!), I first painted a thin layer of acrylic paint on the inside.
5. Once dry, spray paint the inside with white paint. I left this to dry for a few hours before grabbing my white spray paint, giving it a good shake and spraying an even coat of paint on the inside.
6. Once dry, spray paint the outside with copper paint. Again, I left this for an hour or so to dry. I then placed the lid and base with the inside facing down and sprayed copper paint all over the outside.
7. Leave to dry & spray with a second coat of copper. I didn't get quite the even coverage or shine I wanted after the first coat and so after an hour I went back in with a second coat.
8. When dry, spray with a thin layer of sealer or varnish. To protect all that hard work, I then went in with a clear sealer spray. It's best to do a thin layer of this and do a second if you need to. Use a glossy finish to give it a nice shine!


DIY // HALLOWEEN HAND-LETTERED PUMPKIN

It's pretty close to the day itself at this point but this is my favourite halloween craft I've done this year and so I wanted to be sure to squeeze it in before tomorrow. If you follow me on instagram you'll know that I've been practising my hand-lettering for a while now and that I really enjoy doodling different phrases with a fine liner. So, with one of my pumpkins, I decided to have a go at hand-lettering a suitably Halloween-ey phrase on a pumpkin.
Read moreDIY // GLITTER PUMPKIN
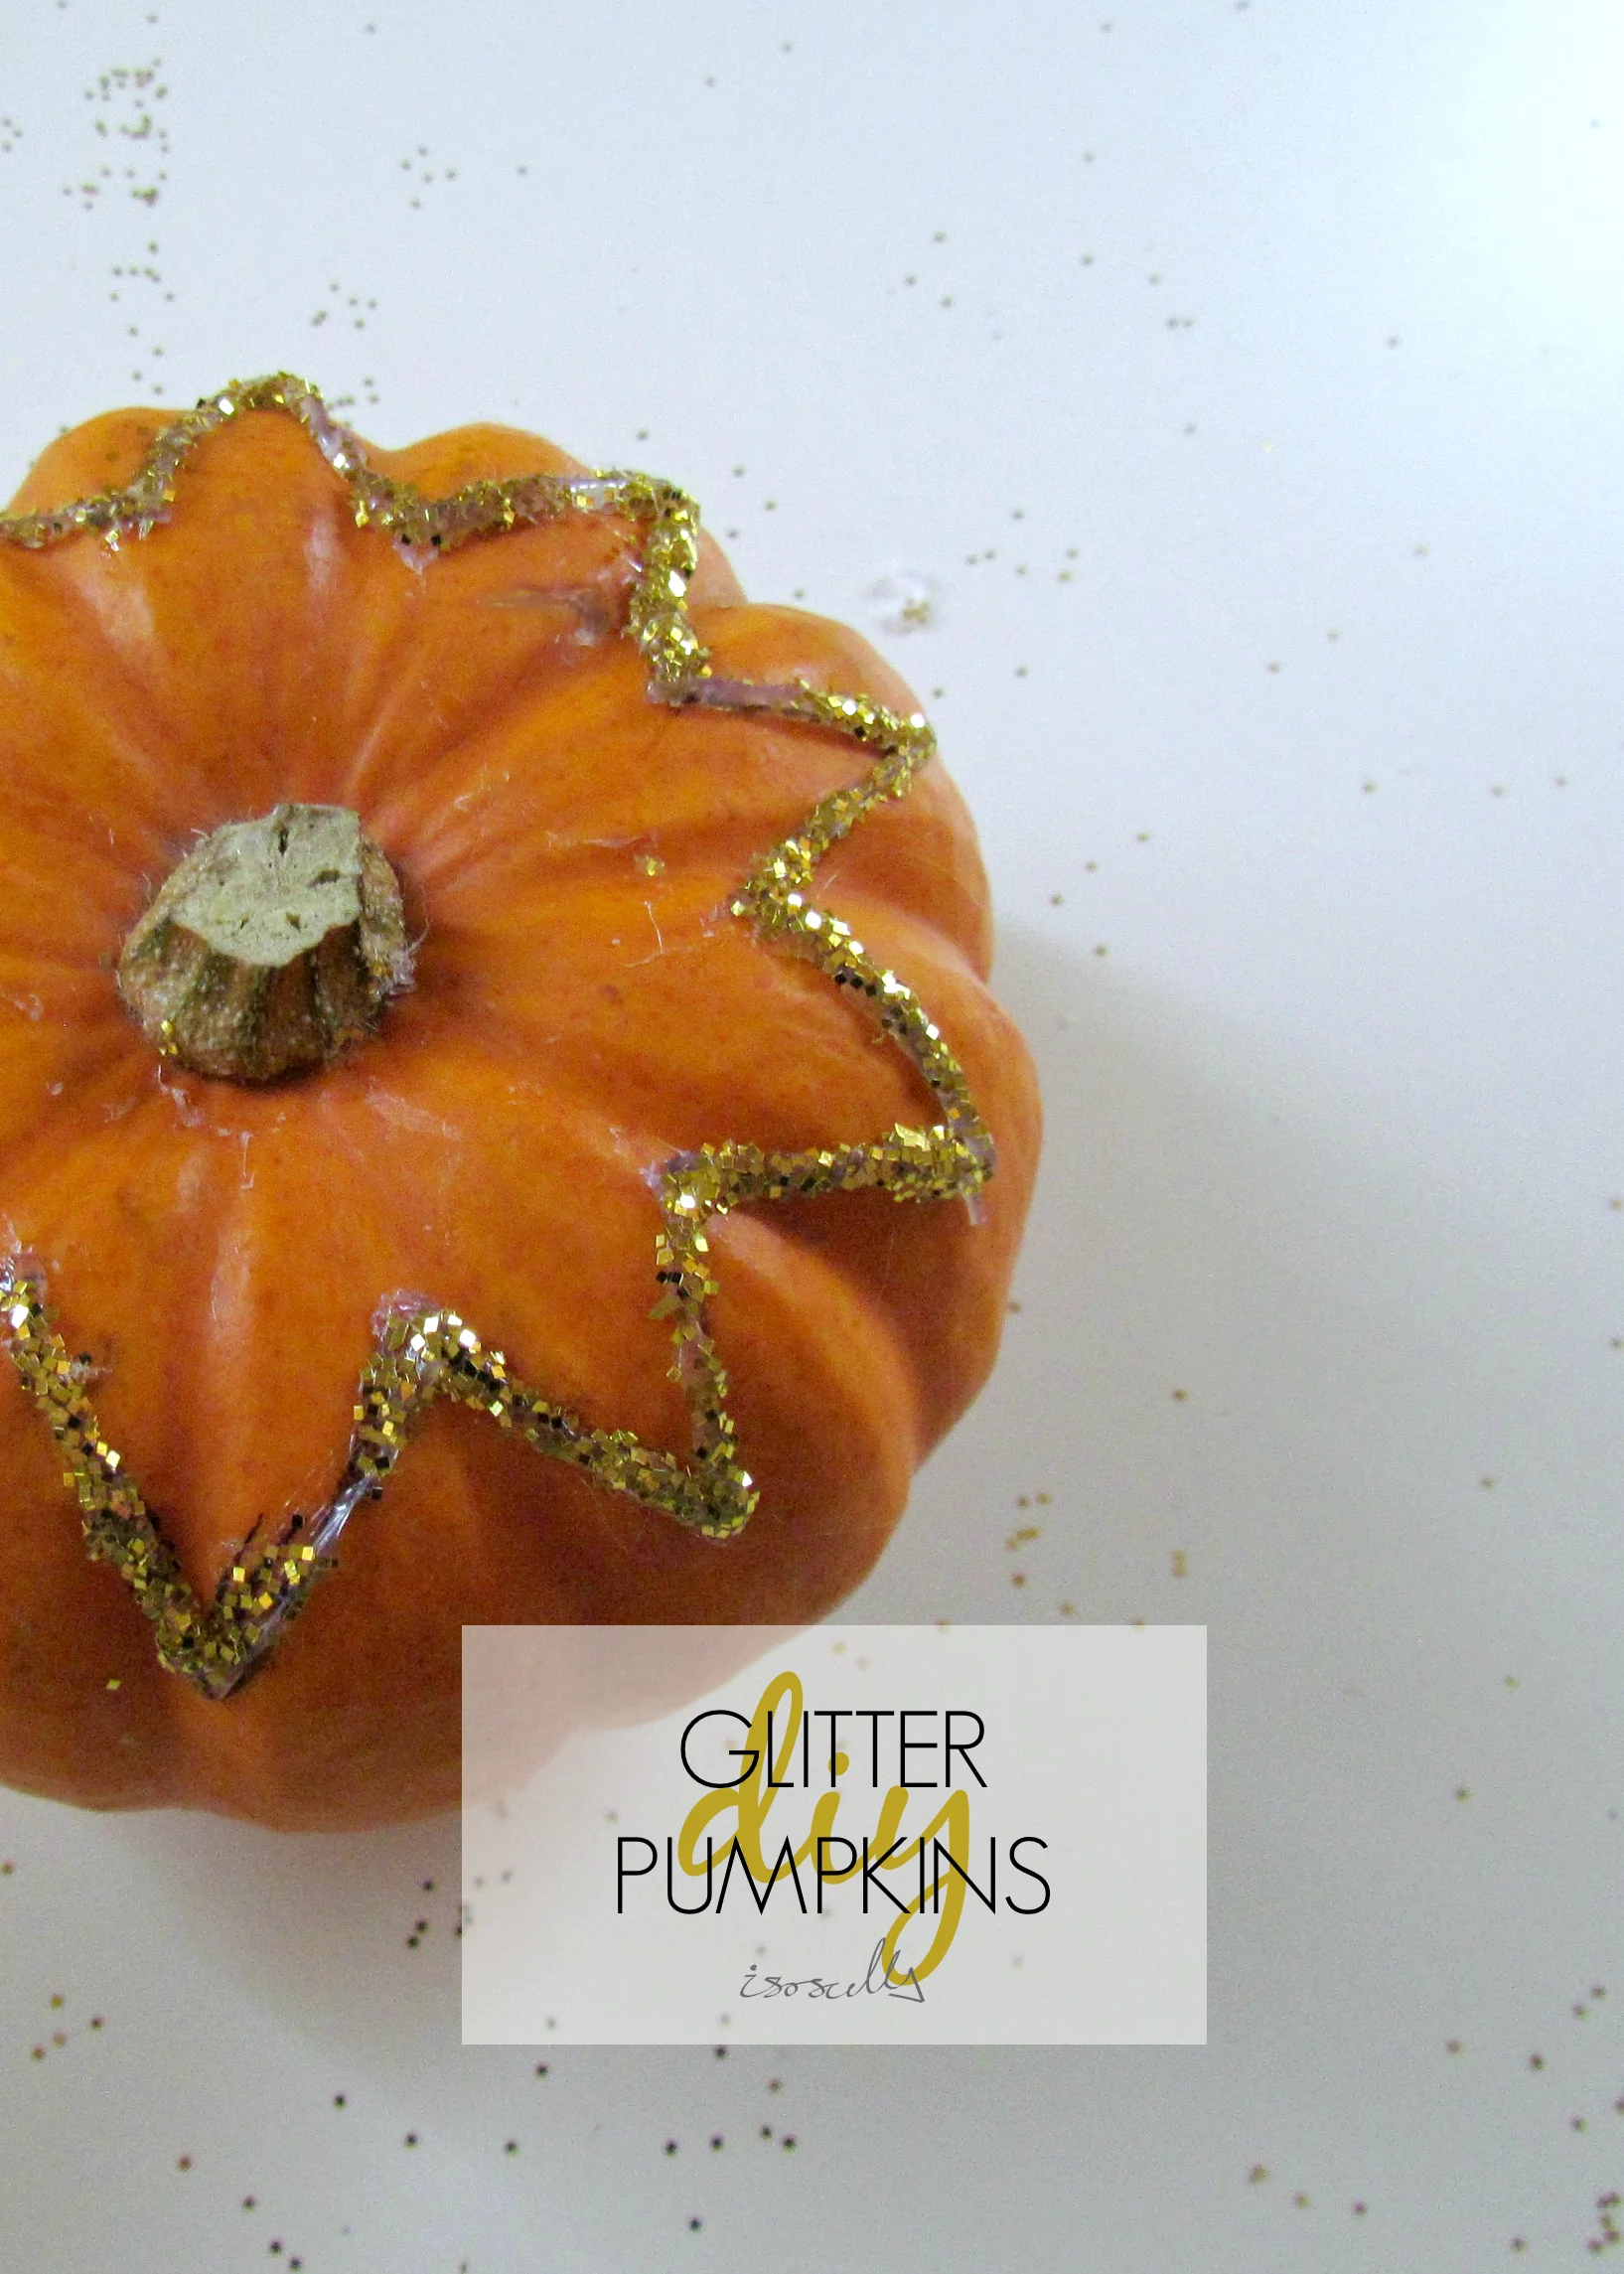
It's that time of year again and where I live, pumpkins are everywhere; every shop has them in stock and even the small green grocers around the corner has them in a variety of different shapes, sizes and colours. If you read my no-mess mumpkin post last year, you'll know I'm not really into carving pumpkins - mine never seem to turn out how I want them too and it's just so messy - so instead I prefer to paint and decorate my pumpkins.
Read more


