• ABOUT ME
    • PRIVACY POLICY
  • COLLABORATE
  • BLOG
    • ART
    • WEDDING
    • LIBRARY
    • DECOR
    • JEWELLERY
    • STATIONARY
    • NAIL ART
    • BAKING
    • CHRISTMAS
    • EASTER
    • ART PRINTS
    • WEDDING STATIONARY
  • CONTACT
Menu

ISOSCELLA

Street Address
City, State, Zip
Phone Number

Your Custom Text Here

ISOSCELLA

  • ABOUT
    • ABOUT ME
    • PRIVACY POLICY
  • COLLABORATE
  • BLOG
  • ART
    • ART
    • WEDDING
    • LIBRARY
  • DIY
    • DECOR
    • JEWELLERY
    • STATIONARY
    • NAIL ART
    • BAKING
    • CHRISTMAS
    • EASTER
  • SHOP
    • ART PRINTS
    • WEDDING STATIONARY
  • CONTACT

NAIL ART // SPOOKTACULAR NAILS

October 30, 2015 isoscella

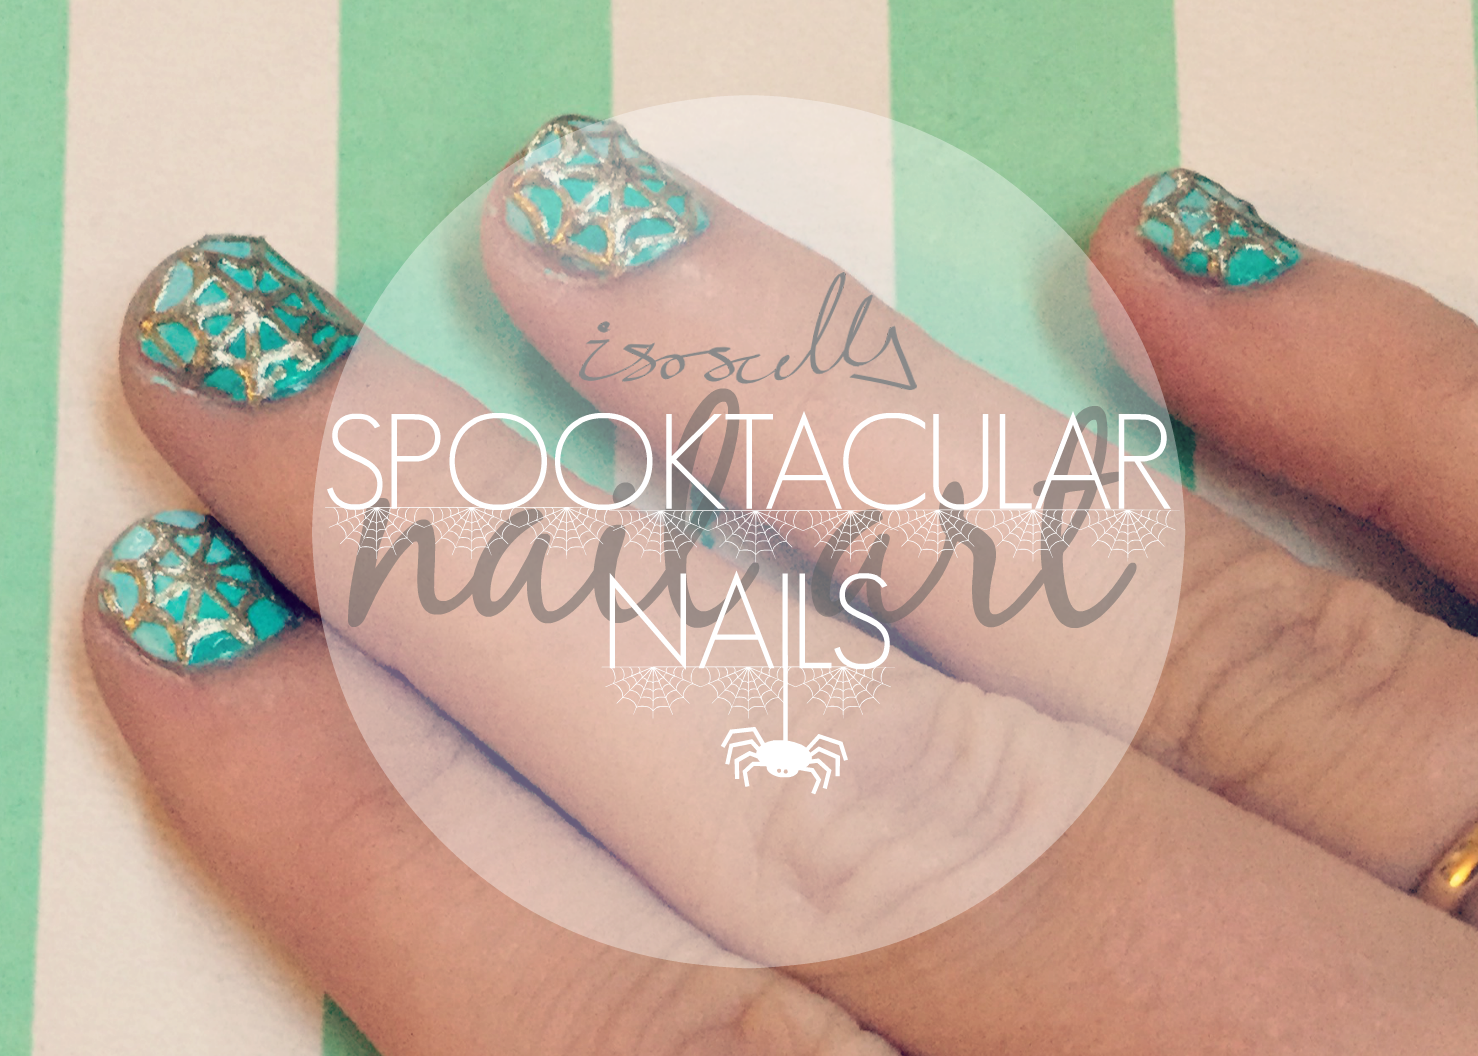
It's almost halloween which means it's time for me to sort out my nails and get them looking less ghastly and more spooktacular. I'm really not a fan of blood and gore and so I really struggled to come up with a halloween-related design for my nails this year. I'm loving the Snow Queen look (probably because it's more festive than it is spooky...) and so I thought I would go with a bit of an icey theme. This definitely inspired my choice of colours, however whilst I was looking for inspiration, I stumbled across this beautiful photograph of a spiders web. I intended to add 'dew drops' like those in the photo but in the end I decided that I quite liked the nail design as it was.

1. Paint all over with a base coat and leave to dry. Here, I used the Sally Hansen Double Duty Base and Top Coat.

2. Paint the bottom half of the nail with mint green and the top half of the nail with a light blue. For this I used Barry M Gelly Hi-Shine nail varnishes in Green Berry and Sugar Apple. I did one nail at a time and used a brush to blend the two colours together slightly as I went.

3. Draw a line down the middle of the nail from top to bottom and a line across the middle of the nail from left to right. For this I used a nail art pen that I bought ages ago from New Look but you could also do this with a pot of nail varnish and a thin paintbrush.

4. Draw a line across from the top left of the nail to the bottom right and the top right to the bottom left. Here, I made sure that each line went through intersection where the lines I had drawn in step 3 crossed over one another.

5. Connect each line with a curved line approximately halfway down. Here, I found it helpful to draw over the line slightly at each end of the curved line.

6. Repeat this closer to the edges of the nail. As in step 5, connect each line with a curved line in the space between the curved lines created in step 6 and the edge of the nail.

7. Once dry, paint all over the whole nail with a clear top coat to protect your hard work! For this I once again used my Sally Hansen Double Duty Base and Top Coat.

AND THAT'S IT!

Let me know what you think and what you're up to for halloween in the comments below.

Happy Halloweeen!

♥

YOU MIGHT ALSO LIKE...
DIY // 6 PUMPKIN PROJECTS
Oct 31, 2018
DIY // 6 PUMPKIN PROJECTS
Oct 31, 2018
Oct 31, 2018
DIY // FALLING LEAVES NO-CARVE PUMPKIN
Oct 23, 2018
DIY // FALLING LEAVES NO-CARVE PUMPKIN
Oct 23, 2018
Oct 23, 2018
DIY // NO CARVE VINTAGE PUMPKINS
Oct 31, 2017
DIY // NO CARVE VINTAGE PUMPKINS
Oct 31, 2017
Oct 31, 2017
DIY // HALLOWEEN HAND-LETTERED PUMPKIN
Oct 30, 2016
DIY // HALLOWEEN HAND-LETTERED PUMPKIN
Oct 30, 2016
Oct 30, 2016
DIY // GLITTER PUMPKIN
Oct 29, 2016
DIY // GLITTER PUMPKIN
Oct 29, 2016
Oct 29, 2016
DIY // SPRAY-PAINTED PUMPKINS
Oct 29, 2016
DIY // SPRAY-PAINTED PUMPKINS
Oct 29, 2016
Oct 29, 2016
NAIL ART // SPOOKTACULAR NAILS
Oct 30, 2015
NAIL ART // SPOOKTACULAR NAILS
Oct 30, 2015
Oct 30, 2015
DIY // NO-MESS MUMPKINS
Oct 26, 2015
DIY // NO-MESS MUMPKINS
Oct 26, 2015
Oct 26, 2015
5 FAVES FRIDAY // CLASSY CRAFTOWEEN
Oct 23, 2015
5 FAVES FRIDAY // CLASSY CRAFTOWEEN
Oct 23, 2015
Oct 23, 2015
In DIY Tags nail art, halloween
← ART // PURRFECT PEPPERDIY // NO-MESS MUMPKINS →
 

Decorating, DIY-ing and doodling my way through life. Have a look around and let’s get creative!

>> FIND OUT MORE <<

Follow
The office is still one of my favourite transformations in the house! 😍

I started by panelling the wall with MDF strips and then painted the wall with a mix of colours. I used three IKEA drawer units for the base of the desk and then secured the de

ART

DIY

LIFE


THE LATEST

Featured
Wooden Mushroom Decor
Apr 26, 2025
Wooden Mushroom Decor
Apr 26, 2025
Apr 26, 2025
Hand-Painted Floral Mural Arch
Mar 29, 2025
Hand-Painted Floral Mural Arch
Mar 29, 2025
Mar 29, 2025
Easy IKEA Antilop Makeover
Mar 1, 2025
Easy IKEA Antilop Makeover
Mar 1, 2025
Mar 1, 2025
Clay Leaf Shelf
Jun 29, 2024
Clay Leaf Shelf
Jun 29, 2024
Jun 29, 2024
Nursery Feature Wall
Jun 15, 2024
Nursery Feature Wall
Jun 15, 2024
Jun 15, 2024


THE GREATEST

Featured
DIY // IKEA LACK TABLE INDUSTRIAL HACK
Sep 22, 2020
DIY
DIY // IKEA LACK TABLE INDUSTRIAL HACK
Sep 22, 2020
DIY
Sep 22, 2020
DIY
DIY // CLAY ALL-SEEING EYE MIRROR
Aug 14, 2020
DIY
DIY // CLAY ALL-SEEING EYE MIRROR
Aug 14, 2020
DIY
Aug 14, 2020
DIY
DIY // CLAY FACE DISH
Apr 29, 2020
DIY
DIY // CLAY FACE DISH
Apr 29, 2020
DIY
Apr 29, 2020
DIY
DIY // ABSTRACT ART FLORAL EGGS
Mar 25, 2020
DIY
DIY // ABSTRACT ART FLORAL EGGS
Mar 25, 2020
DIY
Mar 25, 2020
DIY
DIY // WIRE FACE EARRINGS
Feb 16, 2020
DIY
DIY // WIRE FACE EARRINGS
Feb 16, 2020
DIY
Feb 16, 2020
DIY

Follow
^^ BACK TO TOP
How does Monday come round so quick?!Wishing I could cosy up here today ✨

#mondaymood #storyofmyhome #mydailyhomesquare #interiordesign #budgetdiy #realstylishhomes #ourdiyhomes #femalediycollective #discoverunder5k #myhousethismonth #myhousedownsou
I&rsquo;ve got the day off today (woop!) and although it&rsquo;s not quite warm enough to sit out here yet, the sun is shining and I think a little walk to blow out the cobwebs is exactly what I need. Hope Monday is treating you well! ☀️

#summerdrea
Had such a lovely day seeing one of my besties and her adorable new baby that I completely forgot to share today&rsquo;s new blog post!

Head over to the blog for all the details of this easy DIY ring dish 🔝✨

#diy #diyhomedecor #diyhome #diyvalenti
That sunshine 👌🏻☀️

#mycosyhome #livingroomdecor #livingroominspo #mydiymydecor #homeobsessed #lovemydecor #homeinterioruk #discoverunder5k #diyhome #diyhomedecor #myhousethismonth #myhousedownsouth #realstylishhomes #ourdiyhomes #happythursday #in
A little corner our home on this chilly Tuesday morning ✨
.
.
#interior #homeobsessed #mycosyhome #homeinterioruk #instadecorating #homesofinstagram #happymonday #mondaymotivation #instainteriors #cornersofmyhome #myhousethismonth #myhousedownsouth #

Copyright 2021 isoscella. All rights reserved.

Powered by Squarespace