
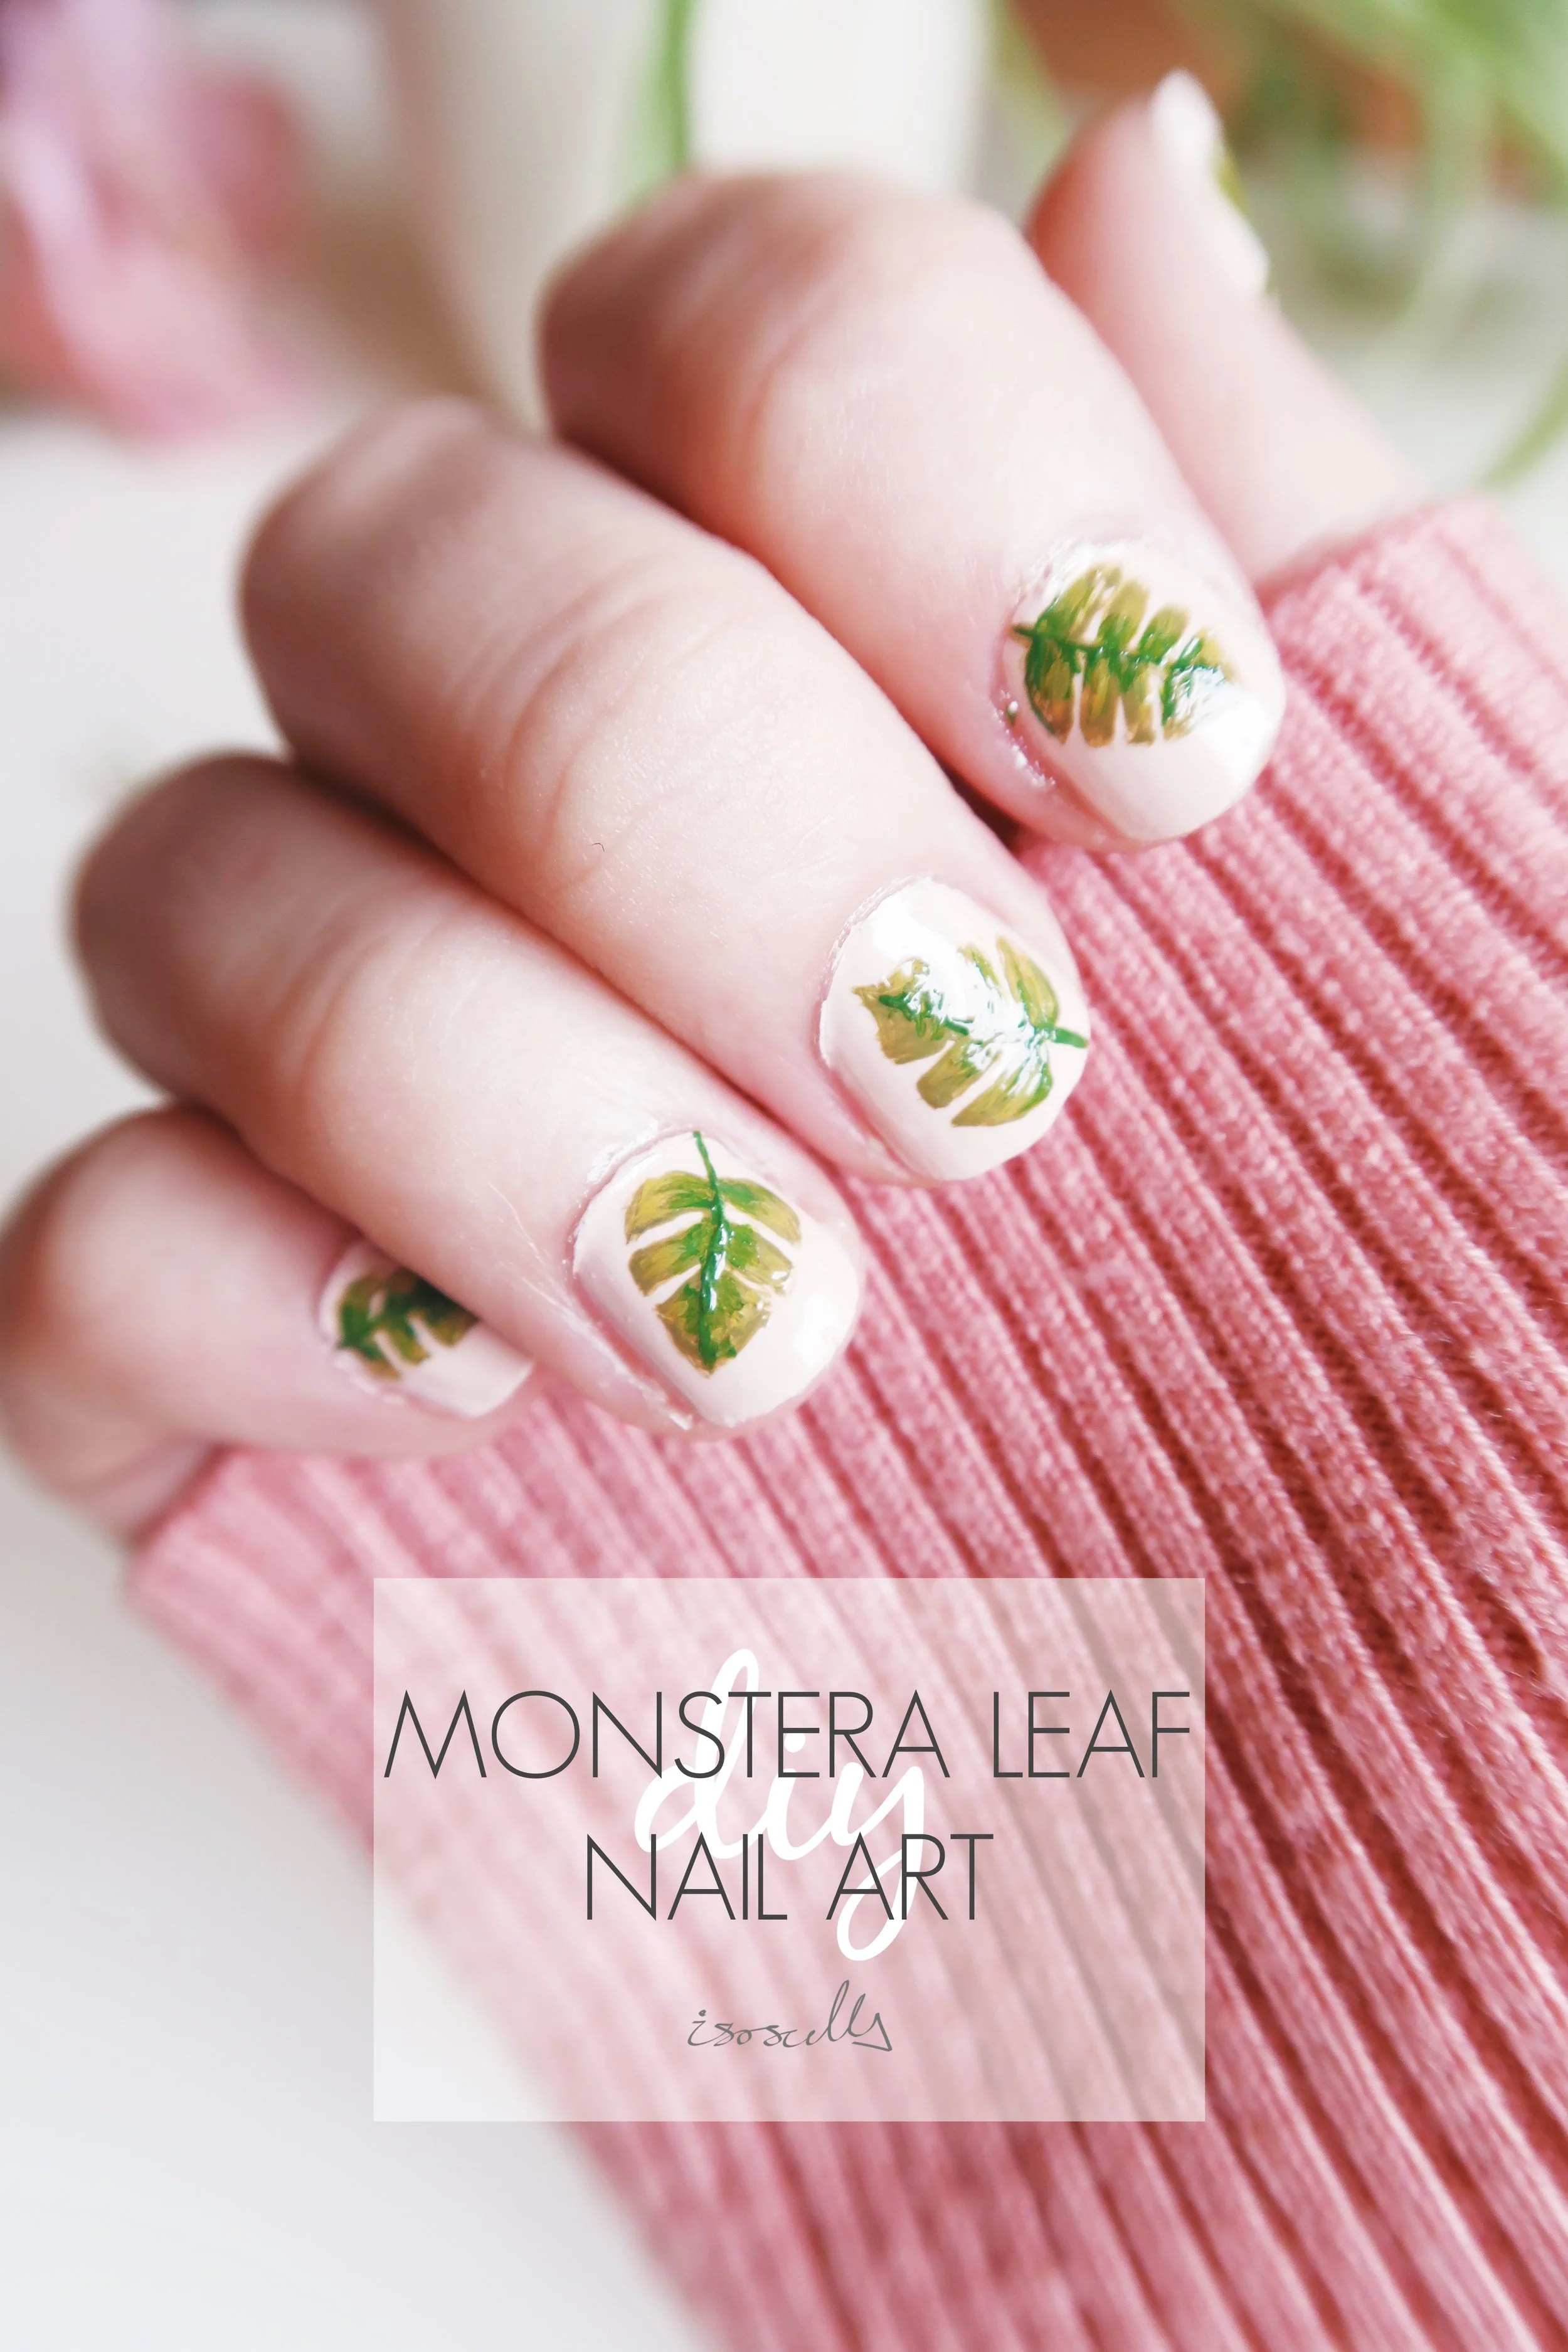
Monstera leaves are everywhere at the moment and what better place to have them than on your nails! Follow this tutorial to create this DIY monstera leaf nail art using acrylic paint!
Read moreNAIL ART // SPRING BLOSSOM NAILS
Isn't Spring just so lovely?! Here in the UK, we've just started to get some beautiful sunshine, daffodils are cropping up everywhere and the trees have started to blossom. It really does make everything so much lovelier. It seems a shame to leave all that loveliness outside though, and so as a much needed distraction from my thesis, I decided to procrastinate by doing some cherry blossom nail art.
Read moreNAIL ART // SPRING CONFETTI NAILS
It's not long until Spring now; the 1st March is just around the corner, the days are ever so slowly becoming longer and I am more than a little bit excited to break out the pastel shades, put my winter coat away and see some sunshine. In this spirit, at the weekend I gave my nails a bit of a Spring-apt overhaul using three of my favourite pastel-coloured nail polishes.
Read moreNAIL ART // EASY GLITTER STRIPED NAILS
Christmas and new year celebrations may be well and truly over but with all the beautiful sparkly nail varnishes I got in my Ciate London Mini Mani Month 2016, I am determined to find a way to continue the party on my nails...
Read more7 DAYS OF BLOGMAS // DAY 2: EASY SANTA HAT NAIL ART

Every year, I see other bloggers and vloggers doing some sort of Christmas countdown and every year I think to myself that I wish I had been organised enough to do one myself. So this year, although I still haven't been organised enough to do a countdown for the whole of December (I am also supposed to be writing my thesis!), I thought I would attempt a smaller countdown; my very own 7 Days of Blogmas. Make sure you don't miss a single post by following Isoscella on Bloglovin.
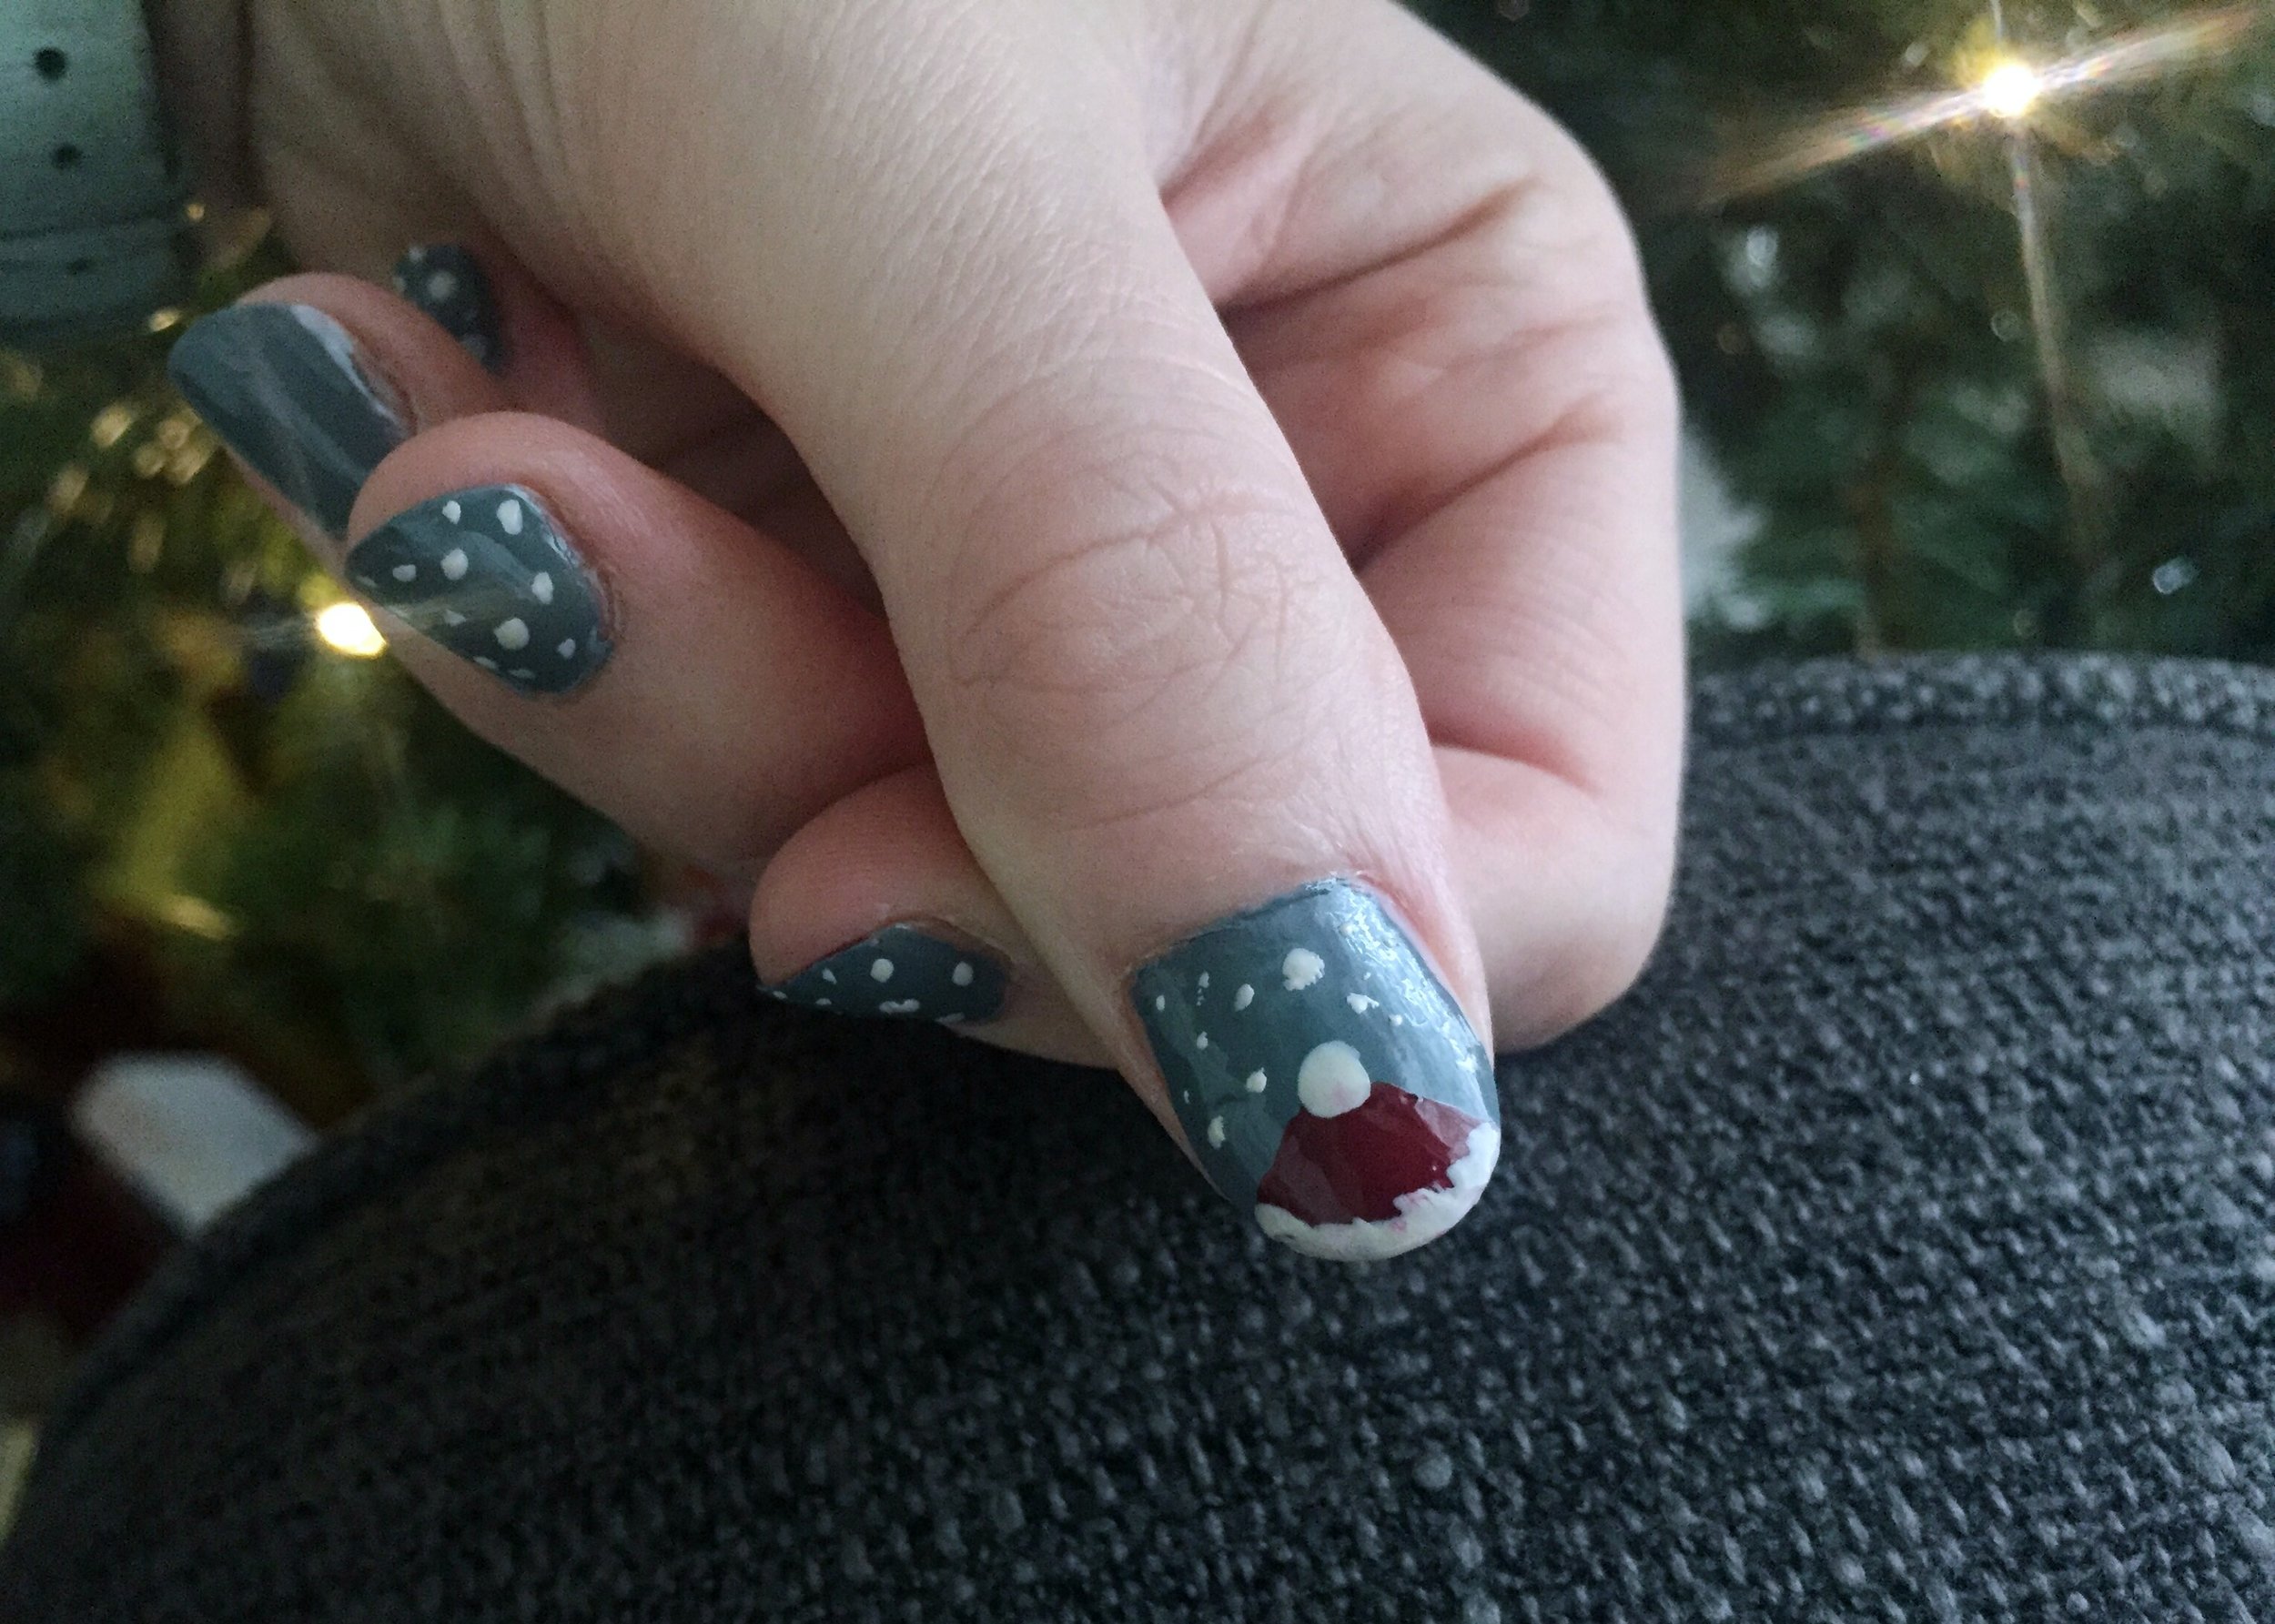
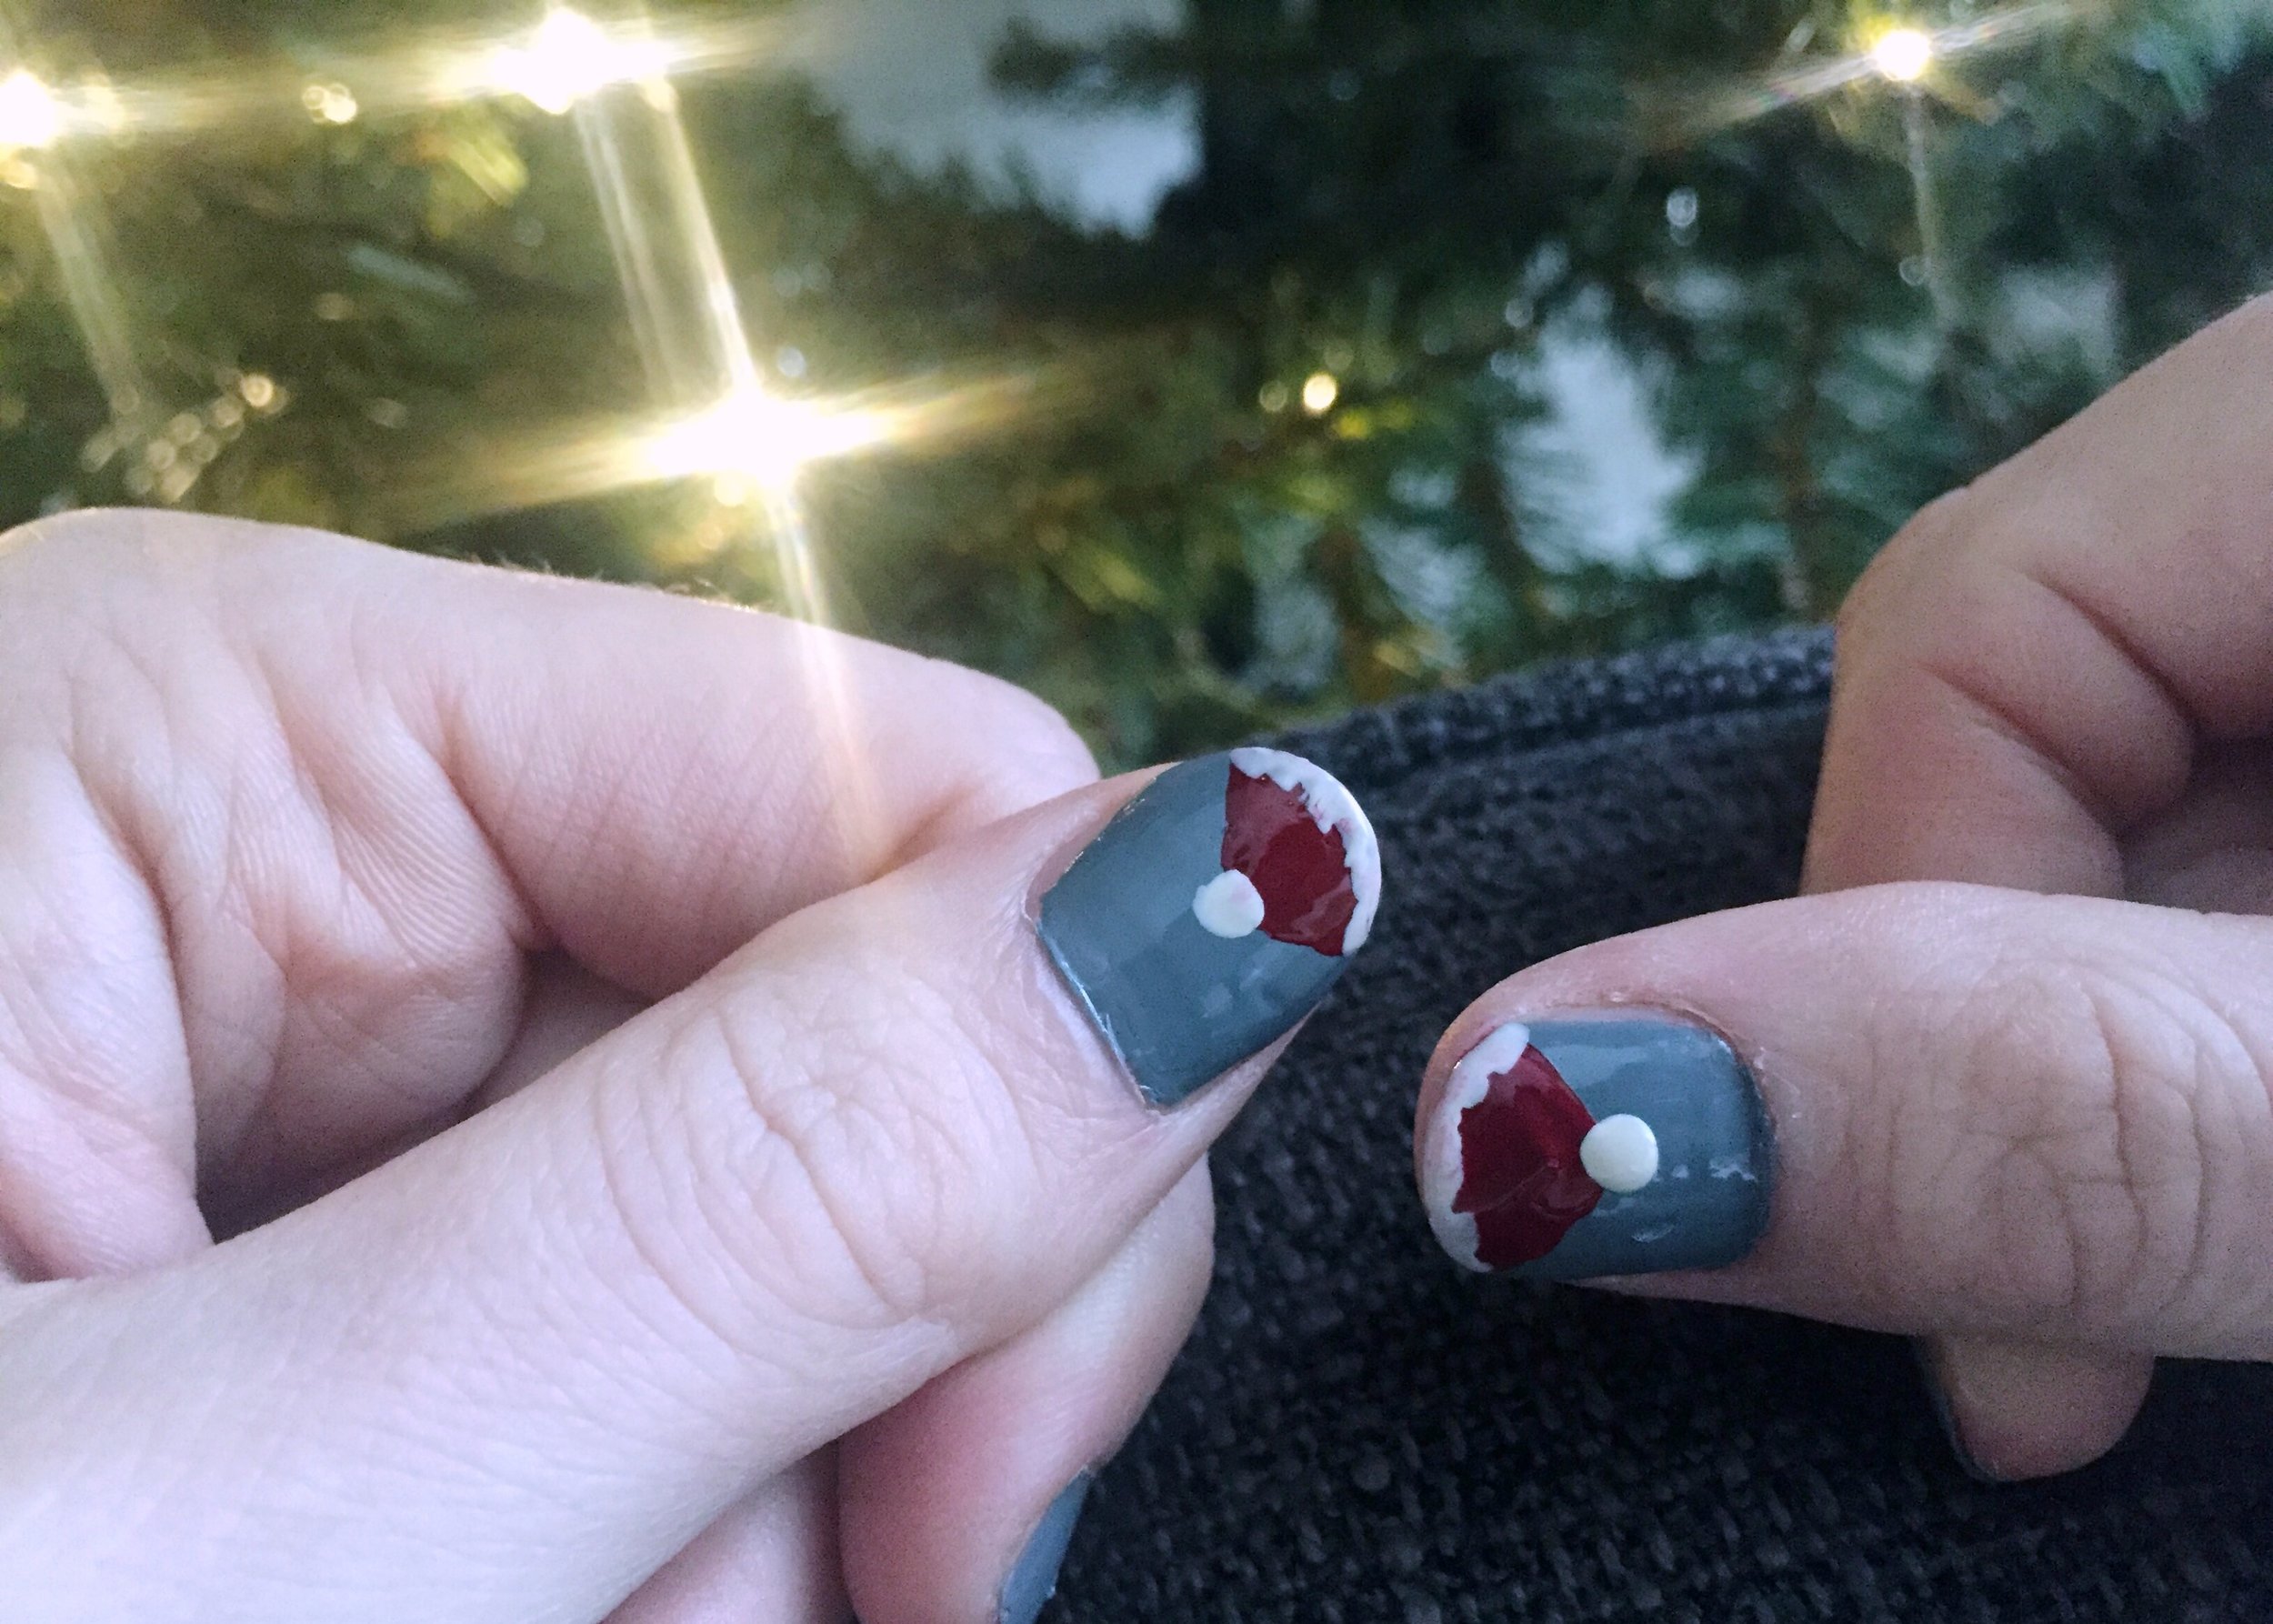
It's Day 2 of Isoscella's 7 Days of Blogmas and today I'm sharing another really quick and easy DIY. It's been a long time since I shared any nail art DIY's on here - mainly because there are people out there who are far more skilled at it than me (as I'm sure you'll be able to tell from the photos!) - but at this time of year I do love to do a festive mani and so I thought I'd share with you a staple of mine. Keep reading to find out how I do it and what I use...


1. Paint your nails with a clear base coat. Here I used a Sally Hansen base coat which strengthens and smooths your nails.
2. Paint your nails all over with one colour. I chose this lovely dark grey as I wanted my hat and snow to really stand out but a navy or christmas green would also look fab.
3. Using a red nail varnish, paint a triangle at the tip of your nails. I did this carefully with the brush that comes with the varnish at the tip of my nails but you could also do it at the base.
4. Add a big white circle at the top of the triangle. Once your red triangle is dry, use a white nail varnish and just the brush that comes with it to blob on a nice big fluffy bobble at the tip of the red triangle. As it's supposed to be fur, it doesn't matter if it's not perfect!
5. Paint several white 'blobs' overlapping at the triangle base. Using the same white nail varnish, add several overlapping blobs at the base of the triangle. Again, this doesn't have to be perfect as it's fur!
...and that's it!

Don't forget to join me tomorrow for some more festive fun as part of my 7 Days of Blogmas!
Let me know what you think in the comments below.
♥


