• ABOUT ME
    • PRIVACY POLICY
  • COLLABORATE
  • BLOG
    • ART
    • WEDDING
    • LIBRARY
    • DECOR
    • JEWELLERY
    • STATIONARY
    • NAIL ART
    • BAKING
    • CHRISTMAS
    • EASTER
    • ART PRINTS
    • WEDDING STATIONARY
  • CONTACT
Menu

ISOSCELLA

Street Address
City, State, Zip
Phone Number

Your Custom Text Here

ISOSCELLA

  • ABOUT
    • ABOUT ME
    • PRIVACY POLICY
  • COLLABORATE
  • BLOG
  • ART
    • ART
    • WEDDING
    • LIBRARY
  • DIY
    • DECOR
    • JEWELLERY
    • STATIONARY
    • NAIL ART
    • BAKING
    • CHRISTMAS
    • EASTER
  • SHOP
    • ART PRINTS
    • WEDDING STATIONARY
  • CONTACT

DIY Floating Shelves

January 28, 2023 Isoscella M

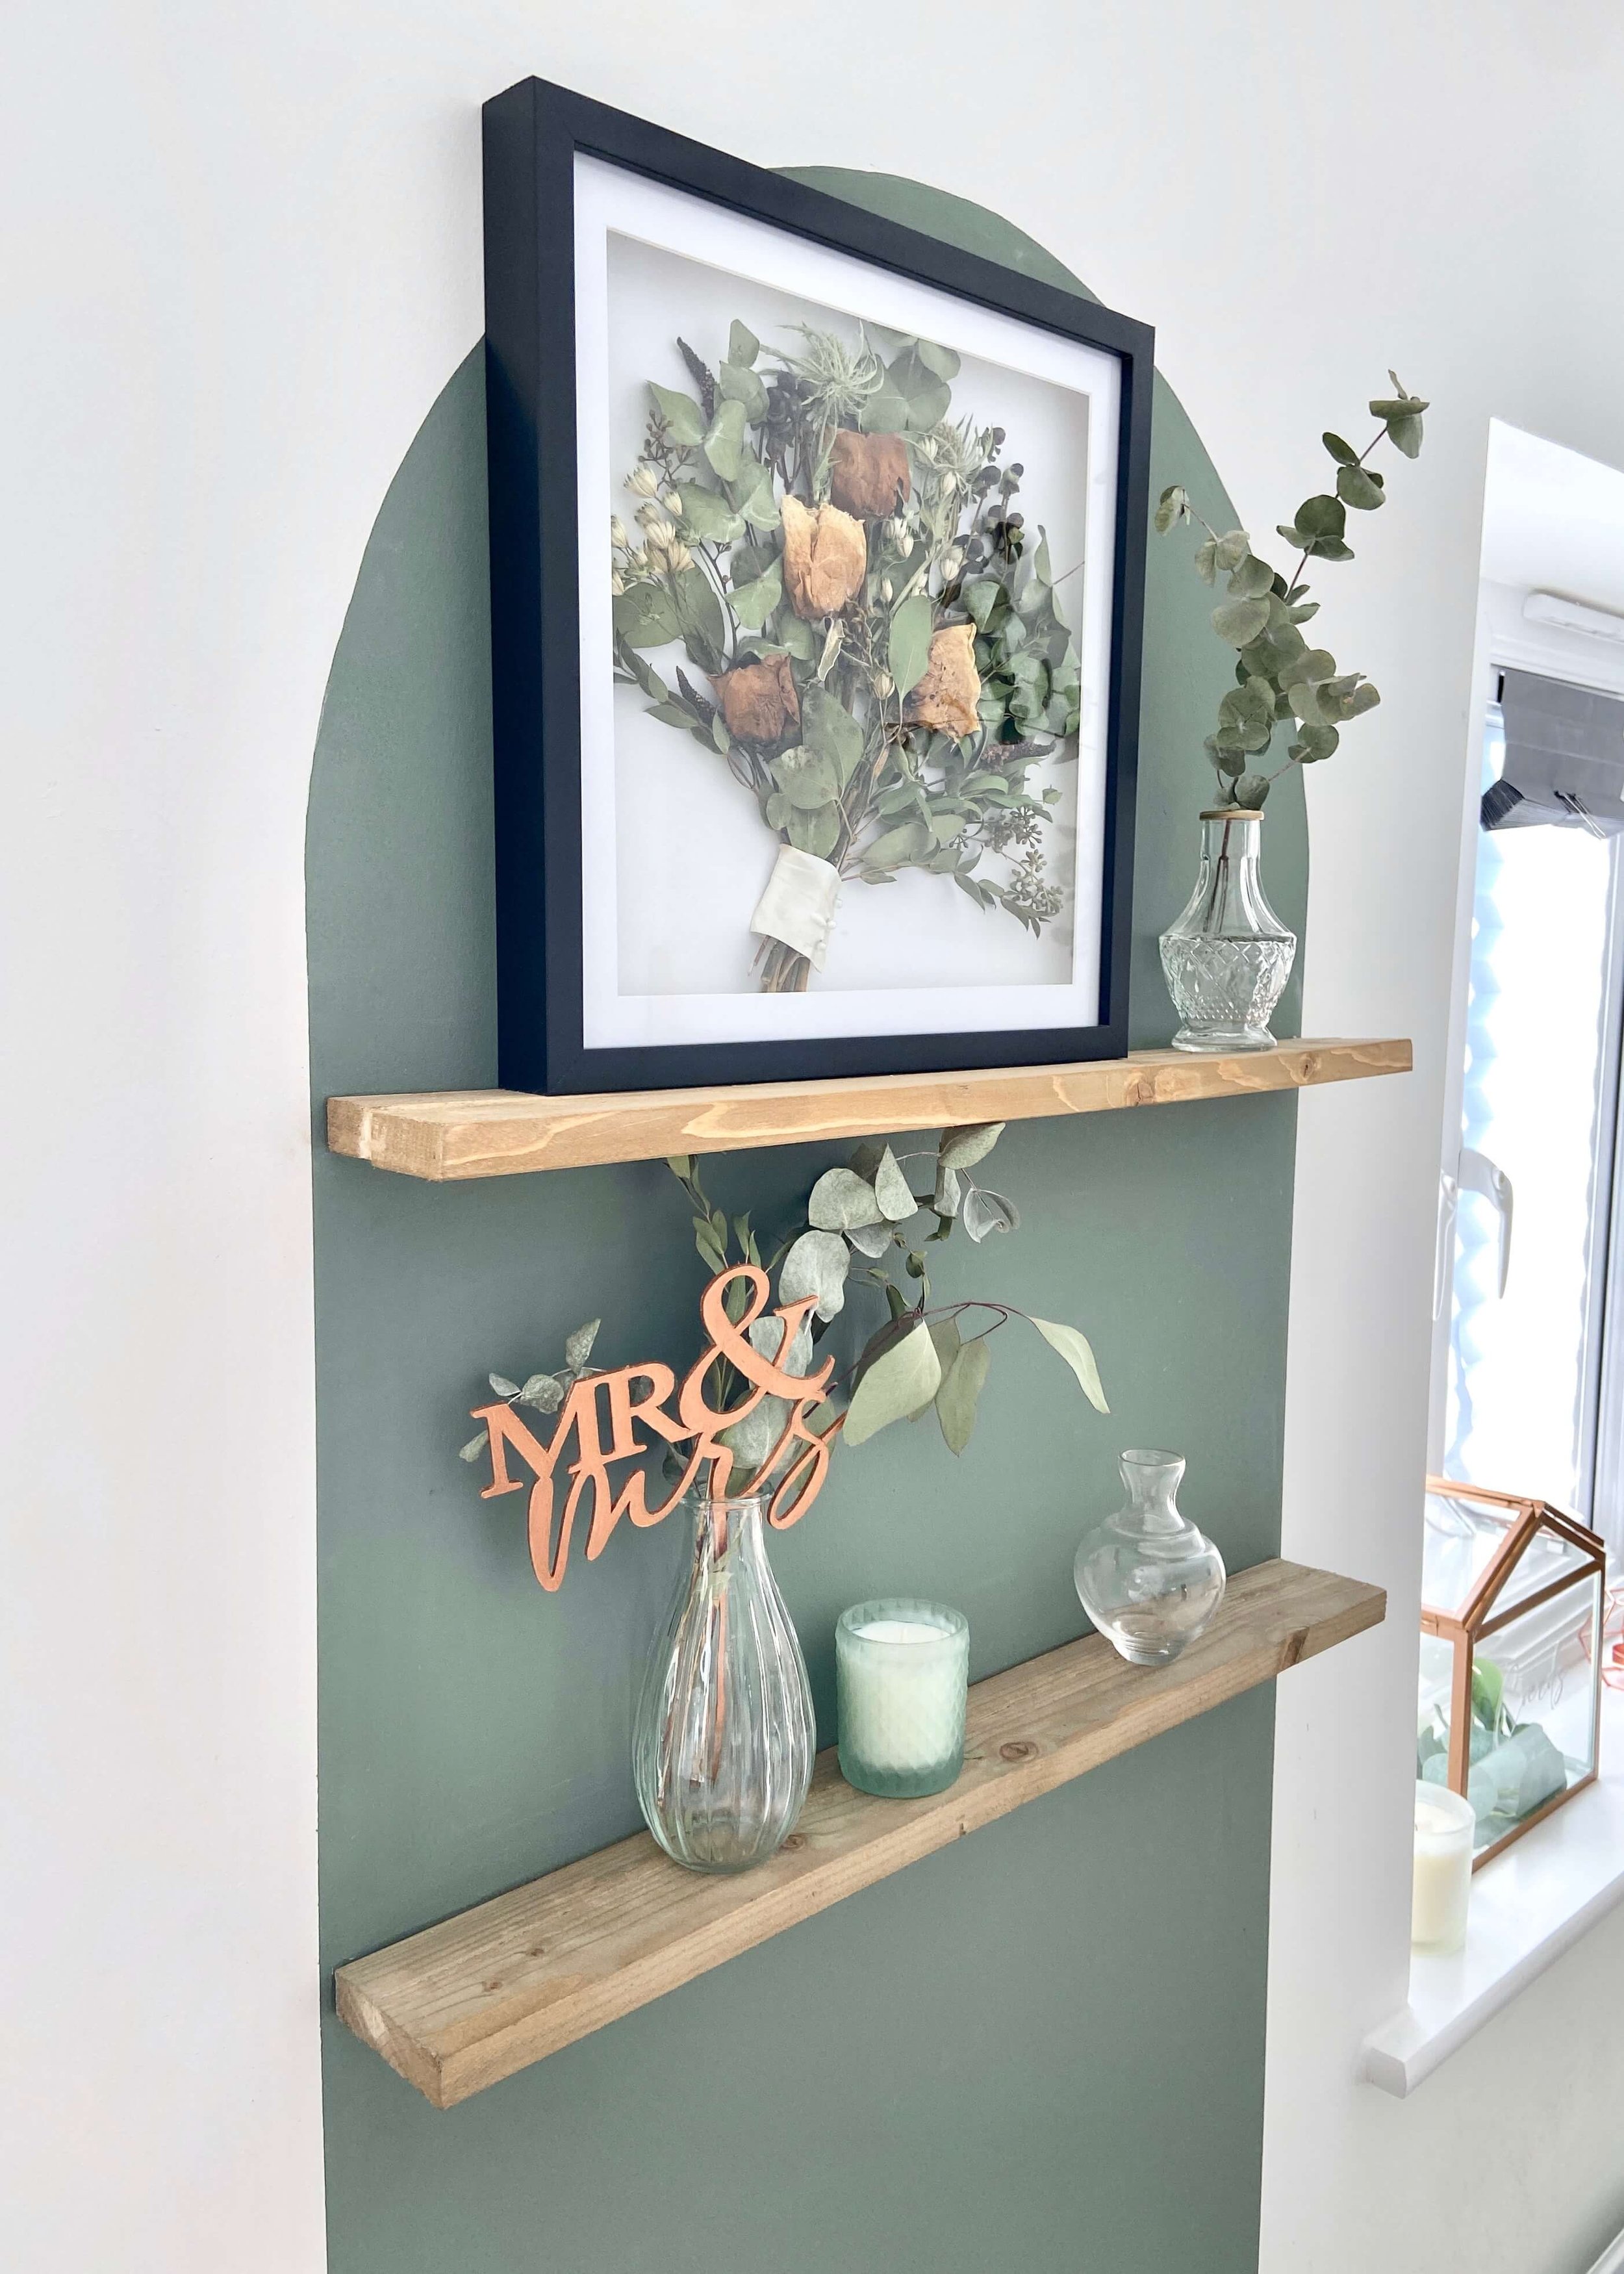
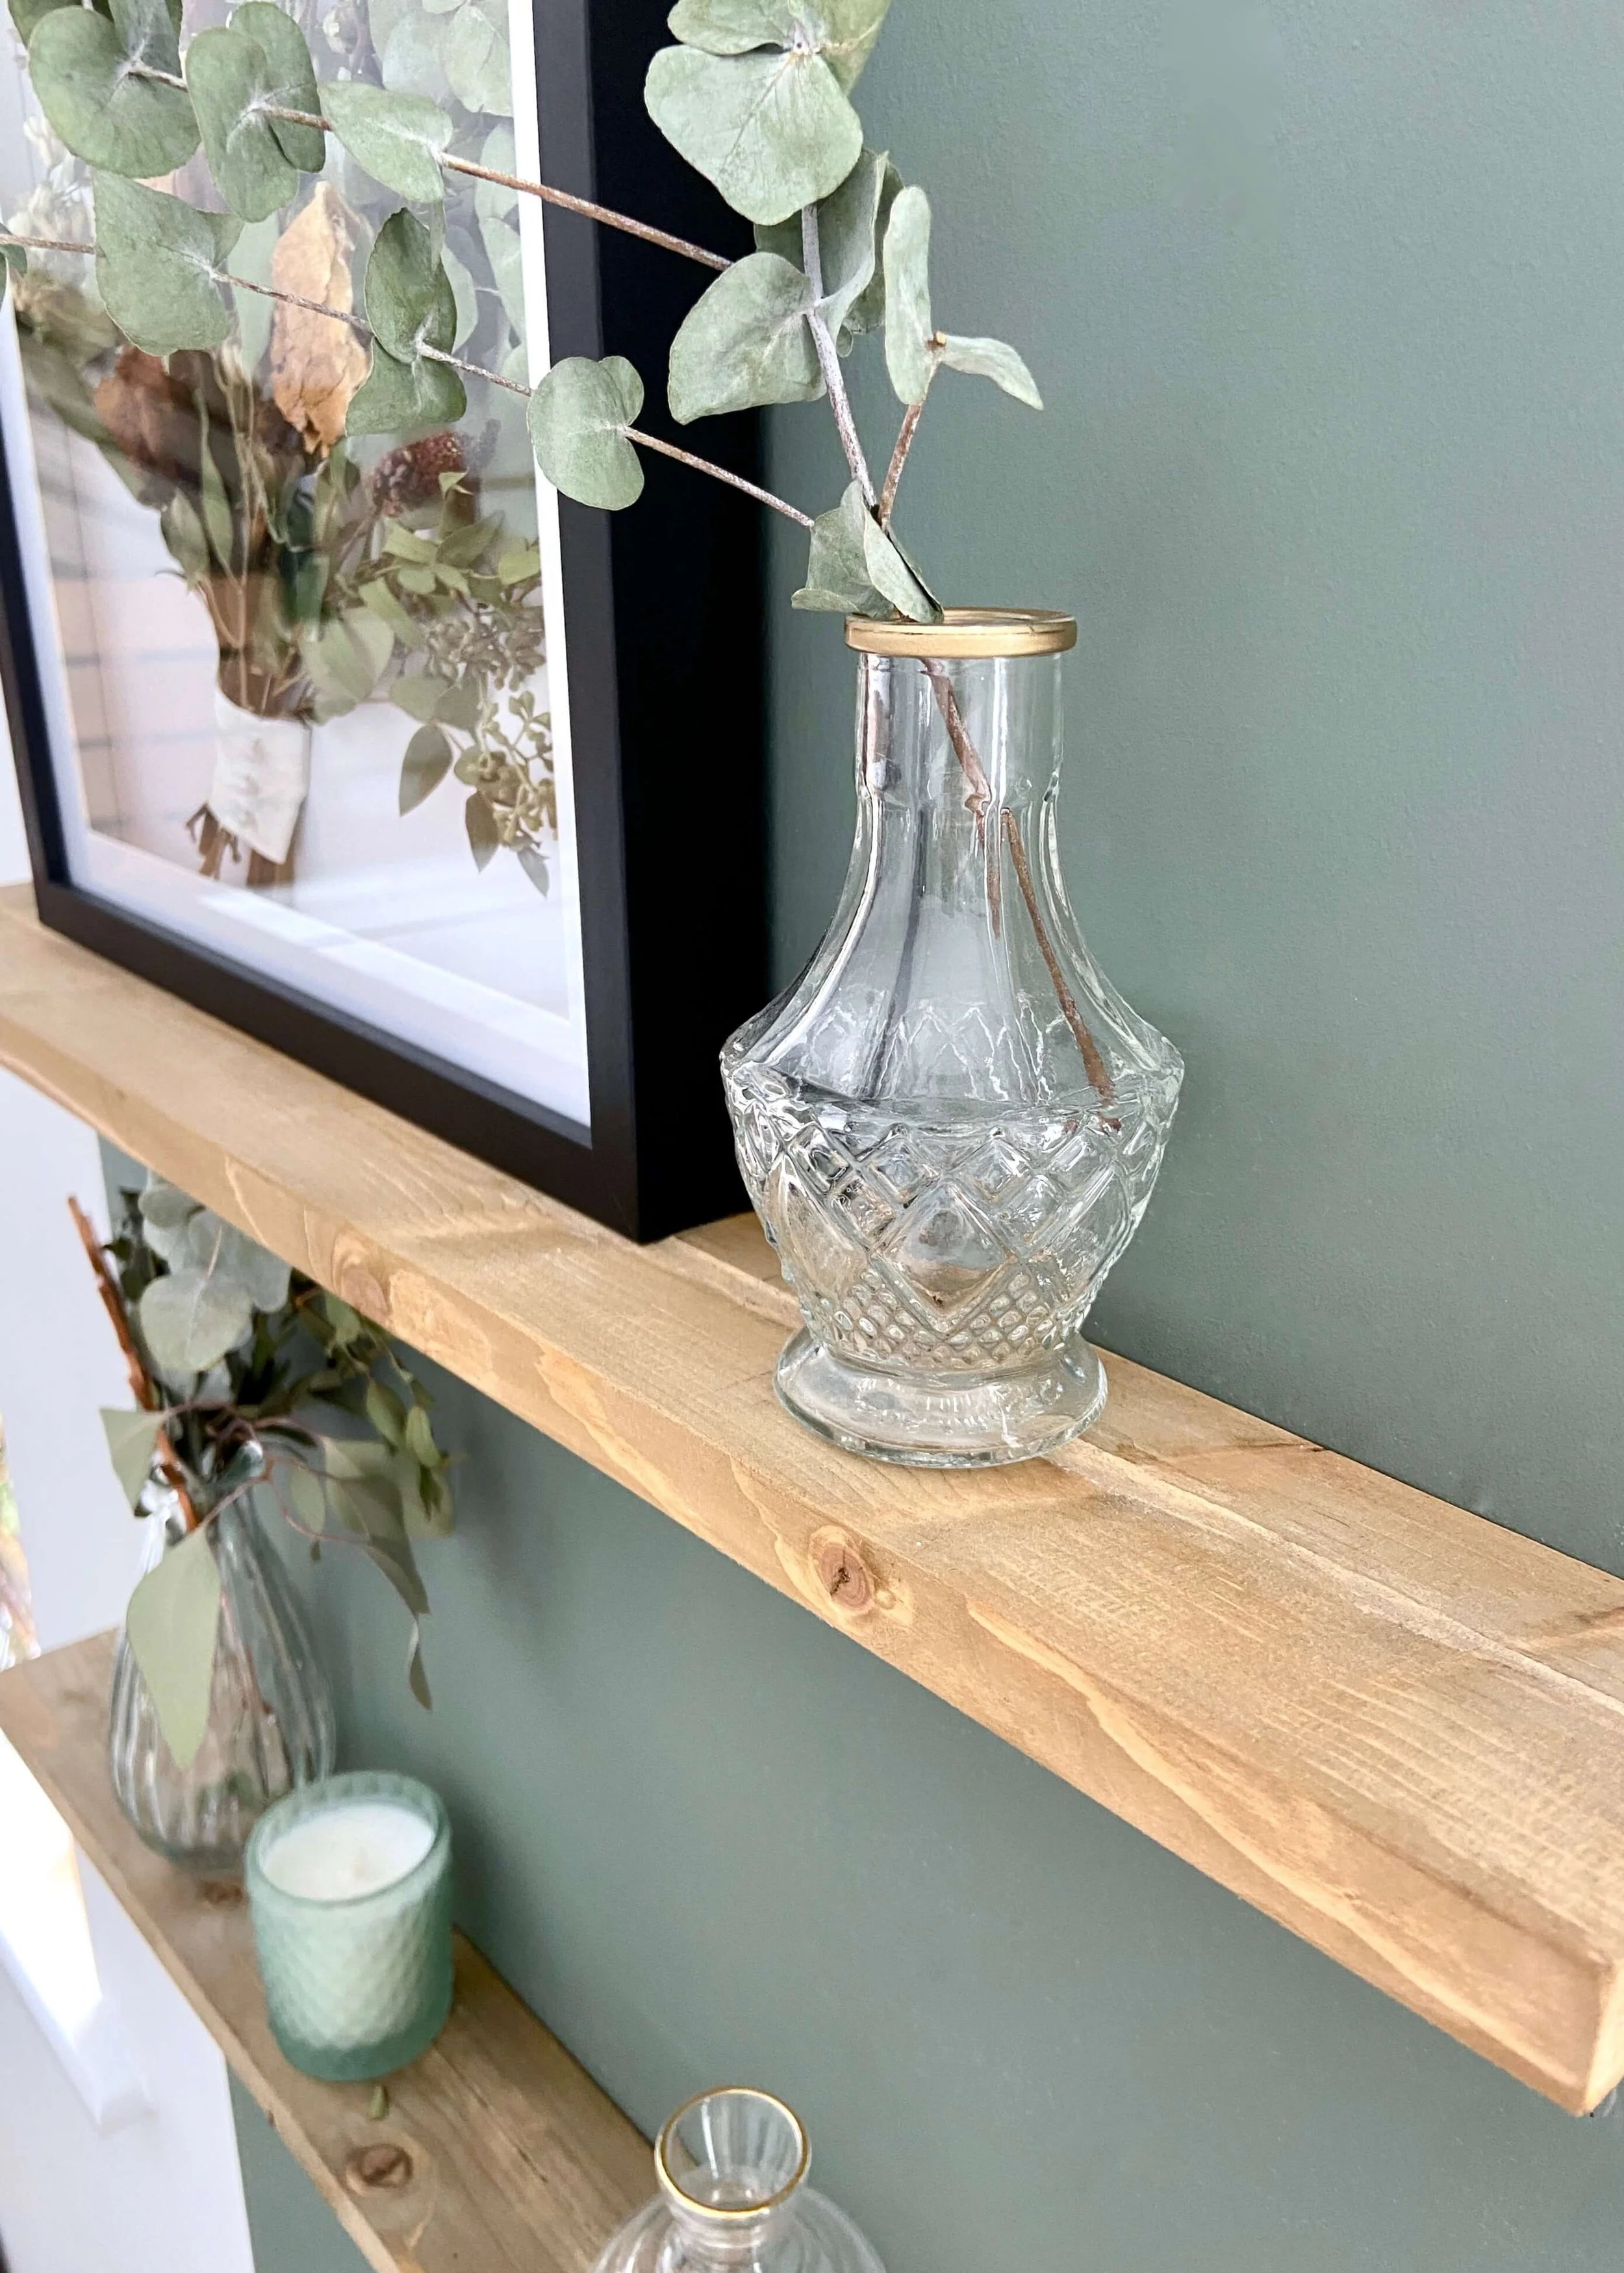
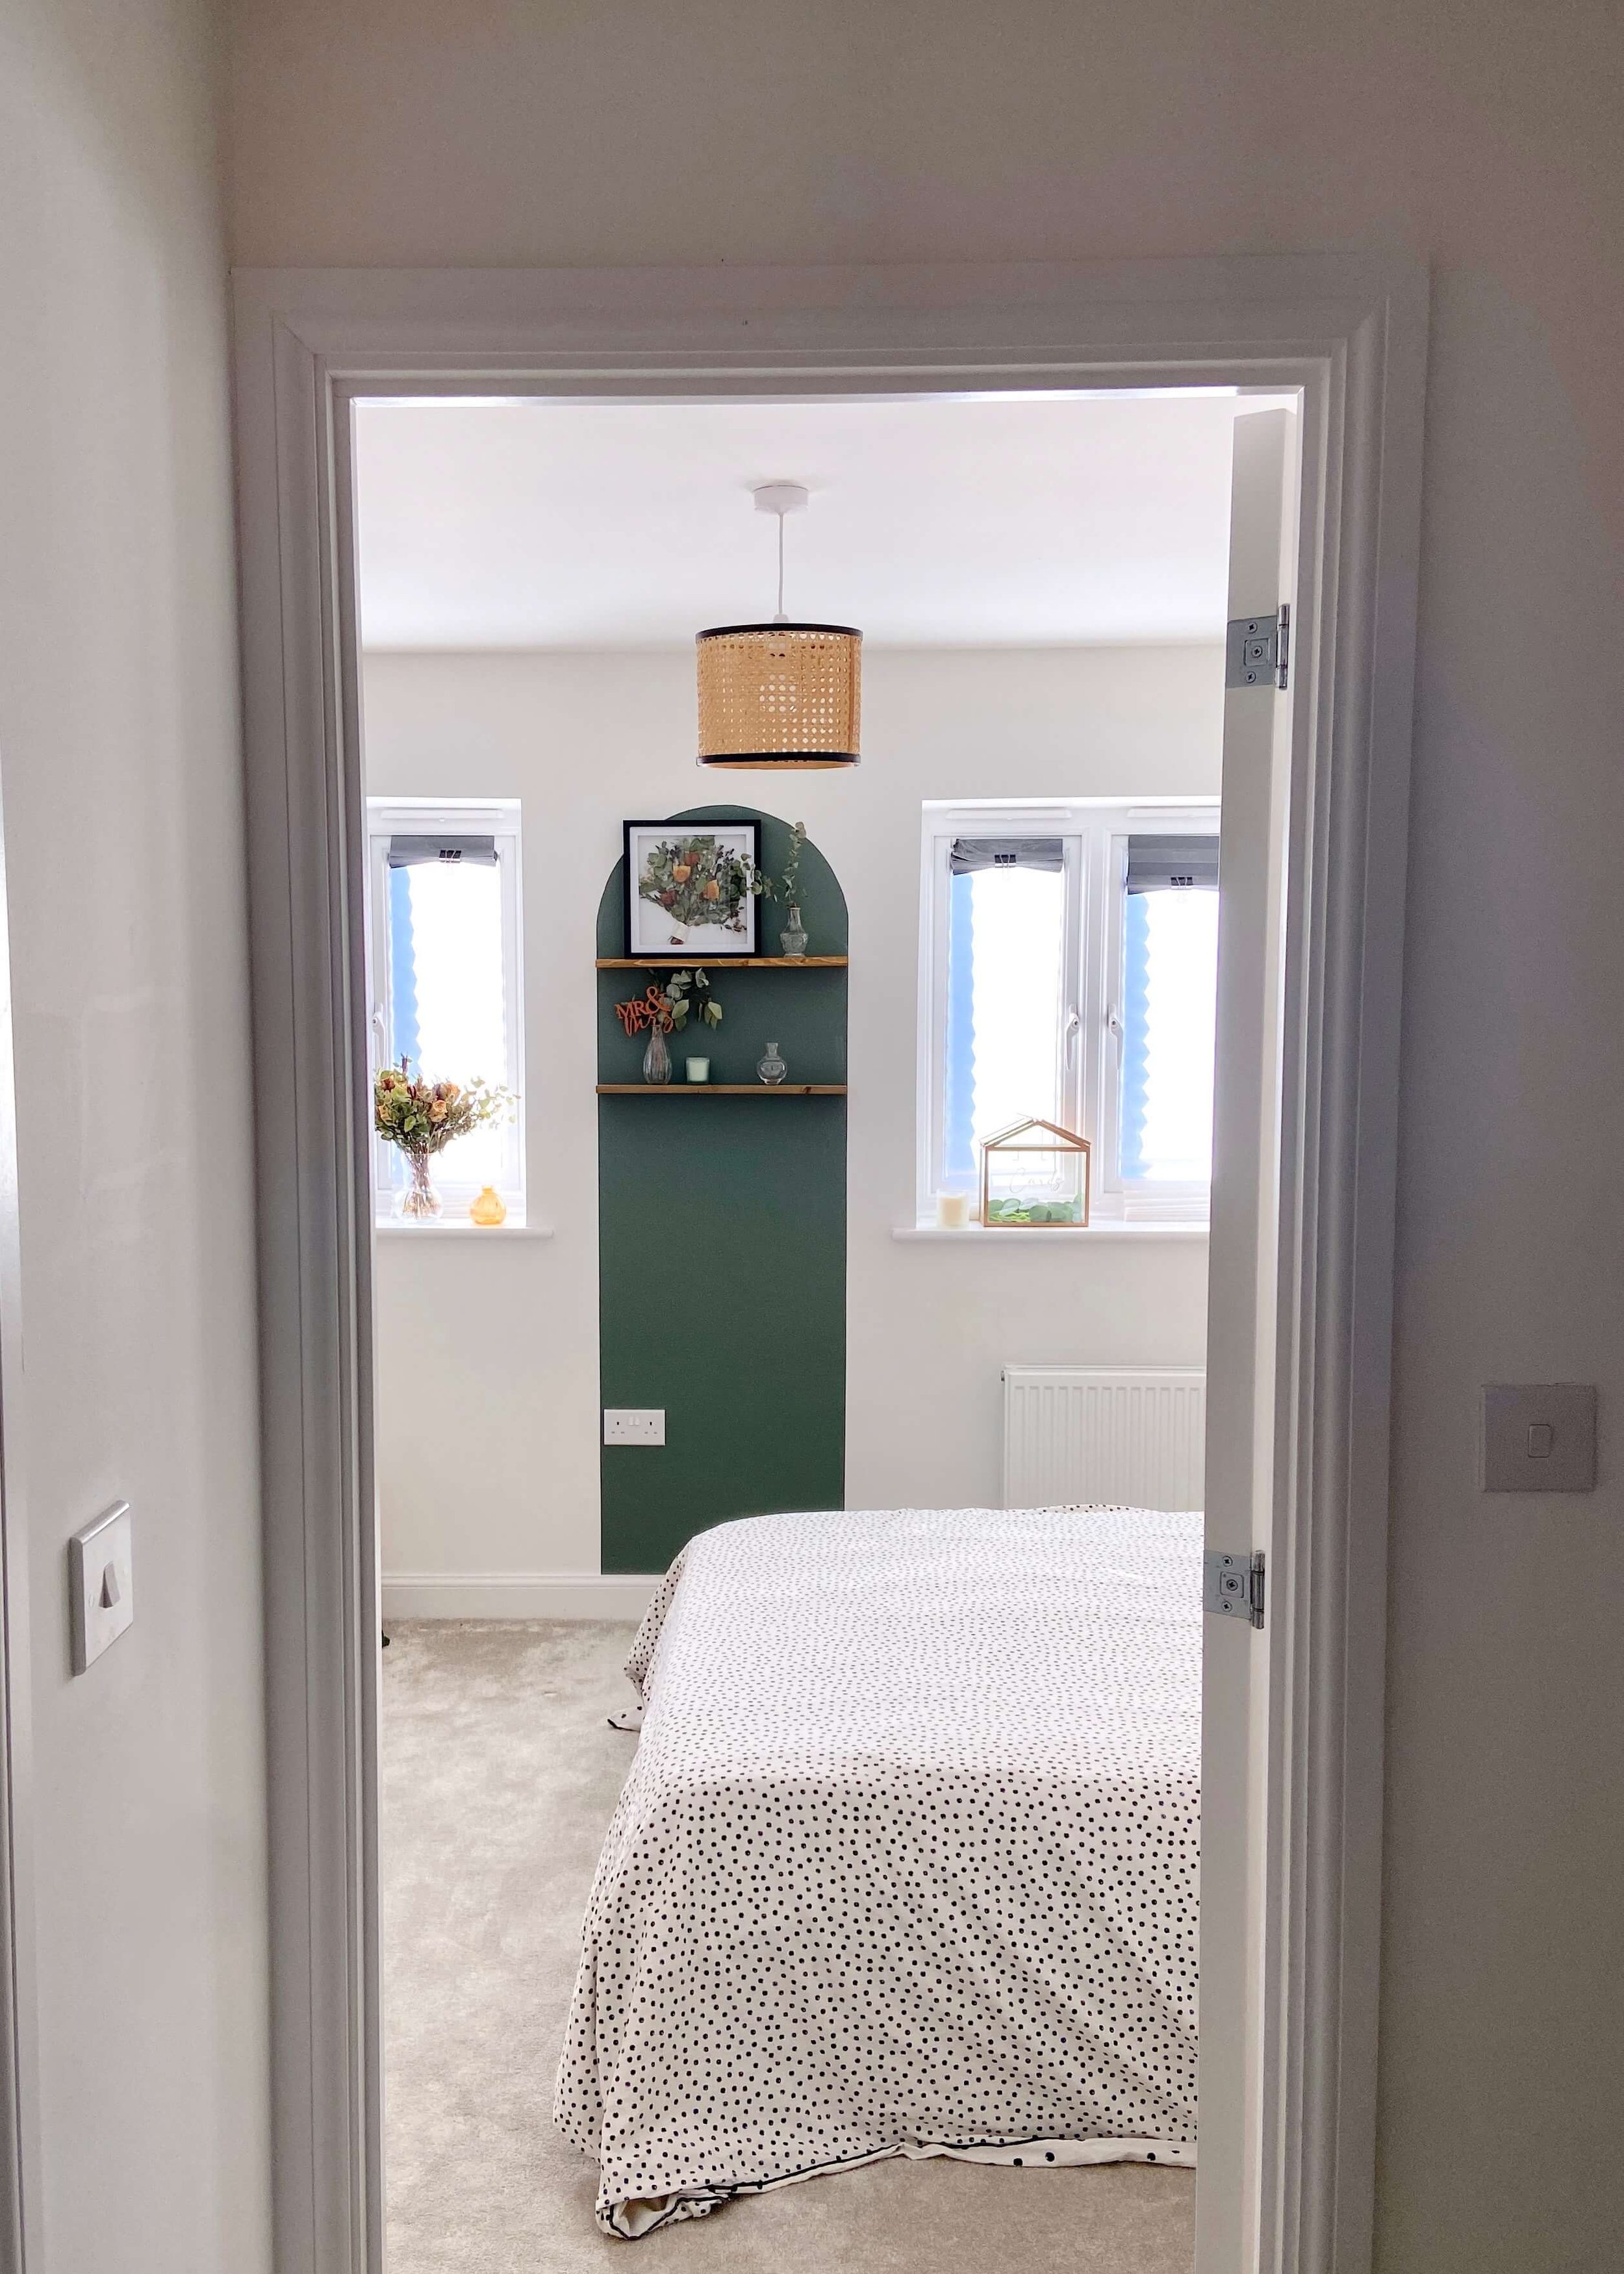
Create your own DIY floating shelves with leftover wood and wooden dowels

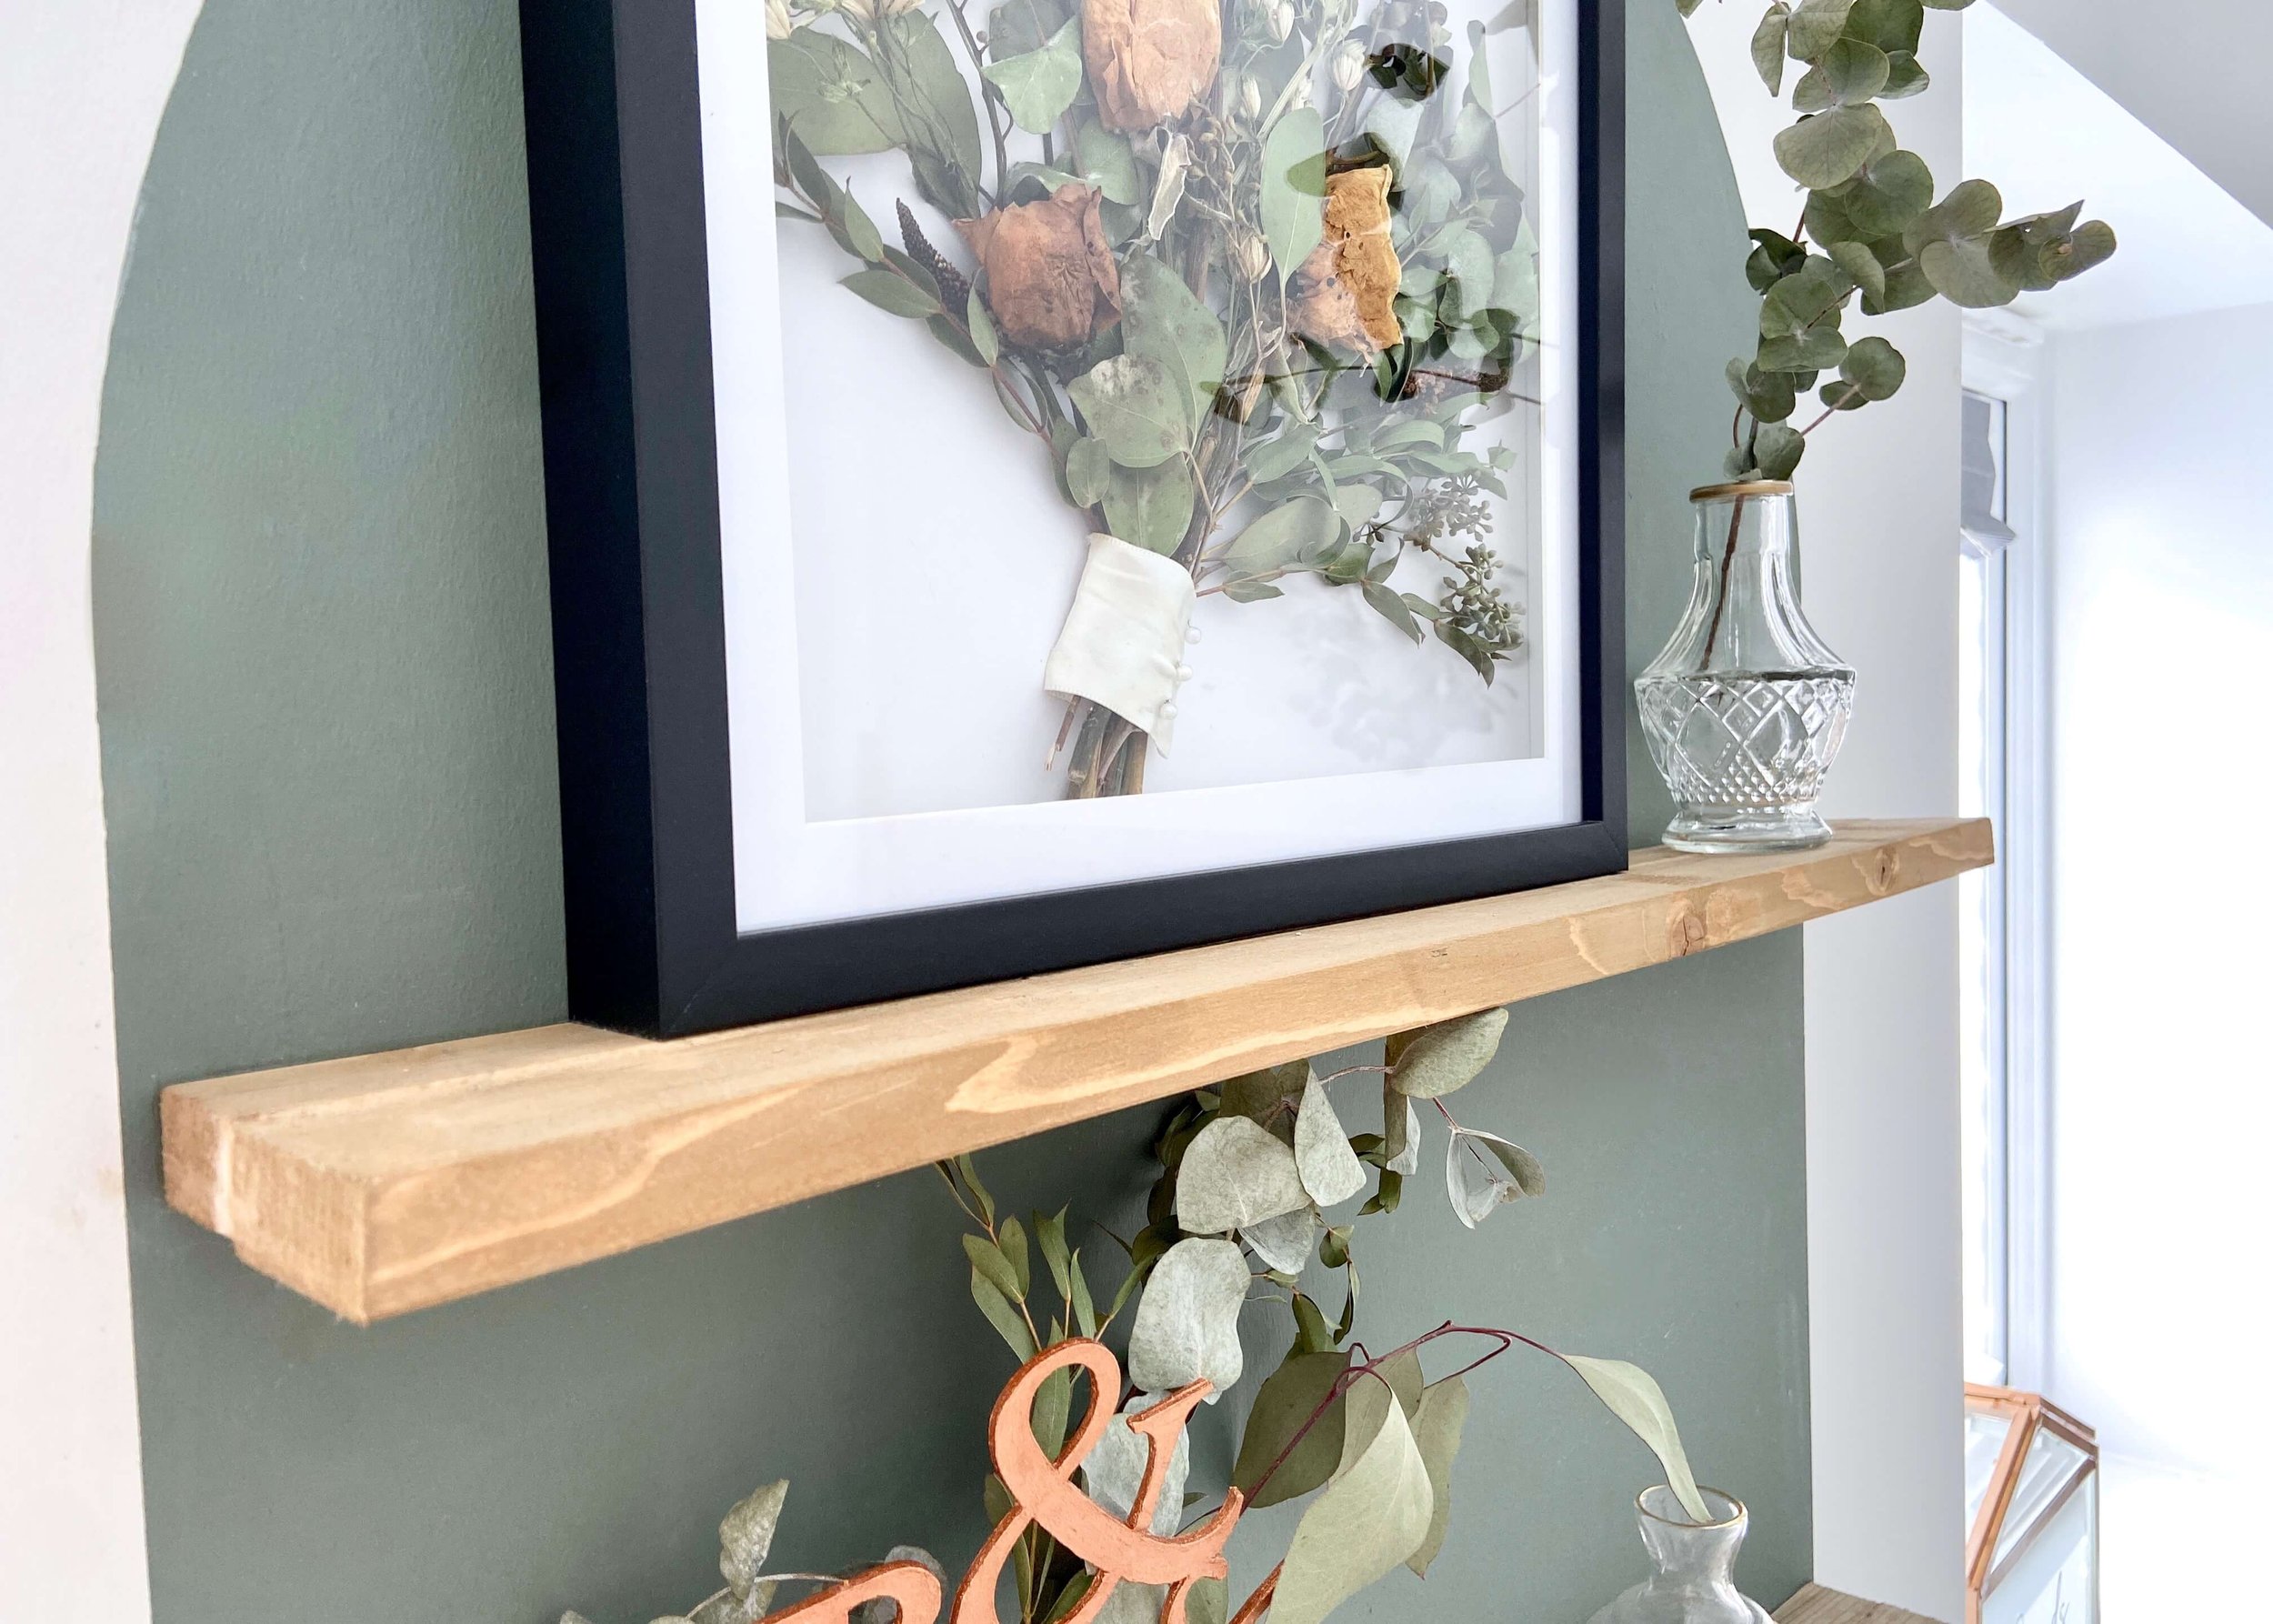
I was expecting to post about our new wardrobe this weekend but after several delays with it being delivered and installed we’ll probably only be getting around to finishing as this post goes live! Still, this is a project that I’ve been slowly working on for a while, and the perfectionist in me has stopped me from saying it’s finished. I may well add another shelf underneath, but whilst this is a guest room it makes most sense to keep the shelves out of the way of people bumping into them. I love the look of floating shelves, and am so glad I had a go at making these myself.

If I had the right tools, like a table saw or circular saw, this would have taken no where near as long and would have been no where near as strenuous. I really do need to invest in some more tools, but the last time I bought a jigsaw I ended up taking it back as I could barely hold it whilst it cut let alone actually cut straight or accurate lines with it. Anyone else had that problem? Perhaps it was the make and model (it was cheap!) or maybe I’m just really physically weak… Let me know below if you have any tips or tool recommendations!

The shelves are FAR from perfect; the join between the front and back of the shelves would be much better had I had the correct tools, and for some unknown reason to me, the two shelves came out ever so slightly different shades using the exact same stain… BUT I’m no wood worker so I’m pretty proud of myself for this one! I hope you like this project as much as I do, who knew you could make floating shelves yourself from a length of pine and some dowels! Let me know what you think, don’t forget to share and subscribe, and keep reading for how I did it…

Wood

Wood saw

Mitre box

Dowels

Wood filler

Wood stain

Drill

DIY floating wood shelves
cut wood length ways

1.

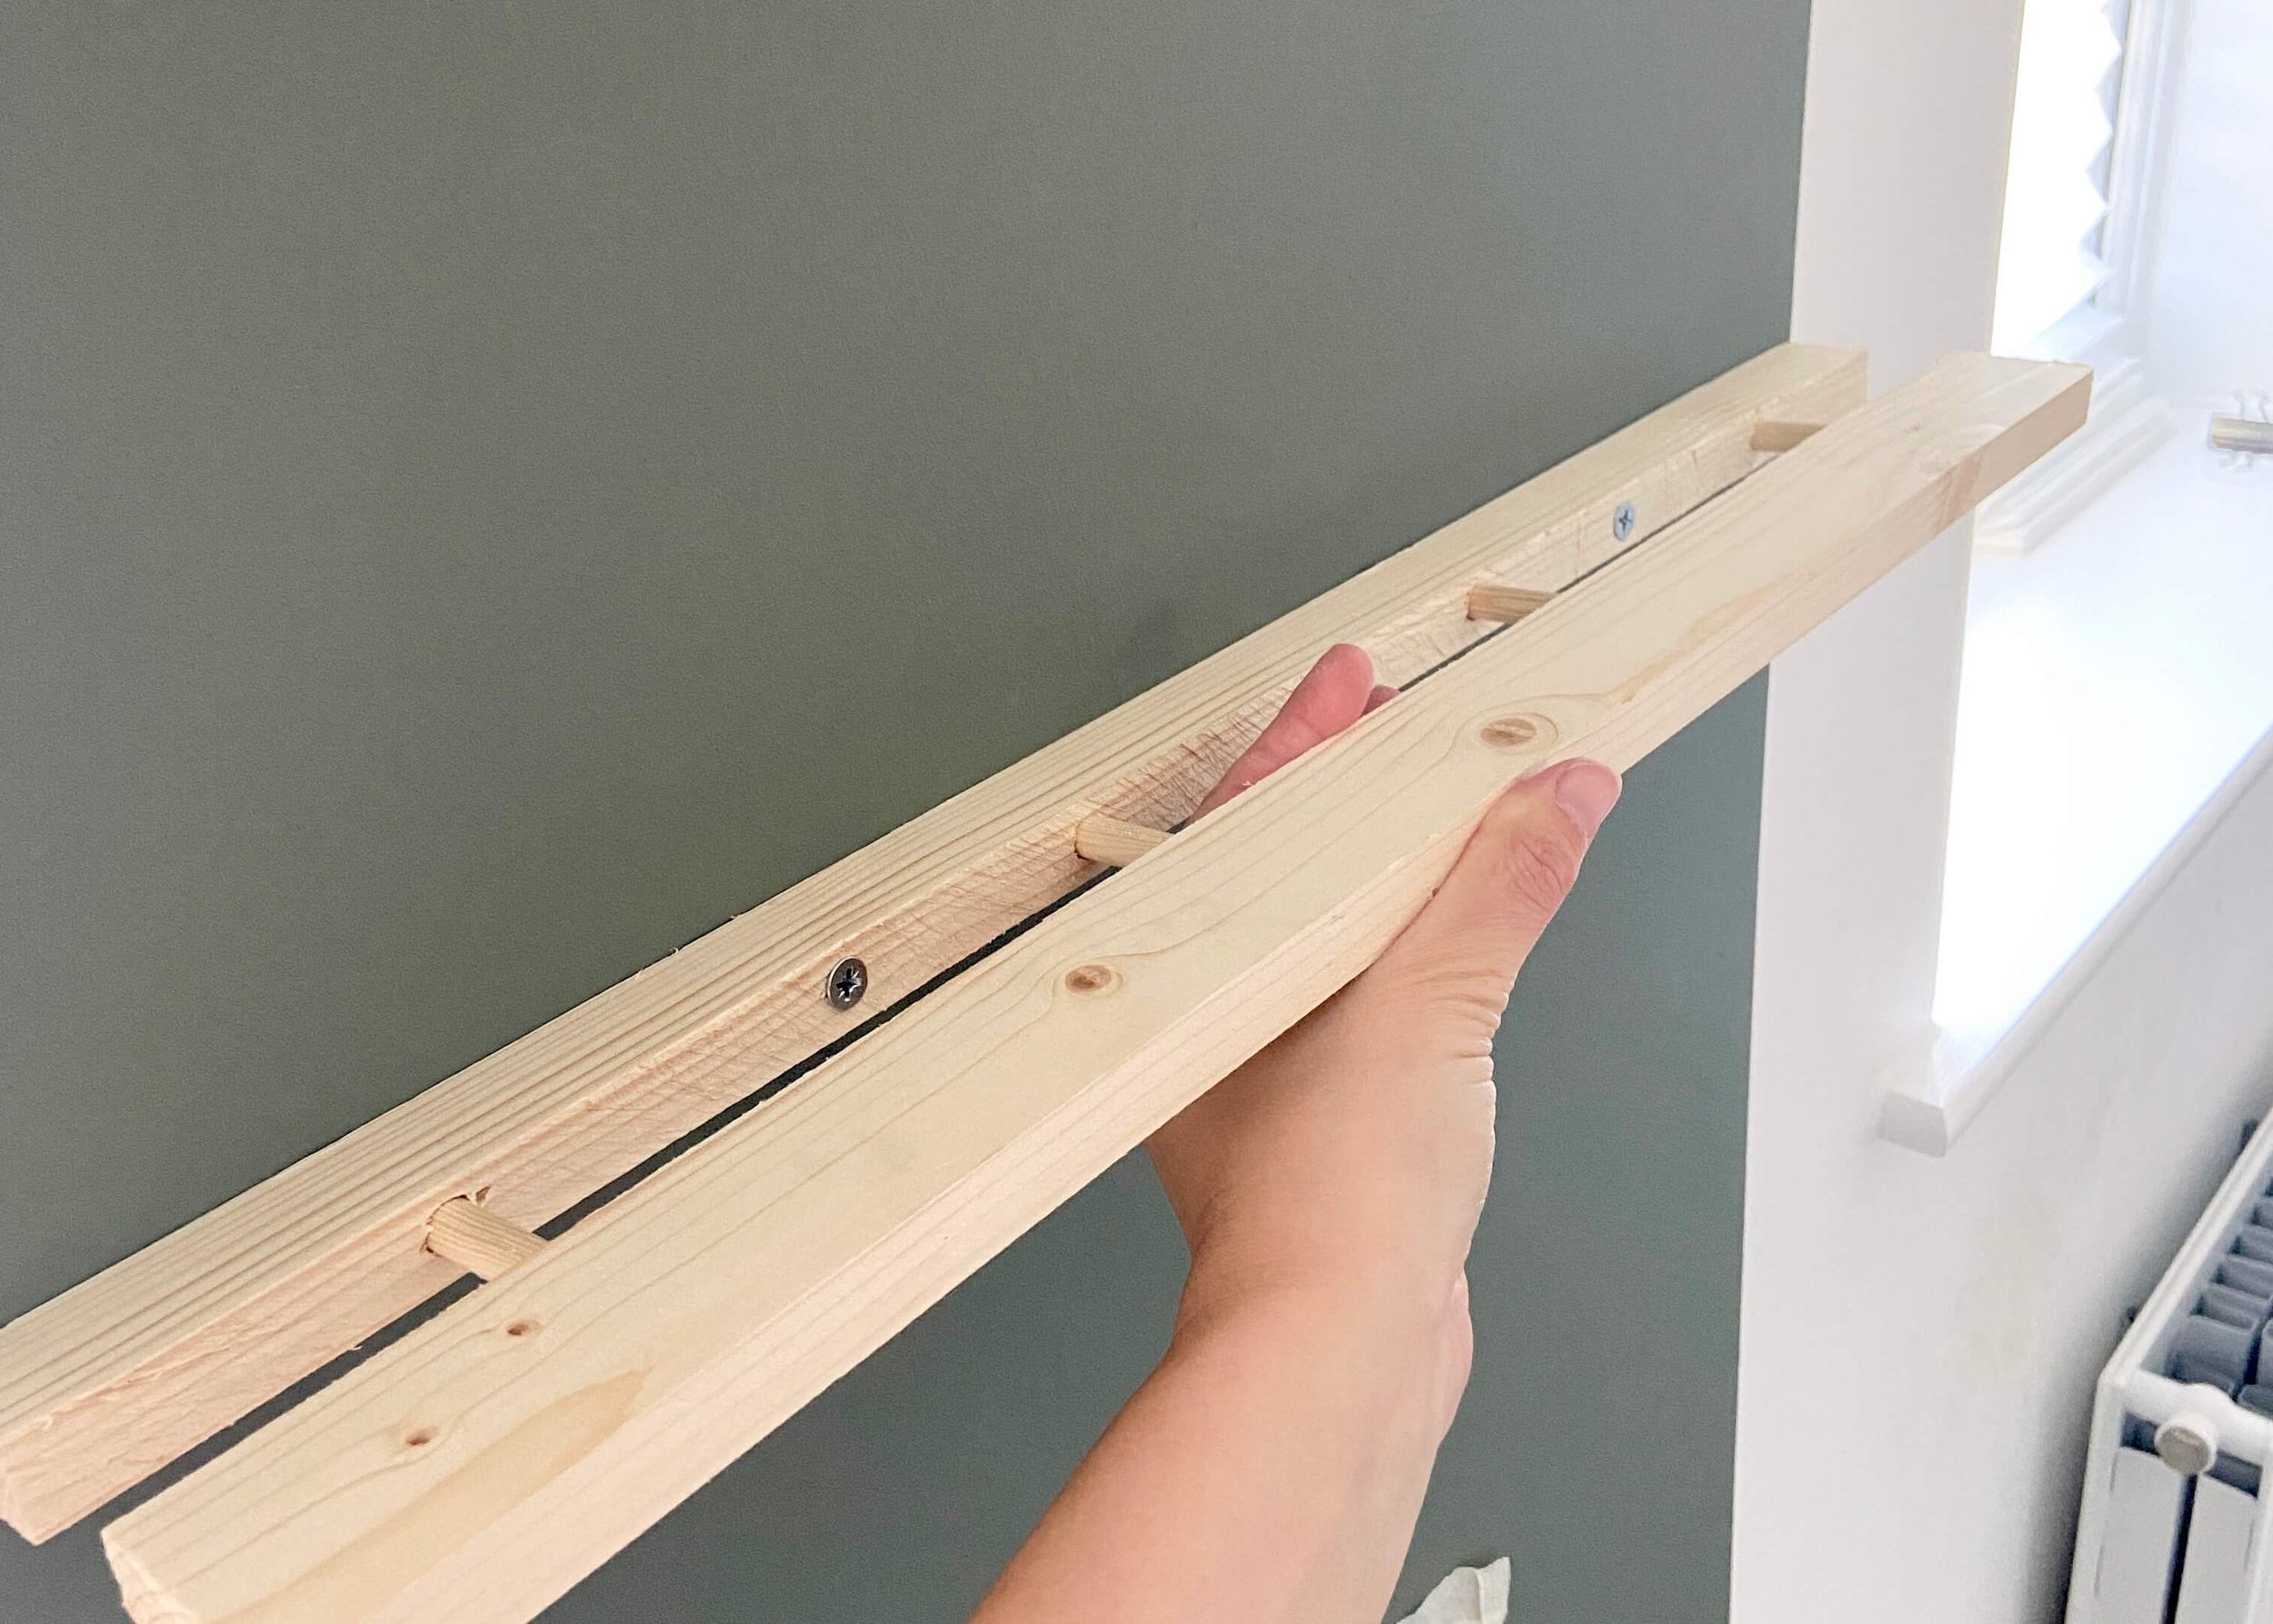
First of all, cut your wood to length (I chose 50cm) and then cut it lengthwise. I did this approximately at 1/3 of the width of the wood.

measure wood dowel

2.

I then grabbed a length of dowel that was around 2/3 of the height of the wood planks in diameter. I then placed the dowel on top of the wood pieces together and marked on the dowel where to cut so that it was around 1.5cm shorter than the width of the wood togeher.

cut wood dowel saw mitre box

3.

I then cut the dowel at this mark using my wood saw and mitre box. I repeated this so that I had 4 dowels the same length.

make drill holes

4.

On the narrower piece of wood, I then turned it so that the inside of the piece was facing upwards and marked 4 places evenly along it.

drill holes

5.

Using a small drill bit I created pilot holes on each of these marks and drilled all the way through the wood. I then gradually increased my drill bit size until I reached one the same diameter as my wooden dowel.

I also then added some pilot holes in between these holes to secure it to the wall.

drill dowel holes

6.

Next, I placed the narrower piece on top of the wider piece, and secured them together. On my drill bit, I placed a piece of tape around it to the depth of my dowel pieces, and then drilled through the holes on the narrower piece through to the wider piece,
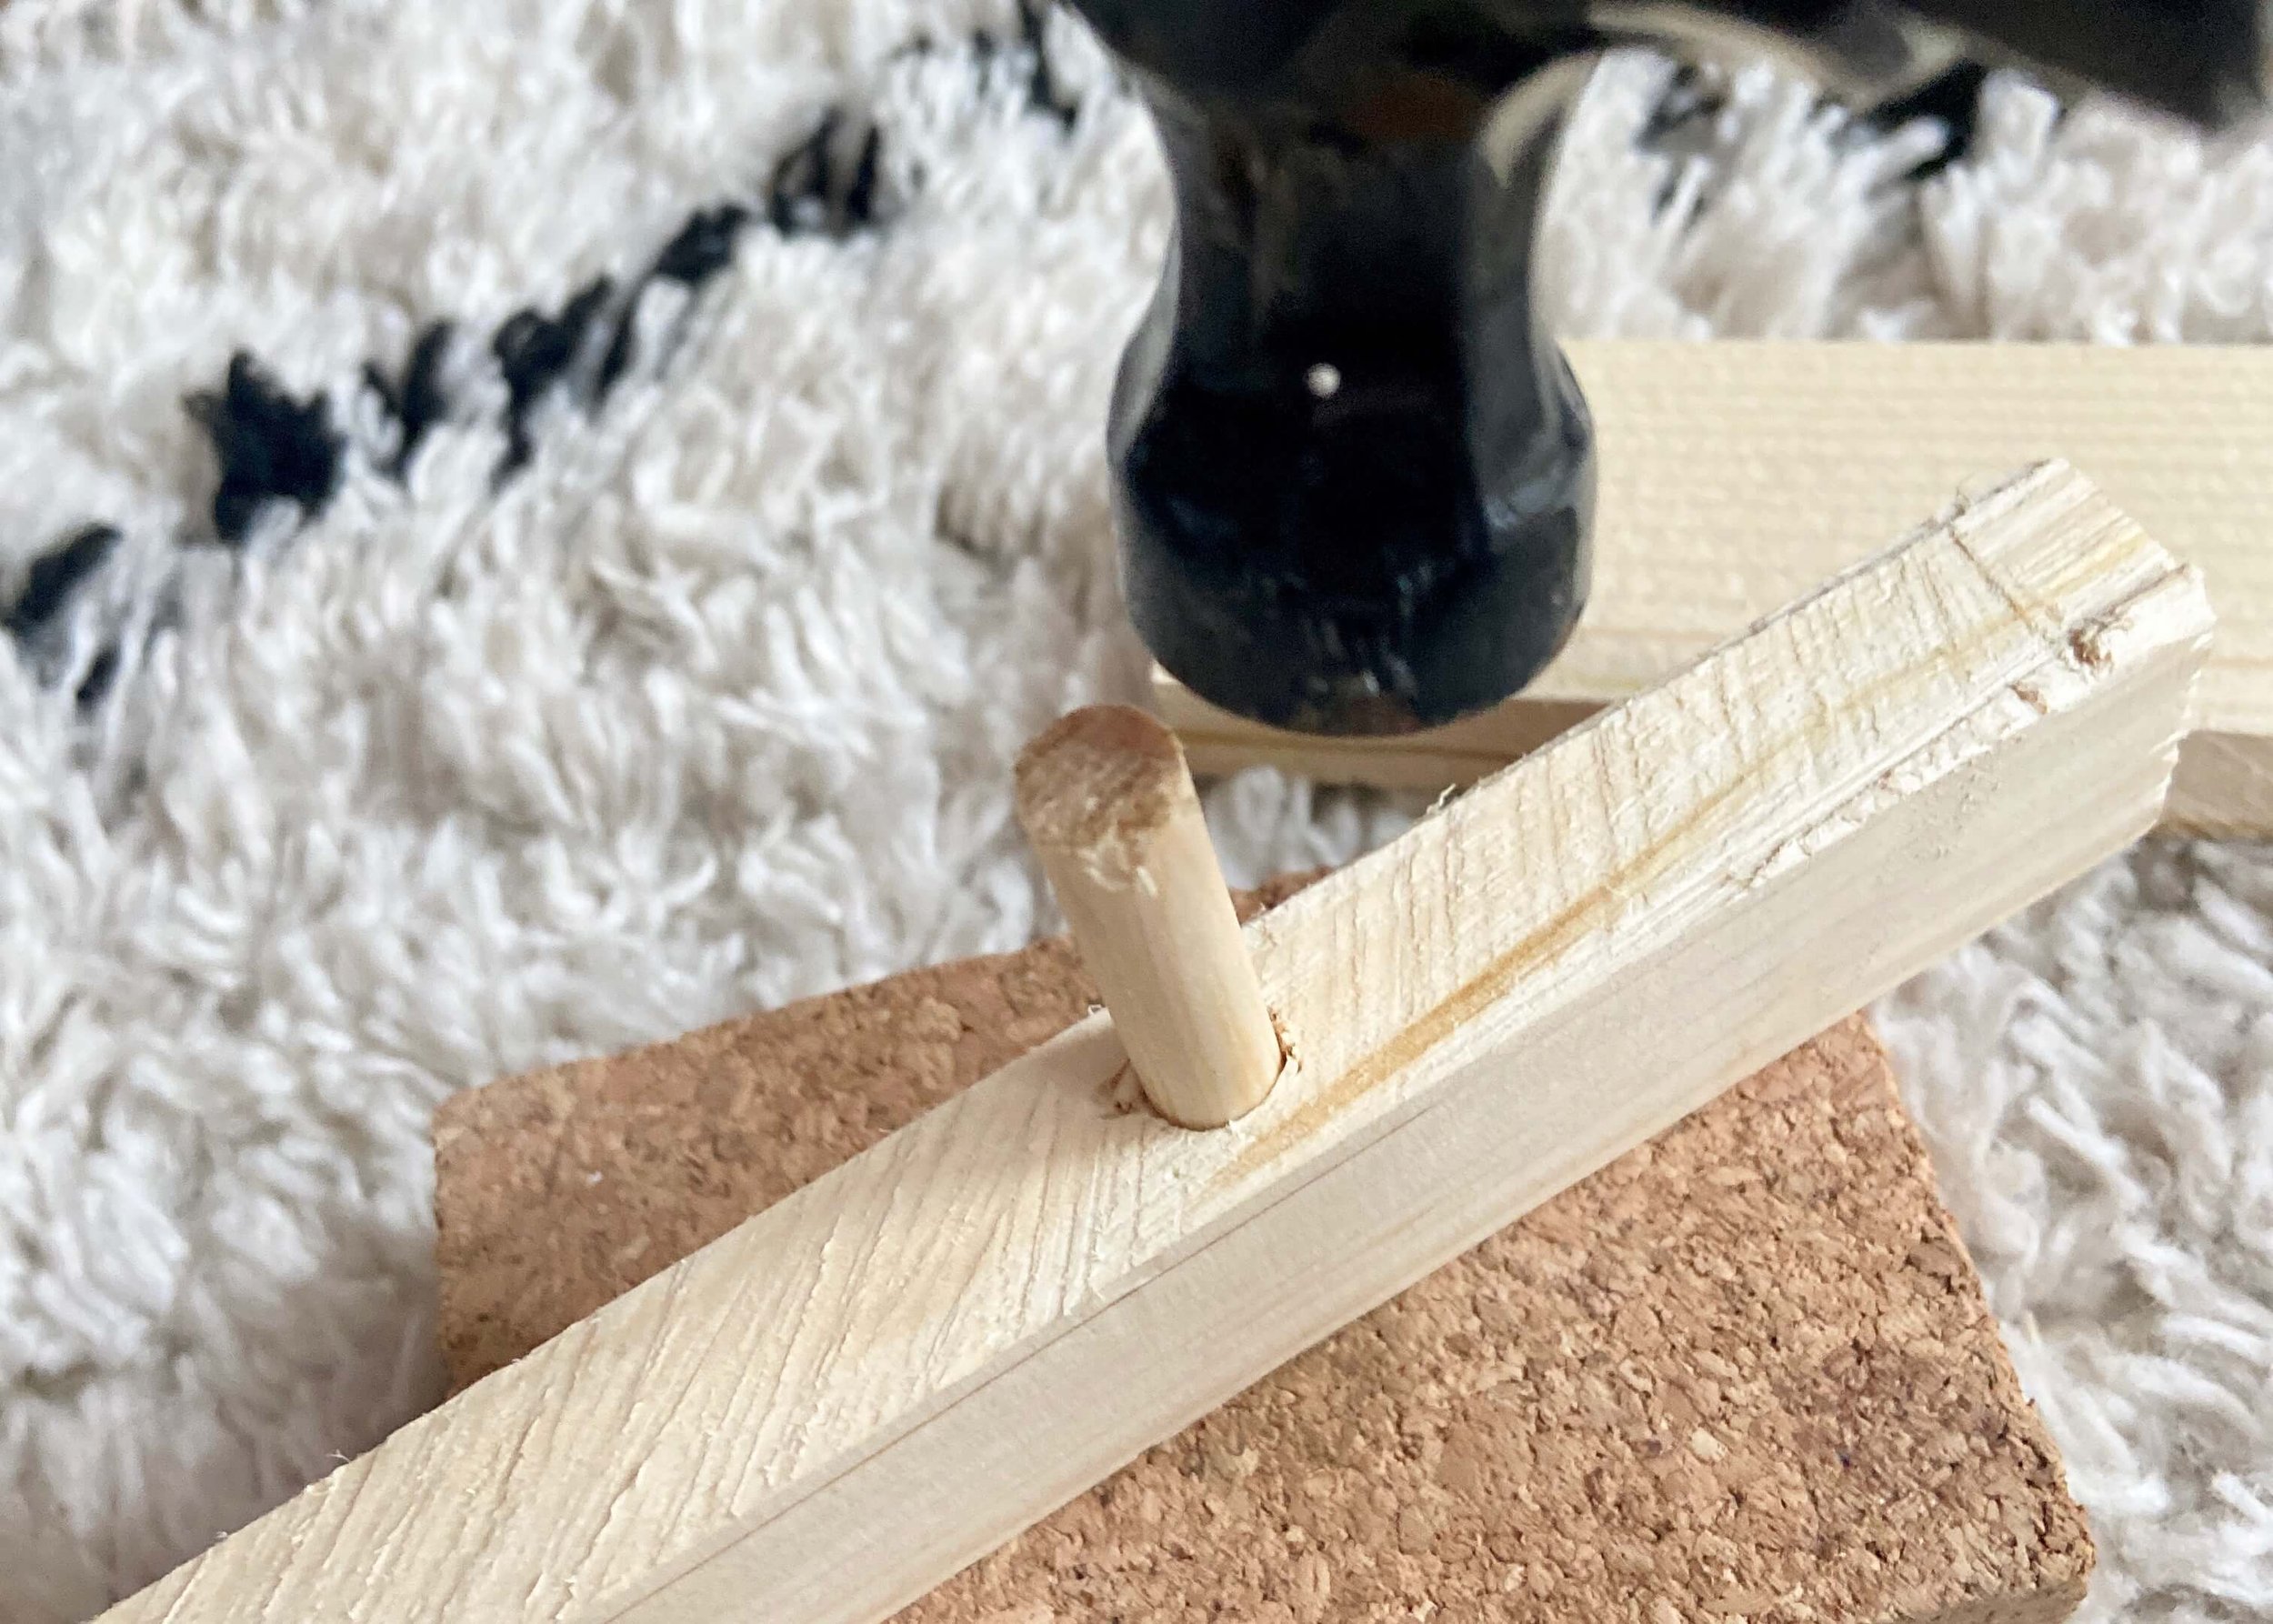
hammer dowels in

7.

I then hammered in the dowels into the narrower piece of wood until the dowel was flush with the other side of the thinner wood (which will be the bracket for our shelf).

mark drill holes on wall

8.

Next, I took my DIY bracket and marked where I wanted it ensuring it was straight using a level. I then marked through the pilot holes onto the wall using a small drill bit.

drill holes wall hammer plugs

9.

Using a drill bit the right size for my plasterboard wall plugs, I then drilled holes where I marked the wall. I then tapped in the wall plugs into these holes using a hammer, ensuring they were flush to the wall.

screw wood bracket into wall plug

10.

I then placed the bracket with the pilot holes lined up with the wall plugs and using an appropriately size screw, fixed the bracket to the wall.

hammer shelf dowels to bracket

11.

Next, I lined up the wider piece of wood with the dowels on the bracket and hammered this into place. If you have any wiggle room with the dowels in the holes, add some wood glue before doing this. Mine were so snug I didn’t need to.

wood fill gap sand

12.

Next, I filled in the gap between the bracket and wider piece of wood with wood filler. As I used pine wood, I used a pine coloured filler. Once dry, I sanded this down and the whole shelf to make sure it was smooth.

stain shelf style

13.

After a good hoover, I then stained the whole shelf, and left it to dry thoroughly before styling. You may want to condition your wood first as I’ve heard this gives a more even finish.

…AND THAT’S IT!

DIY floating wood shelves
this is the alt text
YOU MIGHT ALSO LIKE...
Wooden Mushroom Decor
Apr 26, 2025
Wooden Mushroom Decor
Apr 26, 2025
Apr 26, 2025
Hand-Painted Floral Mural Arch
Mar 29, 2025
Hand-Painted Floral Mural Arch
Mar 29, 2025
Mar 29, 2025
Easy IKEA Antilop Makeover
Mar 1, 2025
Easy IKEA Antilop Makeover
Mar 1, 2025
Mar 1, 2025
Clay Leaf Shelf
Jun 29, 2024
Clay Leaf Shelf
Jun 29, 2024
Jun 29, 2024
Nursery Feature Wall
Jun 15, 2024
Nursery Feature Wall
Jun 15, 2024
Jun 15, 2024
Hallway Wall Niche
Jun 8, 2024
Hallway Wall Niche
Jun 8, 2024
Jun 8, 2024
Ikea Hemnes Drawer Hack
May 4, 2024
Ikea Hemnes Drawer Hack
May 4, 2024
May 4, 2024
Pressed Flower Taper Candle
Apr 20, 2024
Pressed Flower Taper Candle
Apr 20, 2024
Apr 20, 2024
Floral Rabbit Nursery Print
Apr 13, 2024
Floral Rabbit Nursery Print
Apr 13, 2024
Apr 13, 2024
Pressed Flower Egg Ornaments
Apr 10, 2024
Pressed Flower Egg Ornaments
Apr 10, 2024
Apr 10, 2024
In DIY Tags home
← Repurposed Wax Heart CandleMini Clay Donut Vase →
 

Decorating, DIY-ing and doodling my way through life. Have a look around and let’s get creative!

>> FIND OUT MORE <<

Follow
The office is still one of my favourite transformations in the house! 😍

I started by panelling the wall with MDF strips and then painted the wall with a mix of colours. I used three IKEA drawer units for the base of the desk and then secured the de

ART

DIY

LIFE


THE LATEST

Featured
Wooden Mushroom Decor
Apr 26, 2025
Wooden Mushroom Decor
Apr 26, 2025
Apr 26, 2025
Hand-Painted Floral Mural Arch
Mar 29, 2025
Hand-Painted Floral Mural Arch
Mar 29, 2025
Mar 29, 2025
Easy IKEA Antilop Makeover
Mar 1, 2025
Easy IKEA Antilop Makeover
Mar 1, 2025
Mar 1, 2025
Clay Leaf Shelf
Jun 29, 2024
Clay Leaf Shelf
Jun 29, 2024
Jun 29, 2024
Nursery Feature Wall
Jun 15, 2024
Nursery Feature Wall
Jun 15, 2024
Jun 15, 2024


THE GREATEST

Featured
DIY // IKEA LACK TABLE INDUSTRIAL HACK
Sep 22, 2020
DIY
DIY // IKEA LACK TABLE INDUSTRIAL HACK
Sep 22, 2020
DIY
Sep 22, 2020
DIY
DIY // CLAY ALL-SEEING EYE MIRROR
Aug 14, 2020
DIY
DIY // CLAY ALL-SEEING EYE MIRROR
Aug 14, 2020
DIY
Aug 14, 2020
DIY
DIY // CLAY FACE DISH
Apr 29, 2020
DIY
DIY // CLAY FACE DISH
Apr 29, 2020
DIY
Apr 29, 2020
DIY
DIY // ABSTRACT ART FLORAL EGGS
Mar 25, 2020
DIY
DIY // ABSTRACT ART FLORAL EGGS
Mar 25, 2020
DIY
Mar 25, 2020
DIY
DIY // WIRE FACE EARRINGS
Feb 16, 2020
DIY
DIY // WIRE FACE EARRINGS
Feb 16, 2020
DIY
Feb 16, 2020
DIY

Follow
^^ BACK TO TOP
How does Monday come round so quick?!Wishing I could cosy up here today ✨

#mondaymood #storyofmyhome #mydailyhomesquare #interiordesign #budgetdiy #realstylishhomes #ourdiyhomes #femalediycollective #discoverunder5k #myhousethismonth #myhousedownsou
I&rsquo;ve got the day off today (woop!) and although it&rsquo;s not quite warm enough to sit out here yet, the sun is shining and I think a little walk to blow out the cobwebs is exactly what I need. Hope Monday is treating you well! ☀️

#summerdrea
Had such a lovely day seeing one of my besties and her adorable new baby that I completely forgot to share today&rsquo;s new blog post!

Head over to the blog for all the details of this easy DIY ring dish 🔝✨

#diy #diyhomedecor #diyhome #diyvalenti
That sunshine 👌🏻☀️

#mycosyhome #livingroomdecor #livingroominspo #mydiymydecor #homeobsessed #lovemydecor #homeinterioruk #discoverunder5k #diyhome #diyhomedecor #myhousethismonth #myhousedownsouth #realstylishhomes #ourdiyhomes #happythursday #in
A little corner our home on this chilly Tuesday morning ✨
.
.
#interior #homeobsessed #mycosyhome #homeinterioruk #instadecorating #homesofinstagram #happymonday #mondaymotivation #instainteriors #cornersofmyhome #myhousethismonth #myhousedownsouth #

Copyright 2021 isoscella. All rights reserved.

Powered by Squarespace